A few things you need to know before you being:
What are the profiles
Mage2Plenty application uses profile tool for data synchronisation between the two systems.
Profiles are designed to give you the maximum ability to manage data synchronisation and achieve tight system integration.
Current profiles (as of extension version: 1.2.7.1) support the following entities:
- Customer
- Product
- Category
- Attribute
- Order
- Stock
Each entity may be configured to synchronise data in the direction of either “import” or “export”.
For example, we can create a profile that’s responsible for exporting orders to PlentyMarkets. The profile will be of “Order” entity with direction: “Export”.
Each profile needs to be configured to achieve as close as possible integration with PlentyMarkets system. Lets see how profiles are created.
Creating a profile
Here we’ll demonstrate how to create a profile. We’ll also talk in details of how to create profile for each entity, such as product, order, stock or customer.
To create a profile follow these steps:
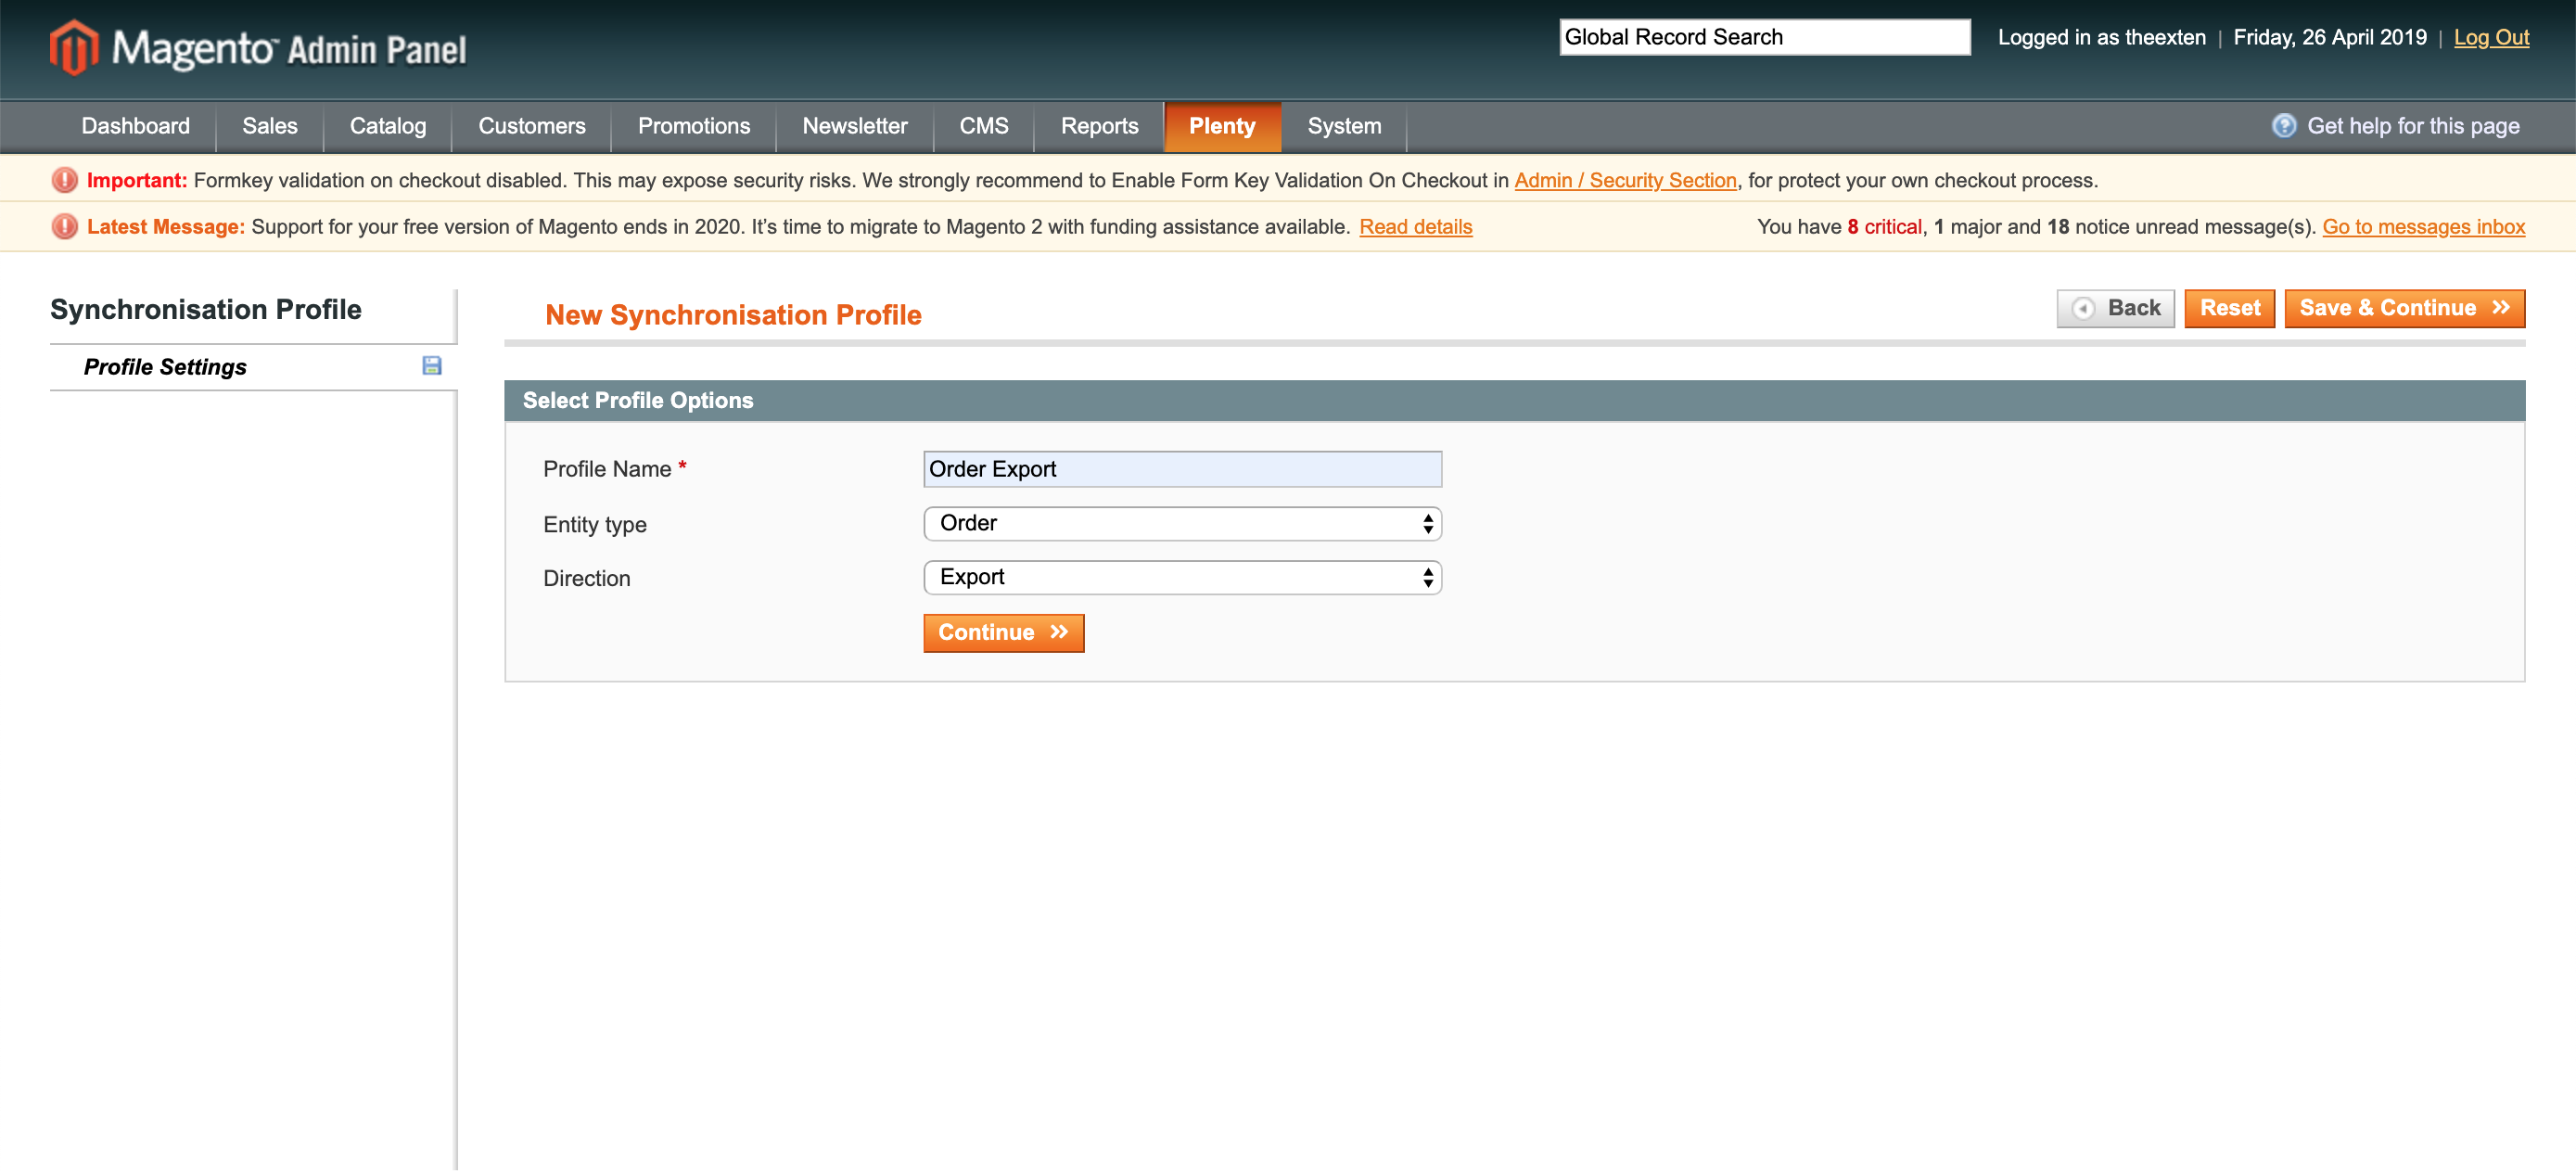
- Within magento admin, go to Plenty » Synchronisation.
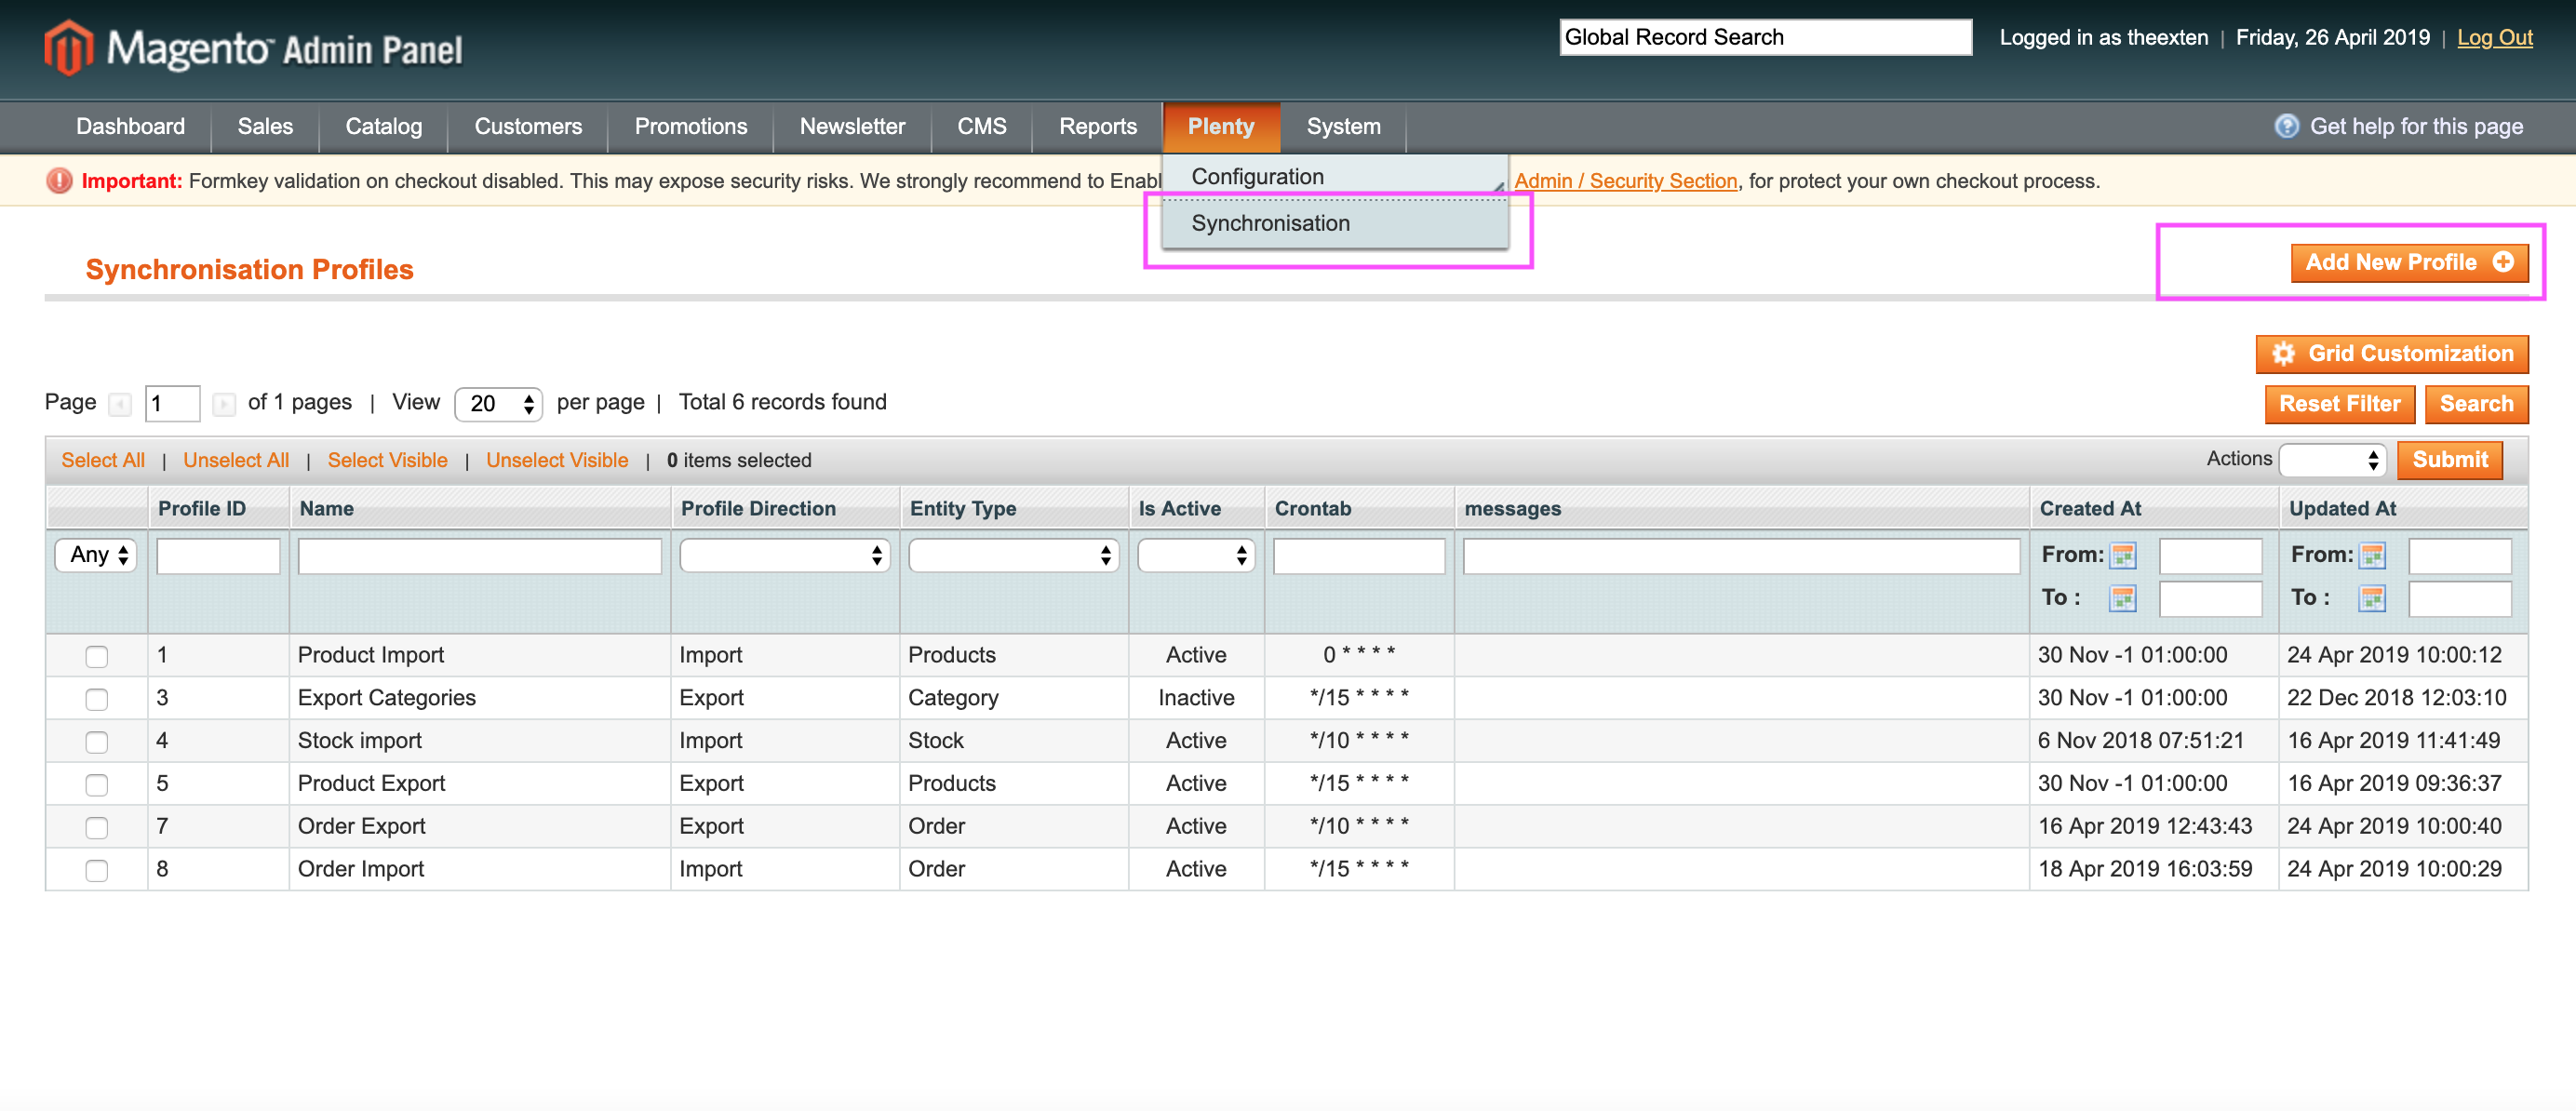
- Click on “Add New Profile” button.
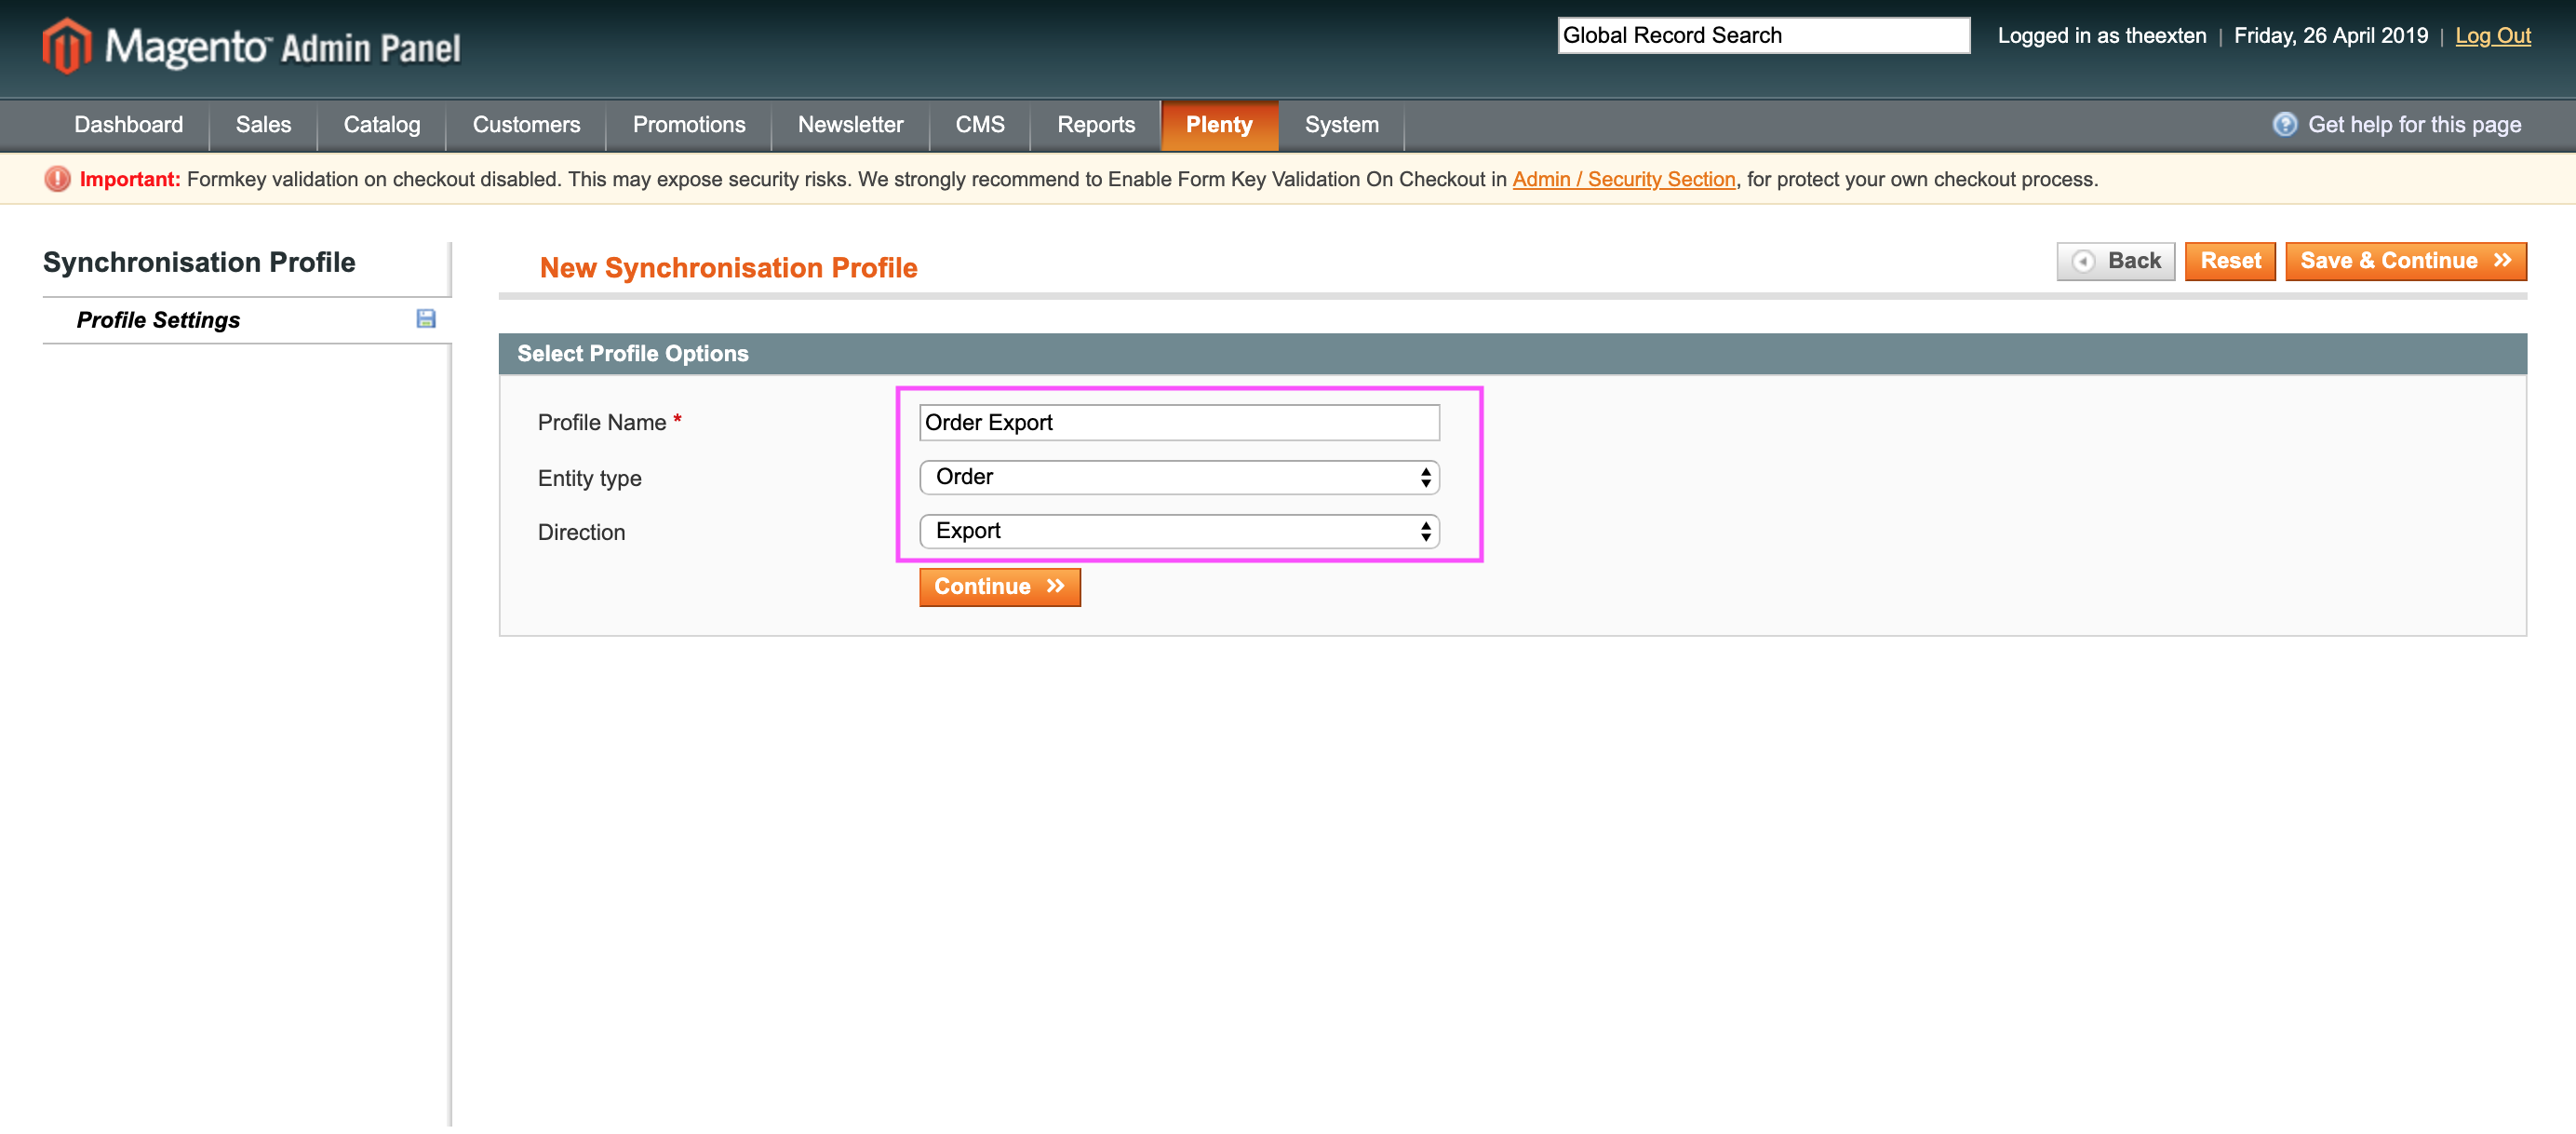
- Enter name for your profile.
- Choose entity type. This can be one of the above mentioned entities (product, order etc).
- Choose direction type. This is either import or export.
- Click “Continue” button to create the profile.
When the profile is created, you will notice a number of additional tabs on the left hand side menu. Each profile entity has its own menu items that depend on type of the profile.
The main items that you will see are:
- the settings tab;
- the synchronisation entity tab (for example, order export would hold all orders that were synchronised and its history);
- the schedule tab and it’s history. This is where a log of schedule tasks and its history is kept.
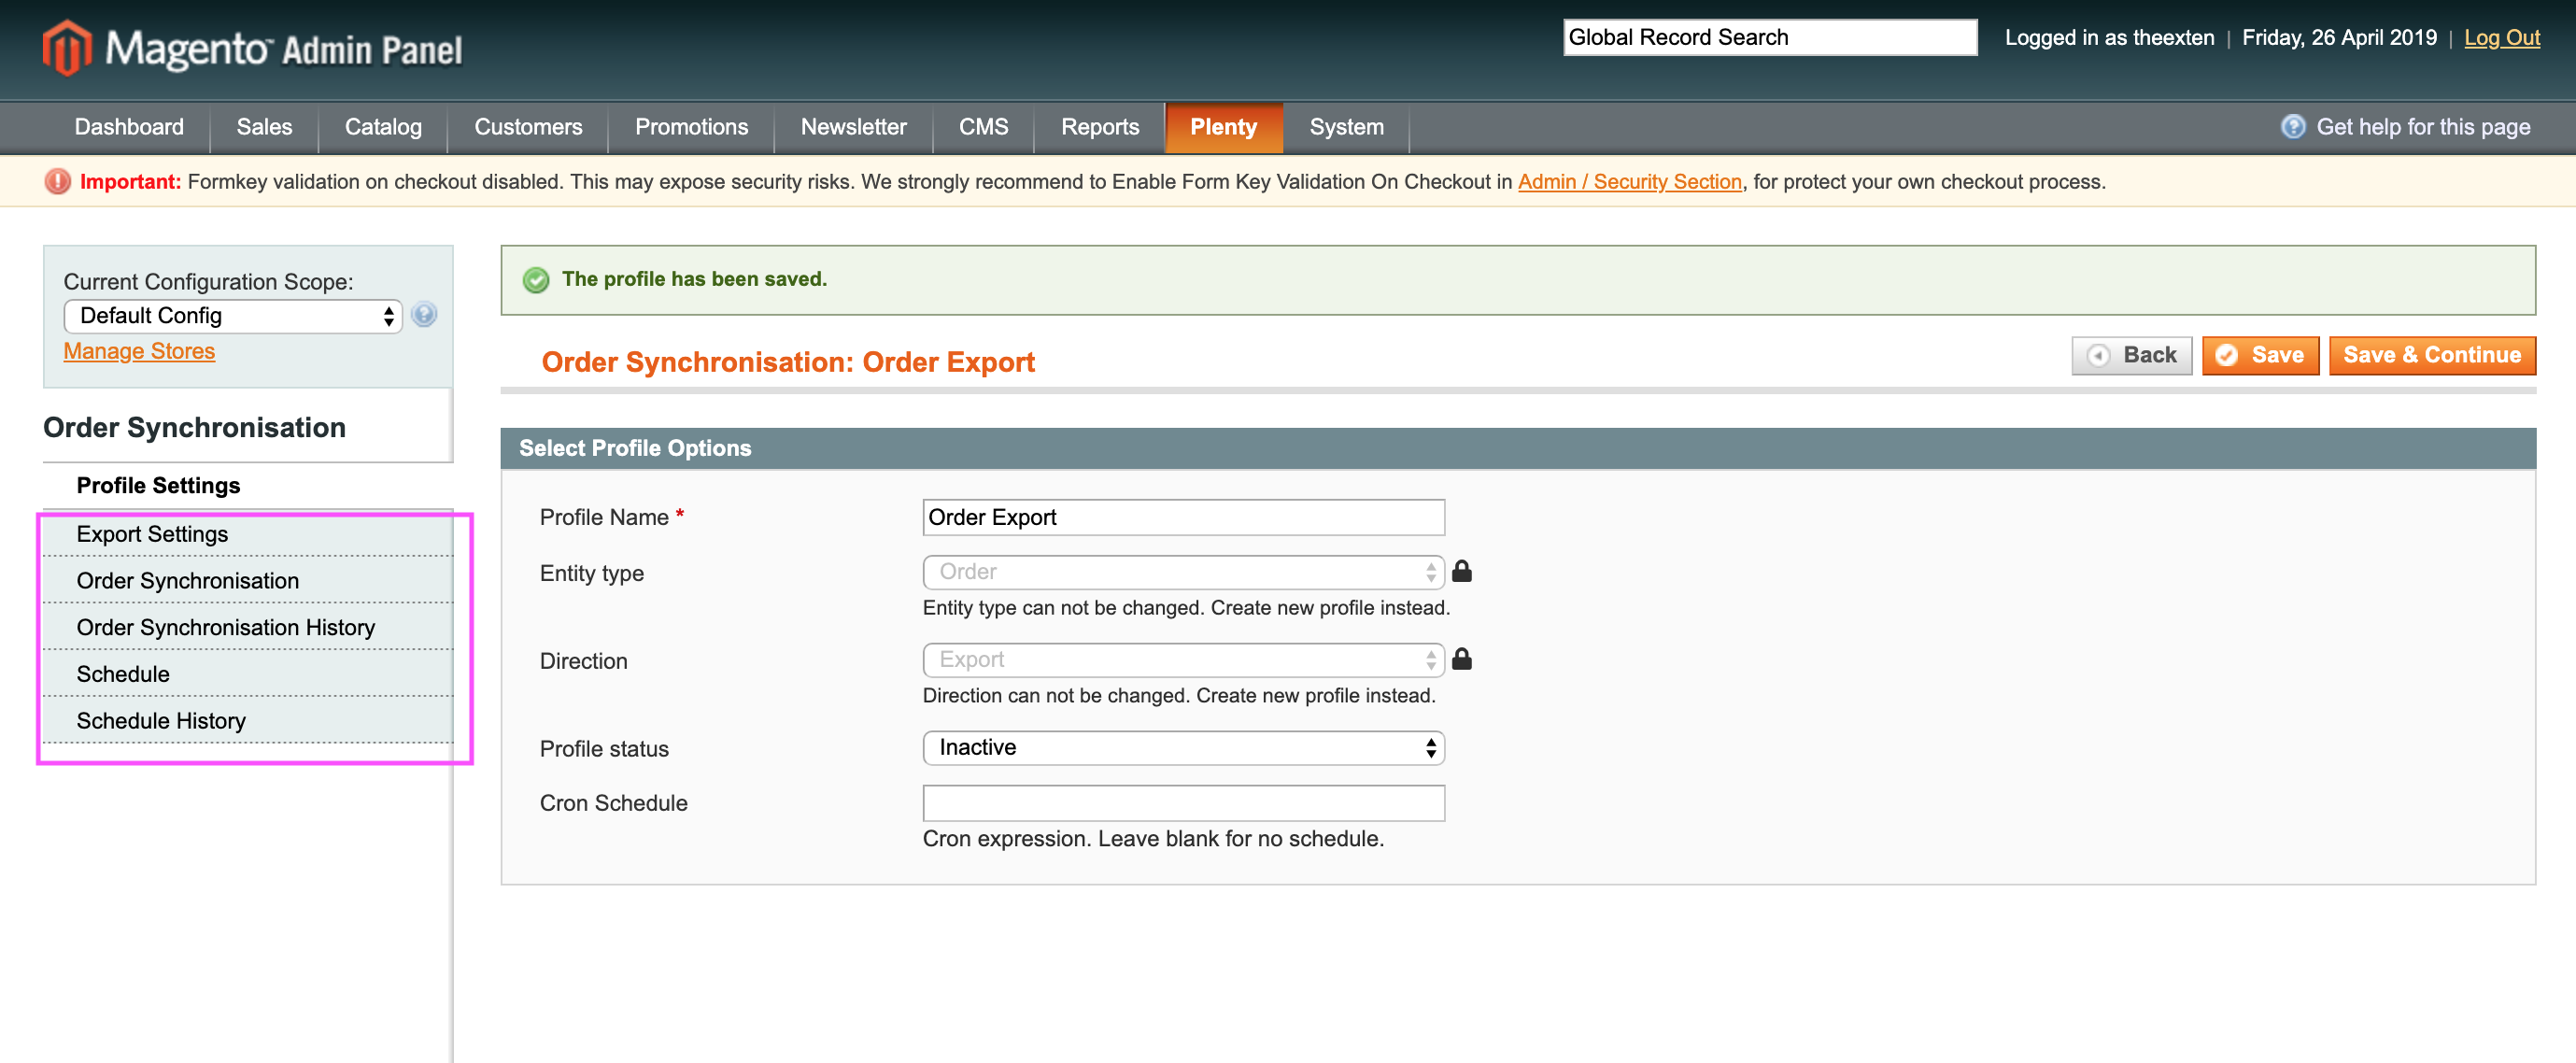
Profile settings
Within profile settings tab you’ll see a number of entries. There are only three entries that can be edited within this section: Profile Name, Status and Cron Schedule.
Profile name field is used to give your profile a meaningful name which enables you to quickly find your profile on profile grid (the profile landing page).
Status is used to enable or disable your profile.
Cron schedule field is used for cron schedule expressions that enables your profile work as a schedule task. Your profile can be configured to run at times when best suites your business. For example, an order export may run every 5 minutes, whereas product synchronisation every hour or once per day. For more details on how to create cron expression, visit https://crontab.guru.
Now that you know how to create profiles, please read on how to configure each profile entity.