Mage2Plenty connects to PlentyMarkets using REST API. It automates every process of your online business.
A few steps to get the connector up and running:
- Obtain account ID and URL
- Create new PlentyMarkets user
- Authentication configuration
- REST API debugging
- REST API configuration
- REST API test
Obtain account ID and URL
Before you being, you need to obtain your PlentyMarkets account ID and server URL. These details could be found in the welcome email or you could do the following:
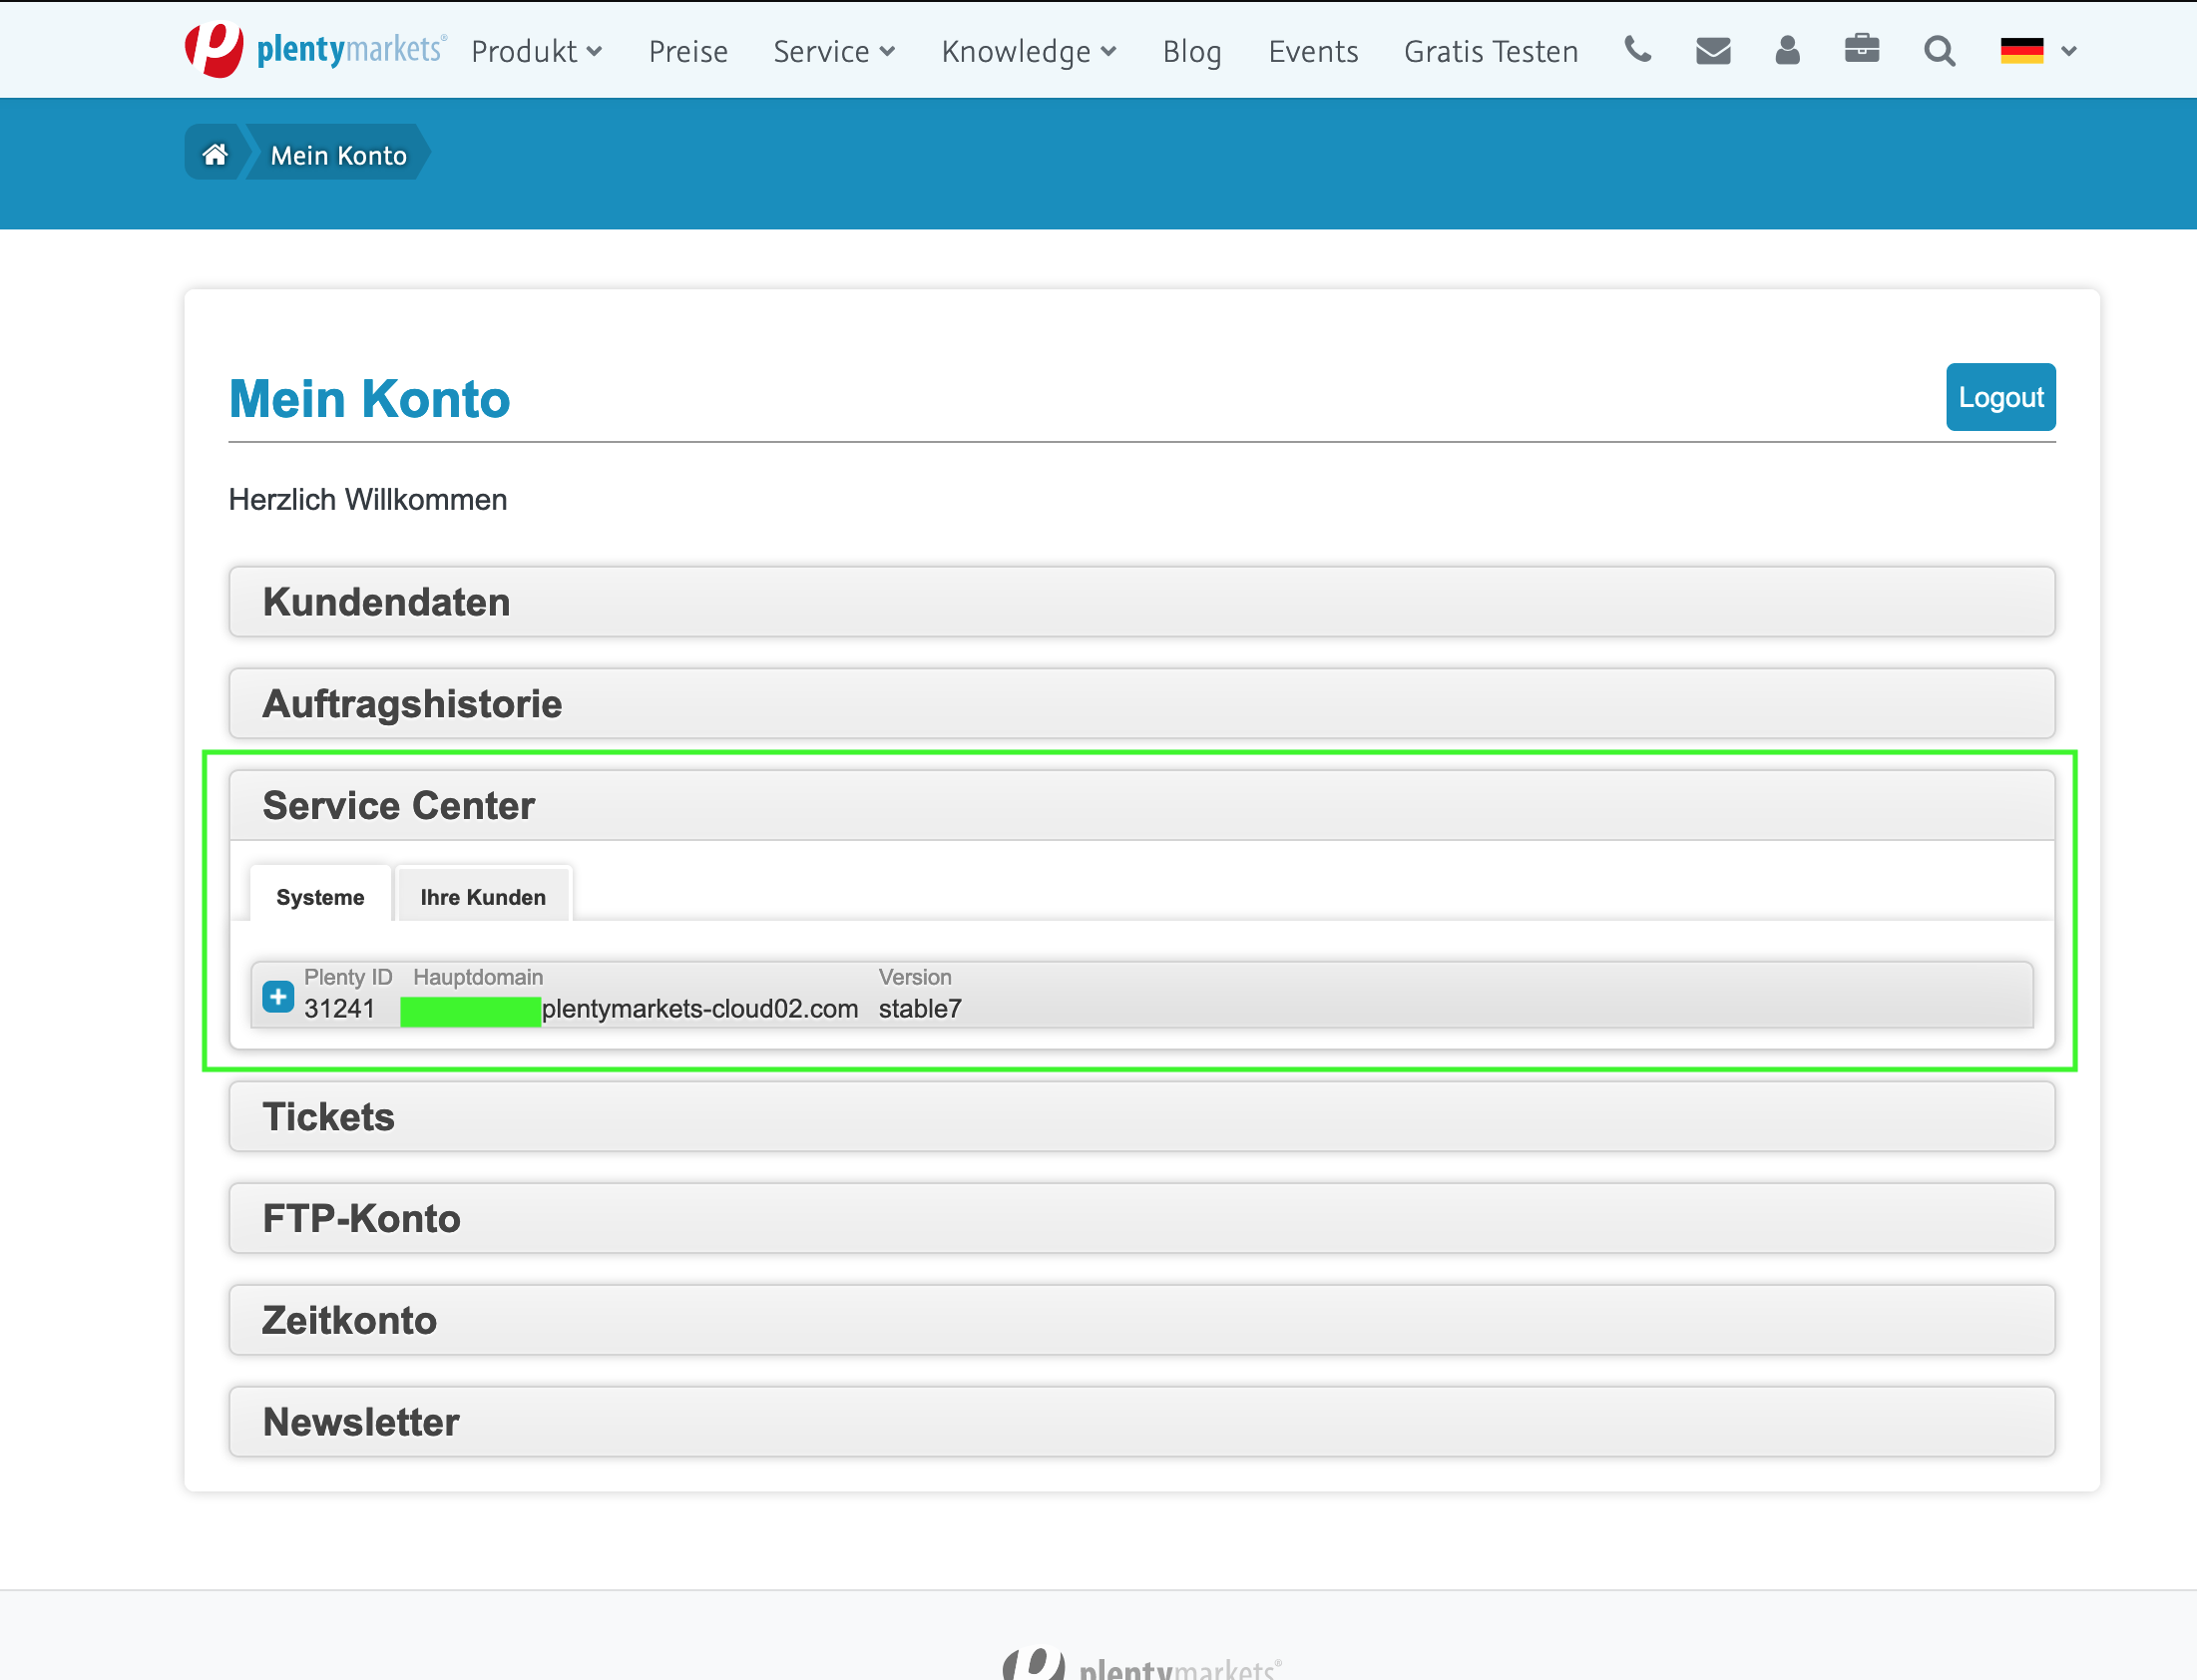
- Login to plentyMarkets and click on home icon on the left. You should now see a dropdown menu. Click on “Service centre” to visit your account dashboard.

- Within account page, click on “Service Center” tab to expand its content.
- Make a note of Plenty ID and URL.
Create new PlentyMarkets user
We need to create a new user for REST API. The user may occasionally need to login to PlentyMarkets to obtain secret and refresh tokes for our application.
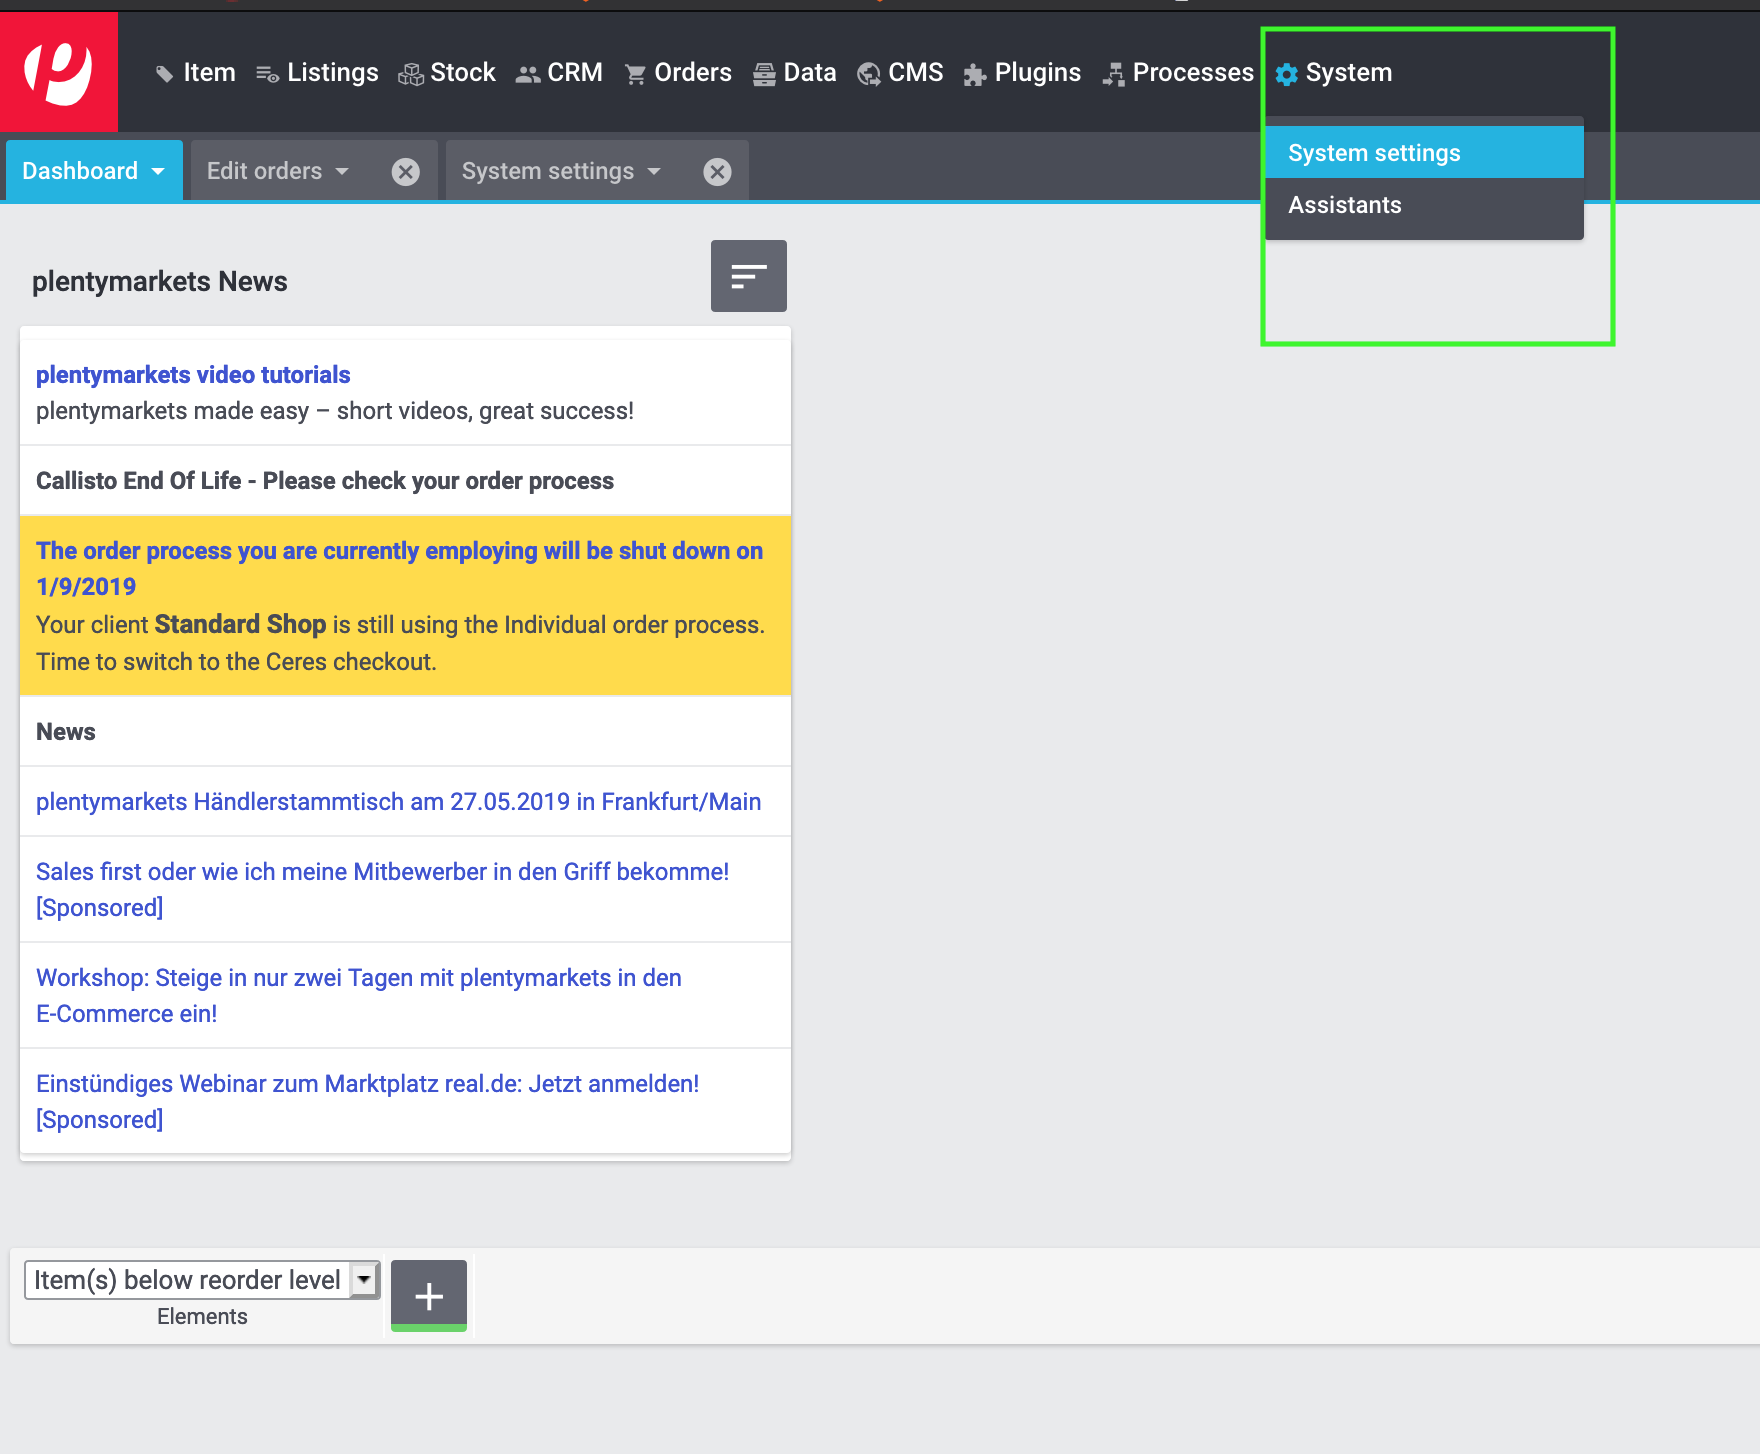
- Login to PlentyMarkets admin.
- Go to System » System settings.
- Within settings page, click on Settings » User » Accounts
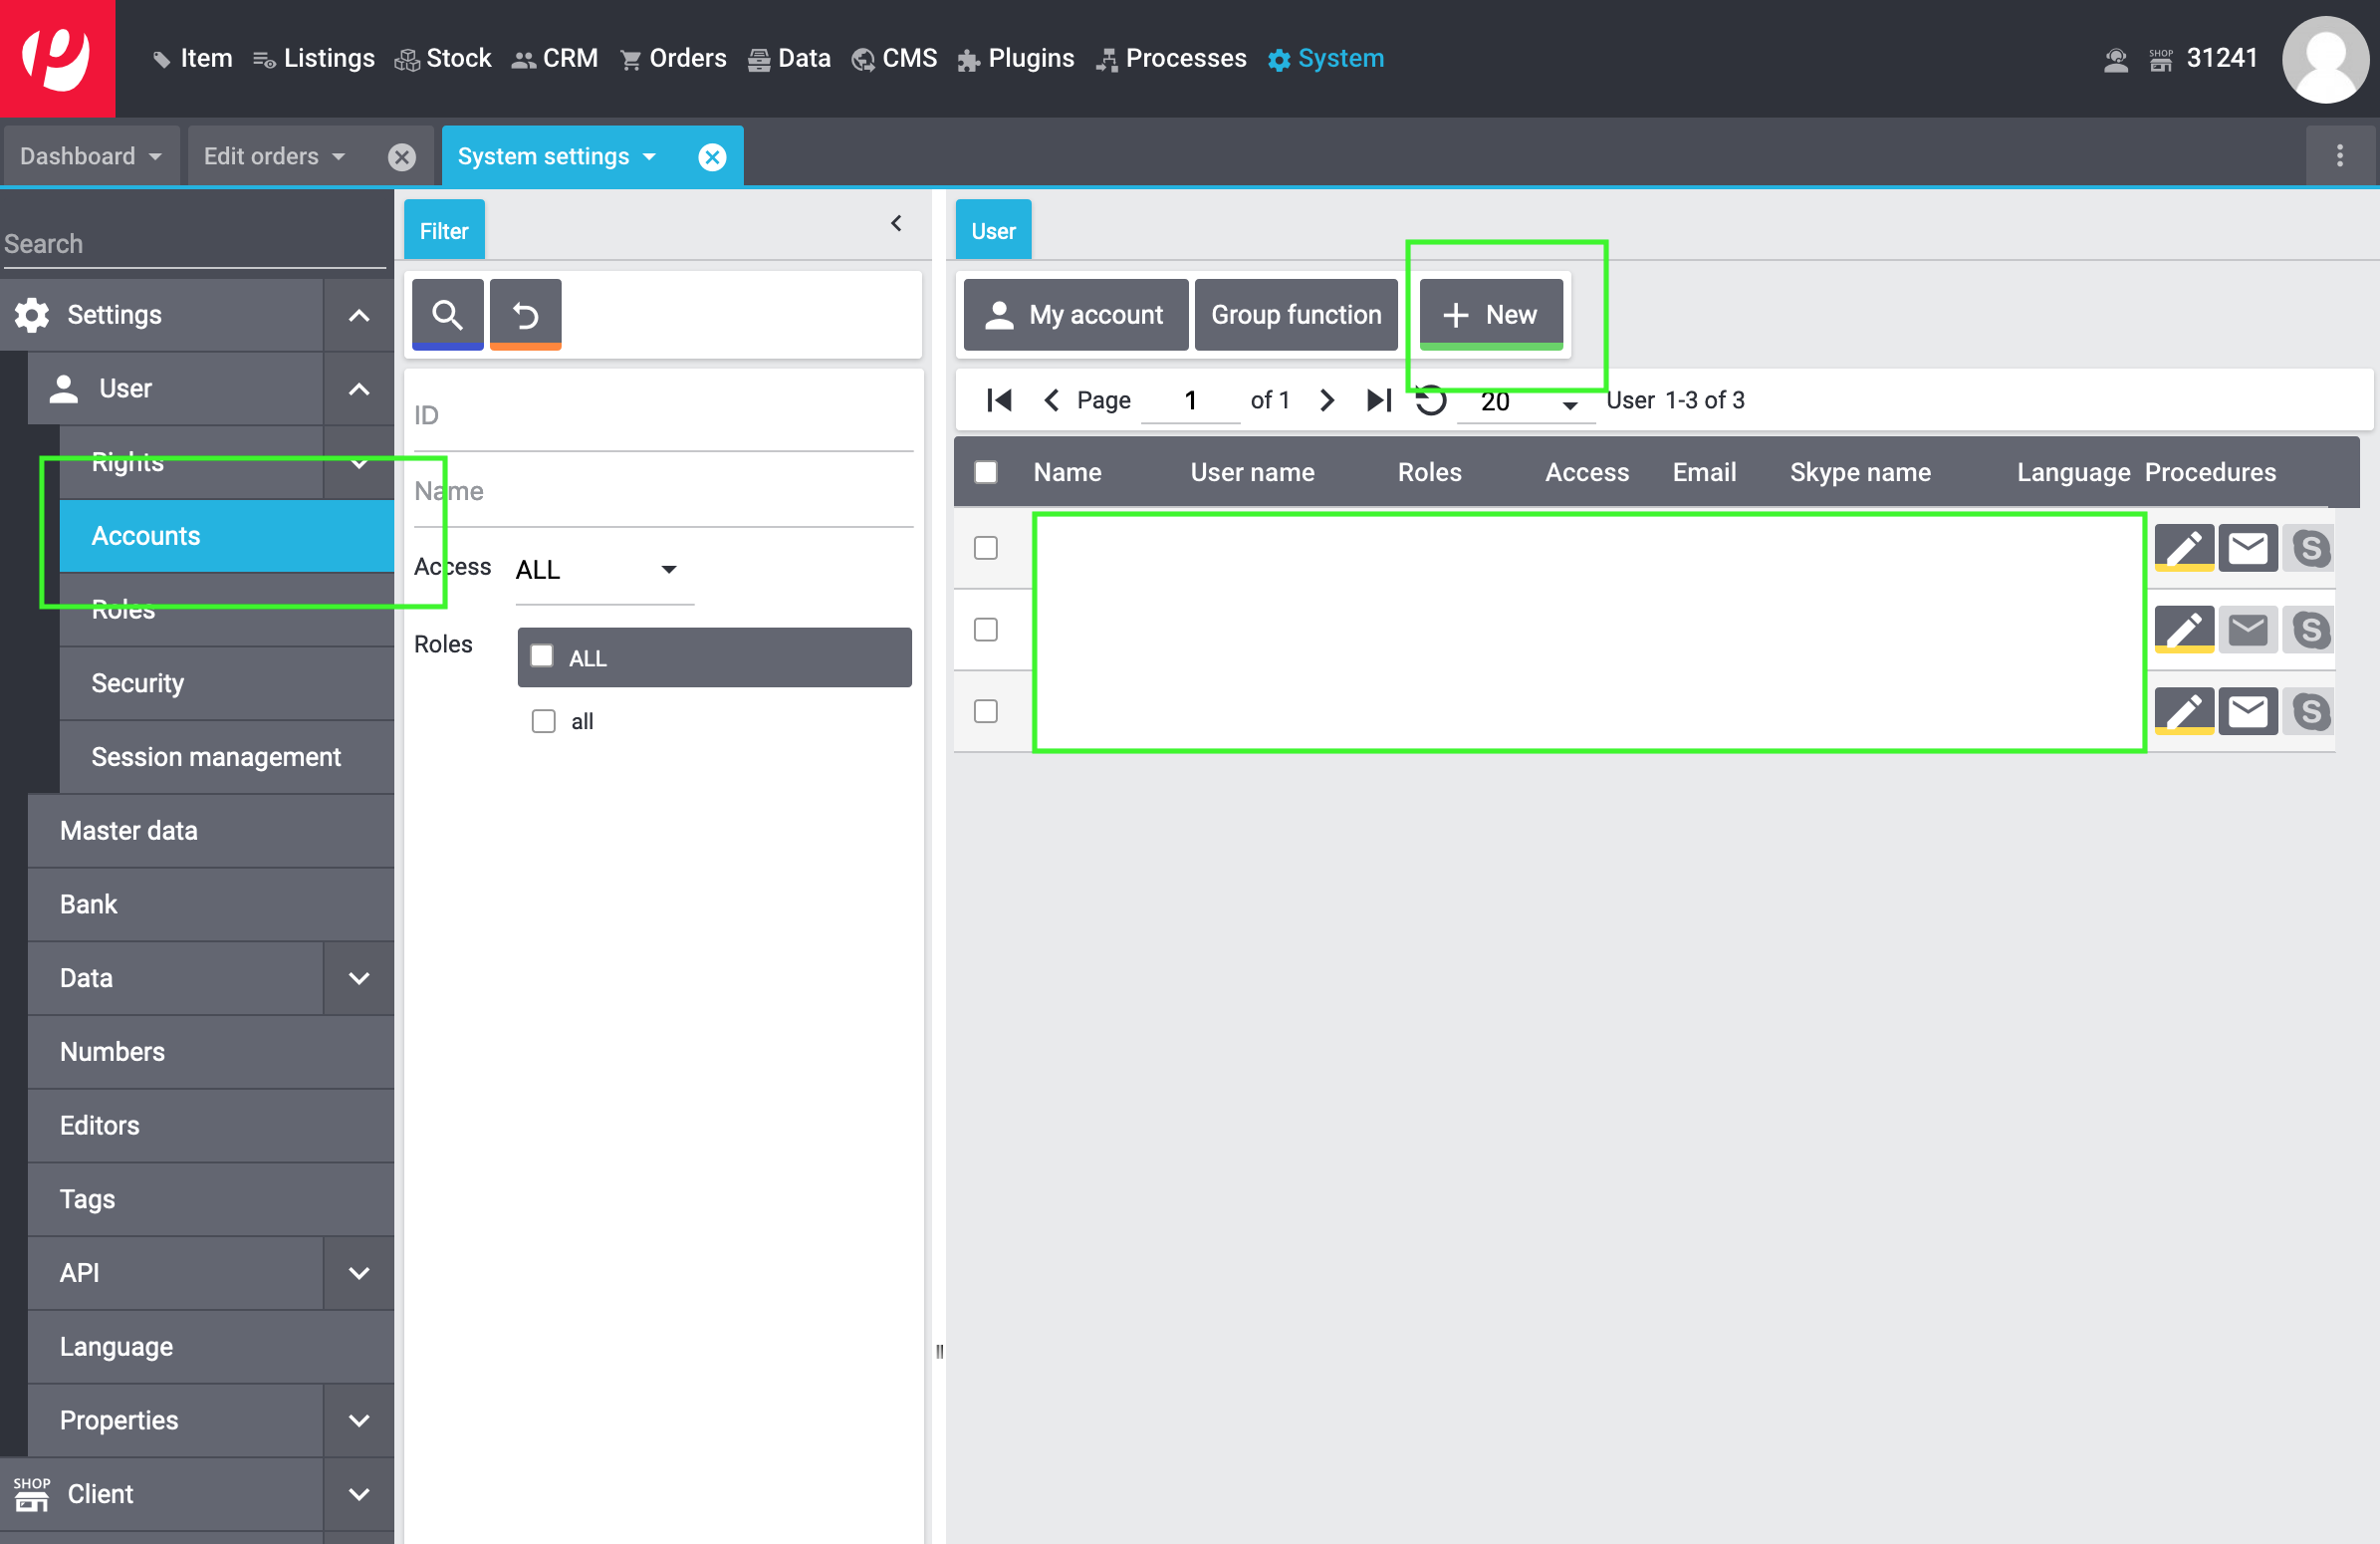
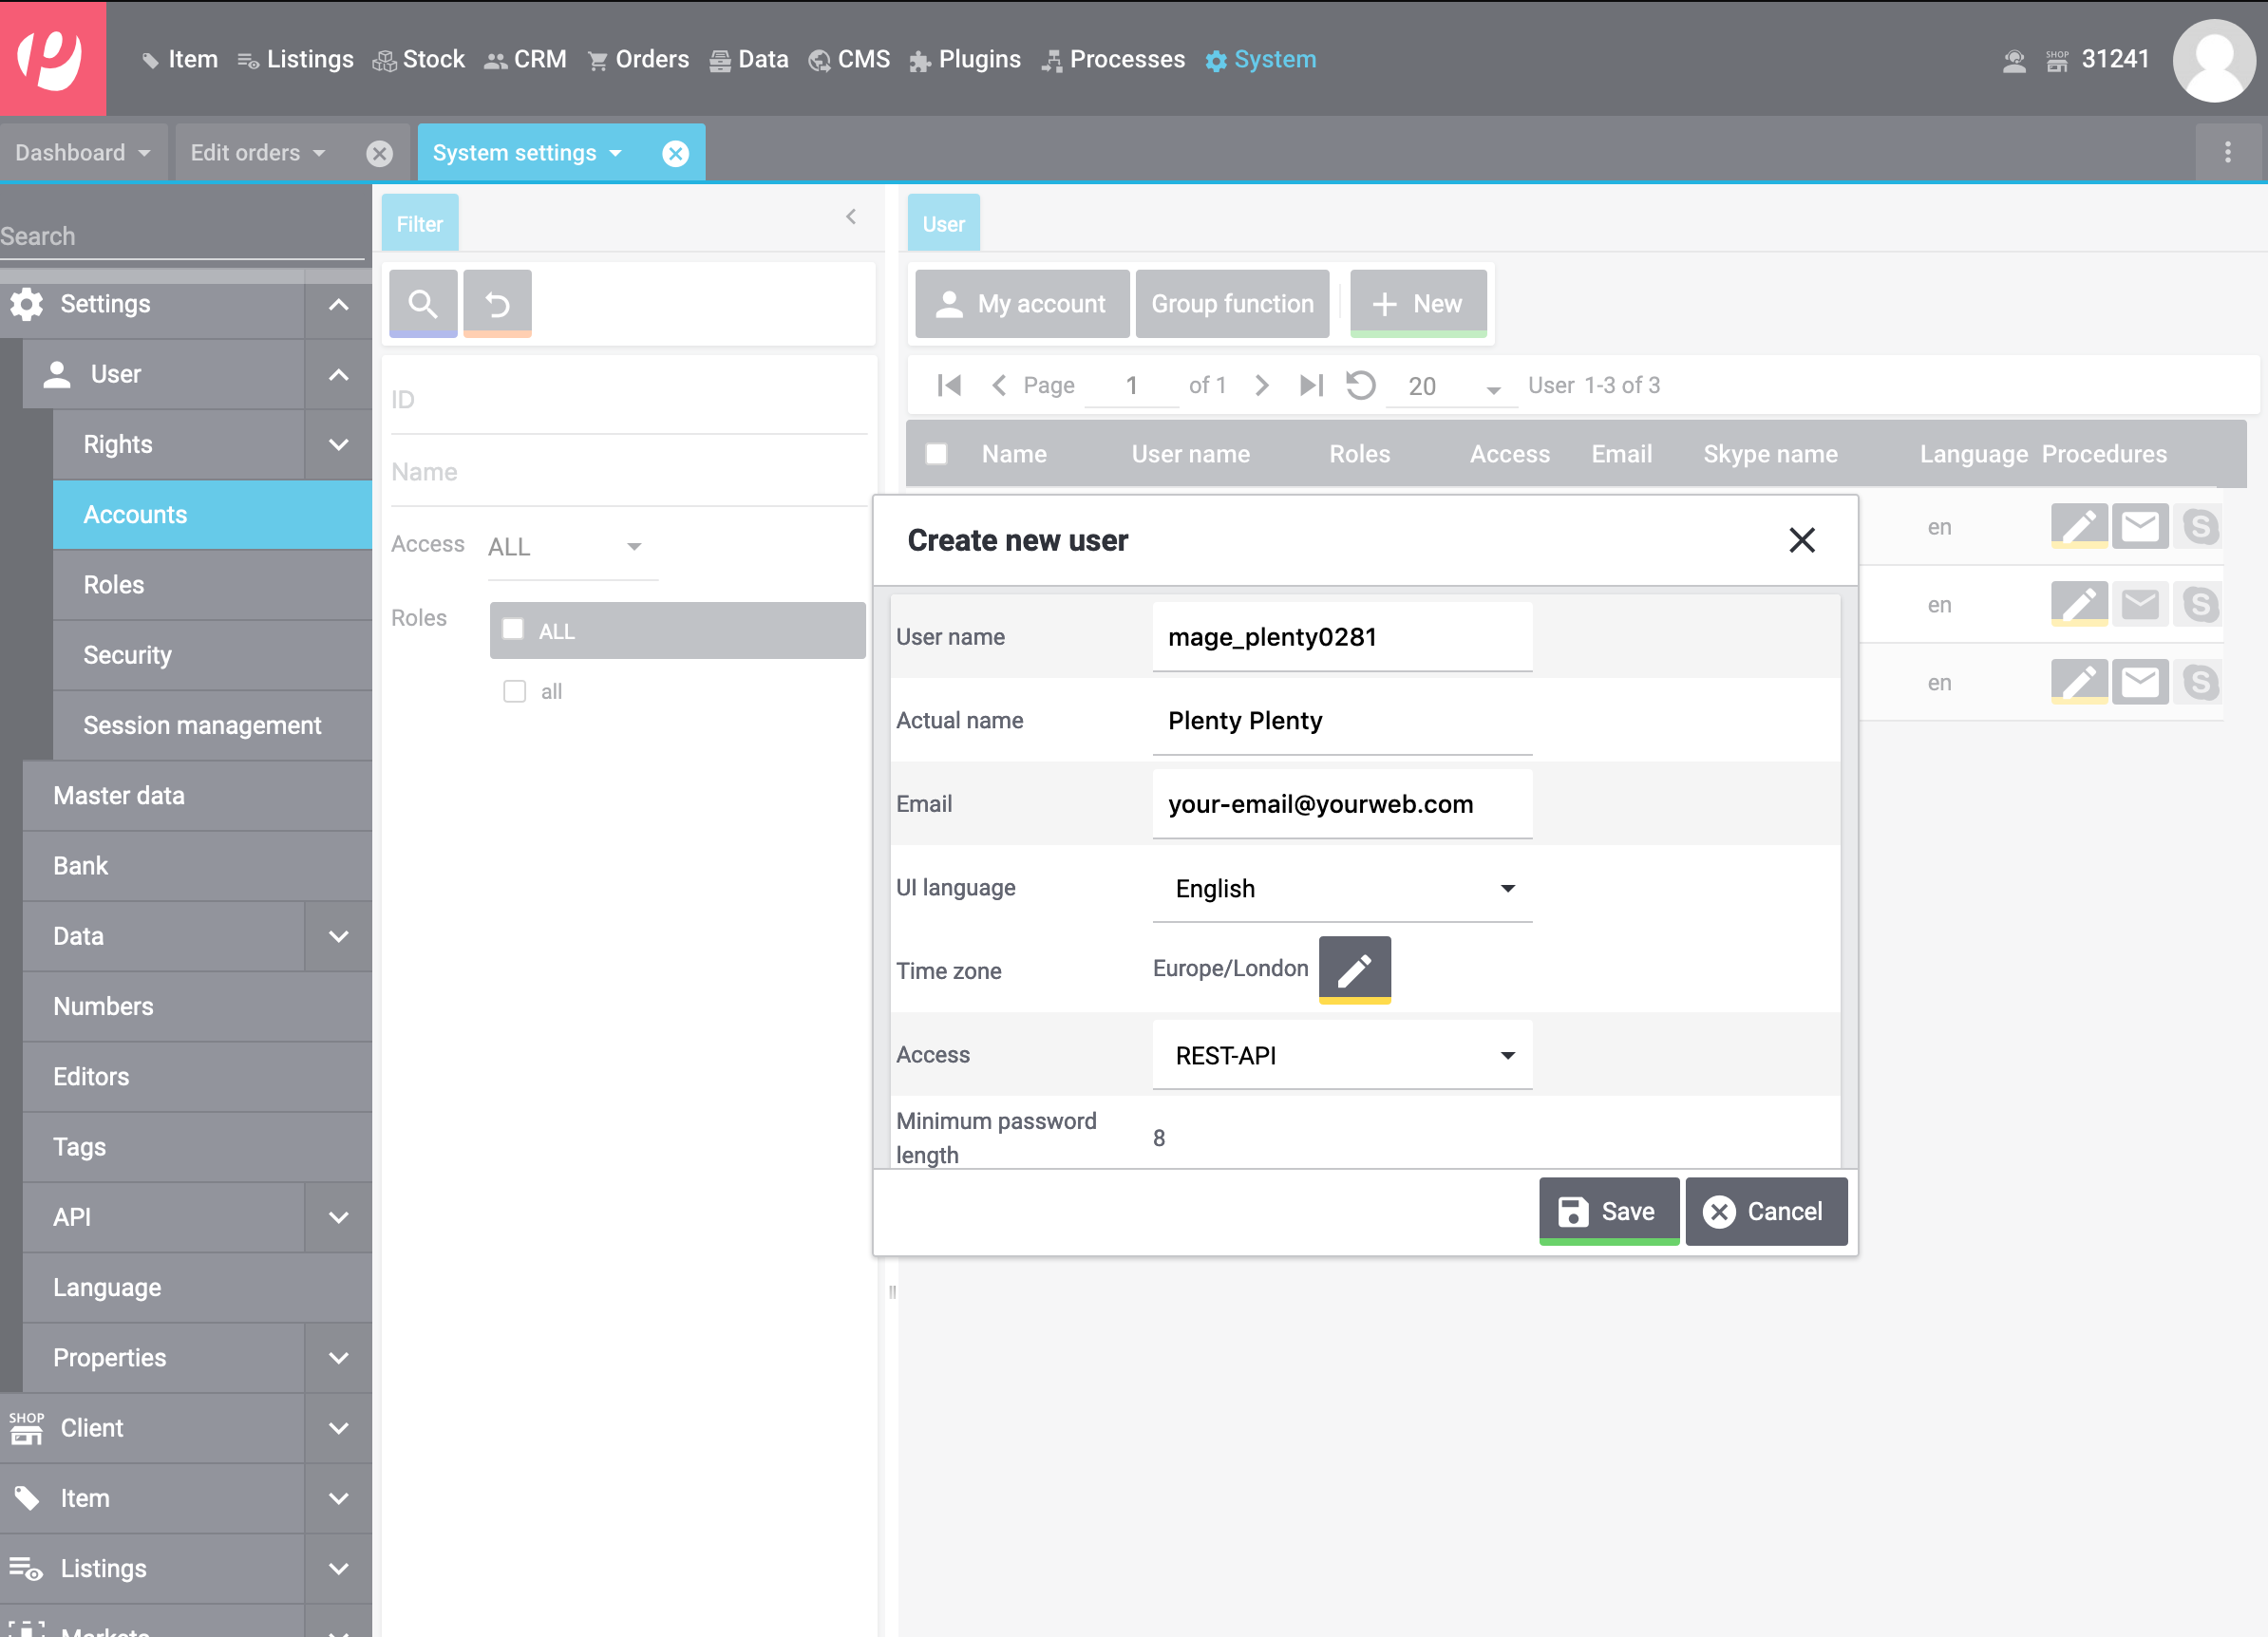
- Within accounts page, click on + New button. You should see a popup screen with user fields that need to be filled out.
- Fill out all the required entries. Special attention should only be paid to username, password and access fields. The rest of fields can be filled out to suite your requirements. We recommend using both letters and numbers in the username. Ensure you create secure strong password. One thing to note is that password should not contain any punctuations, use letters, numbers and signs instead. And finally, the access dropdown should be set to REST-API.
- Save configuration to close the popup and make notes of your username and password, which will be required for magento configuration.
Authentication configuration
Our application connects to PlentyMarkets to exchange data via REST API. We need to provide PlentyMarkets username and password, which will be used to obtain access tokens that are used to make API calls. This is automatic process and all you have to do is to include credentials once. To connect to your account, follow bellow steps:
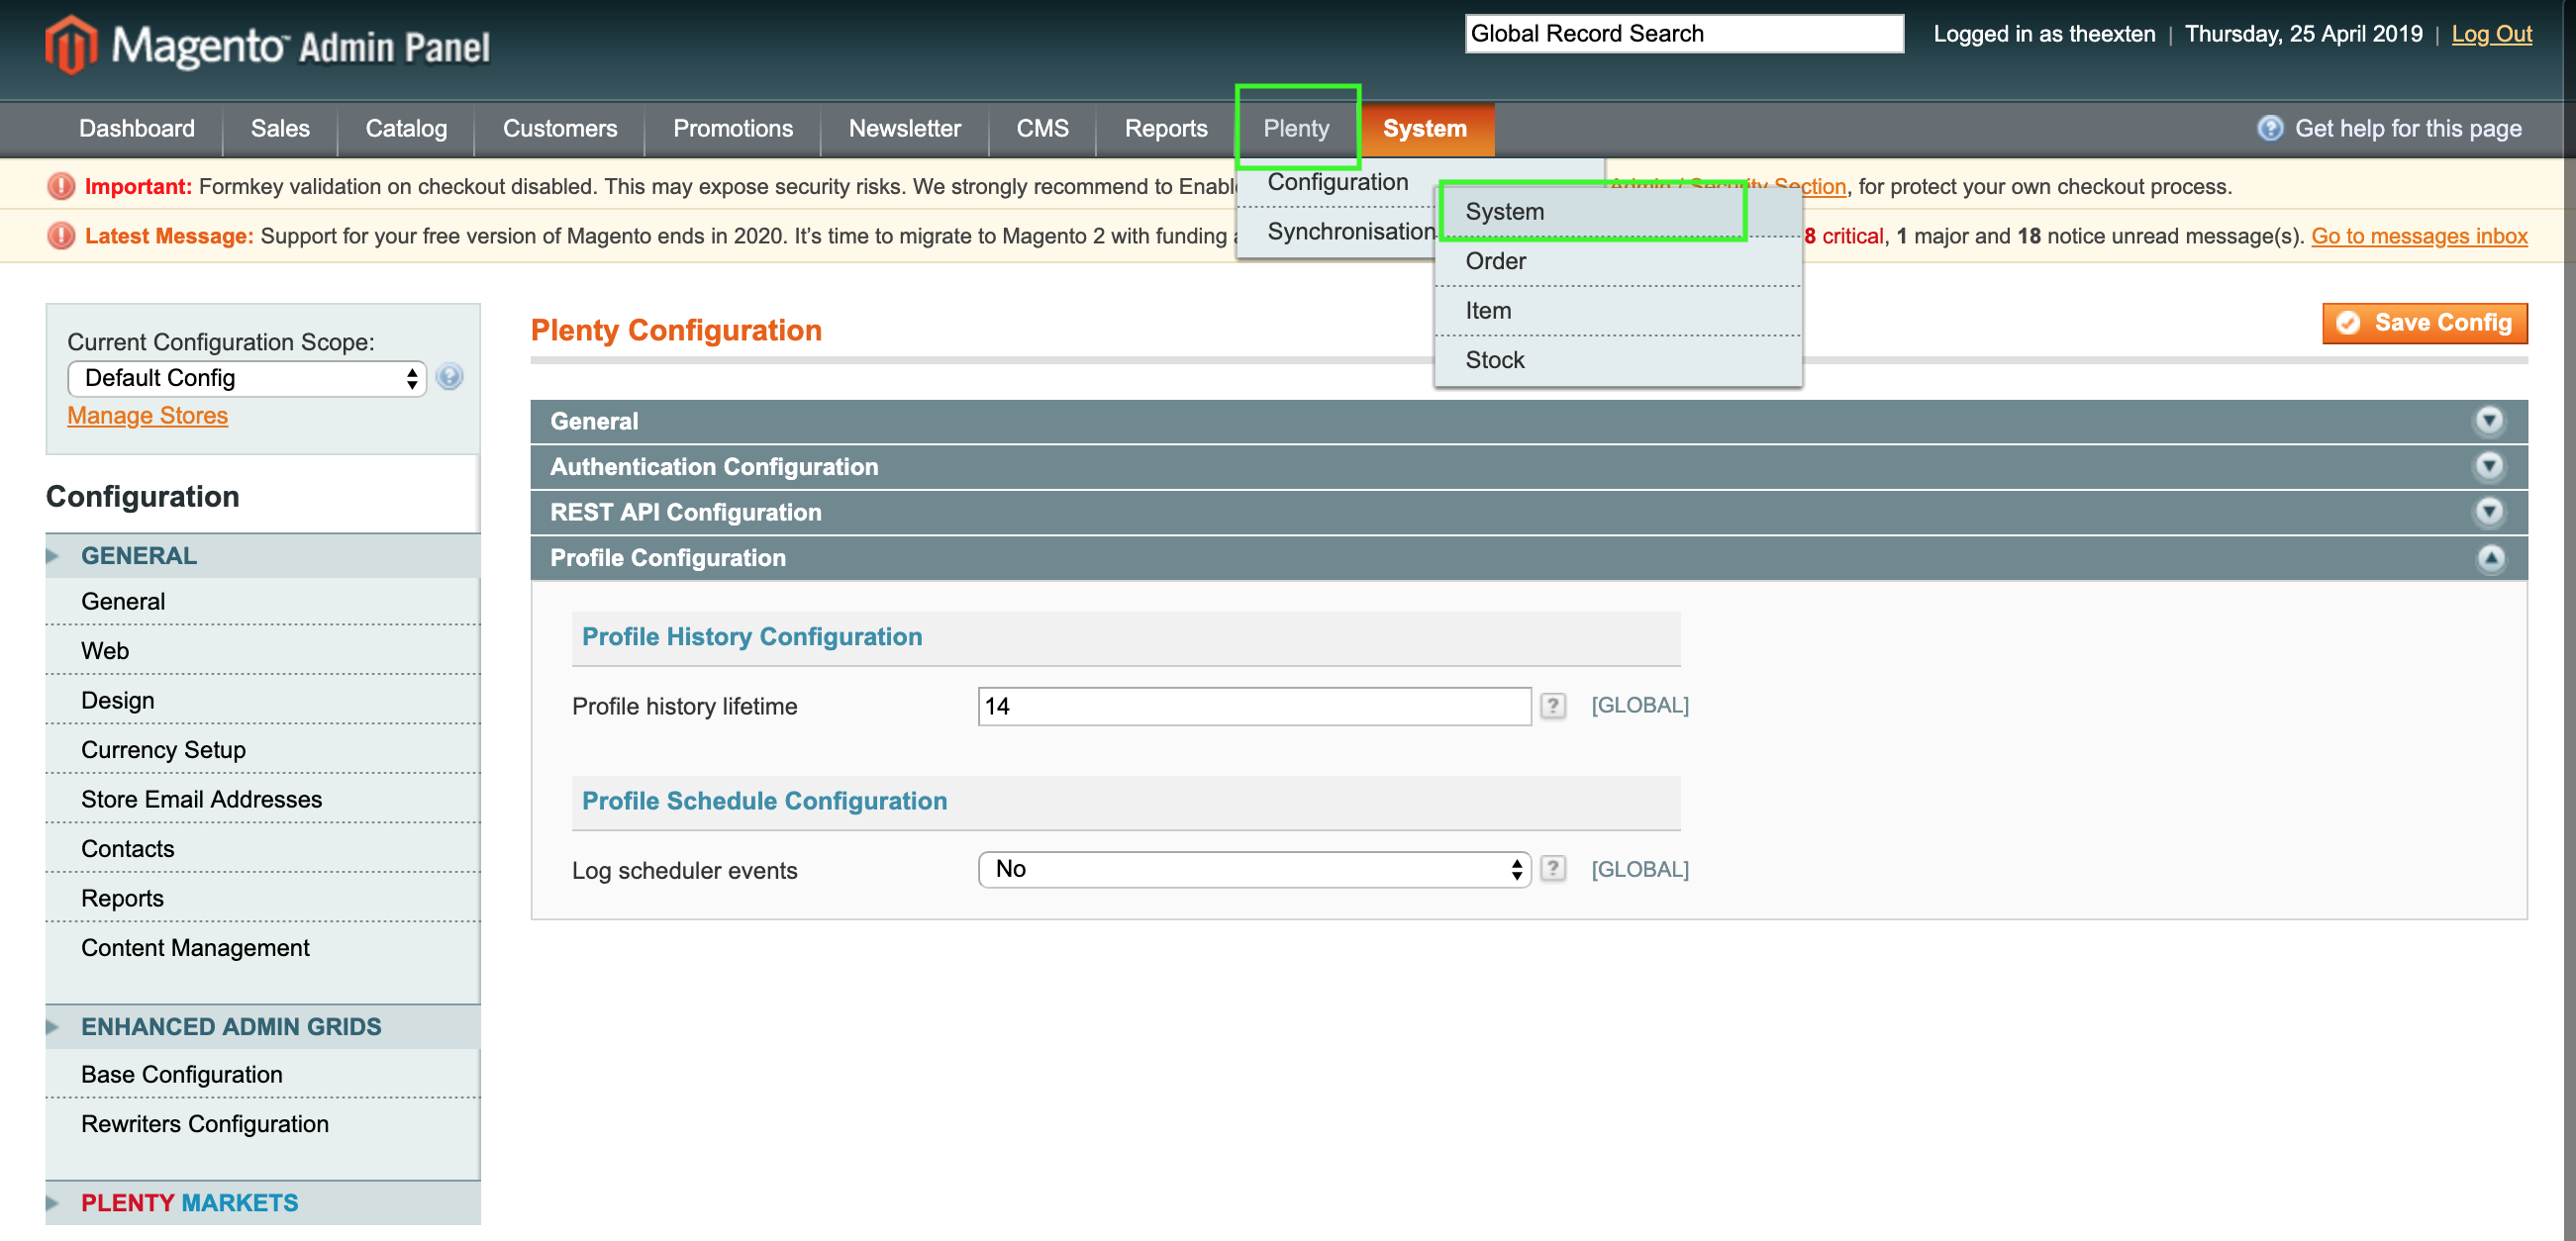
- Login to your magento admin
- Go to Plenty » Configuration » System.
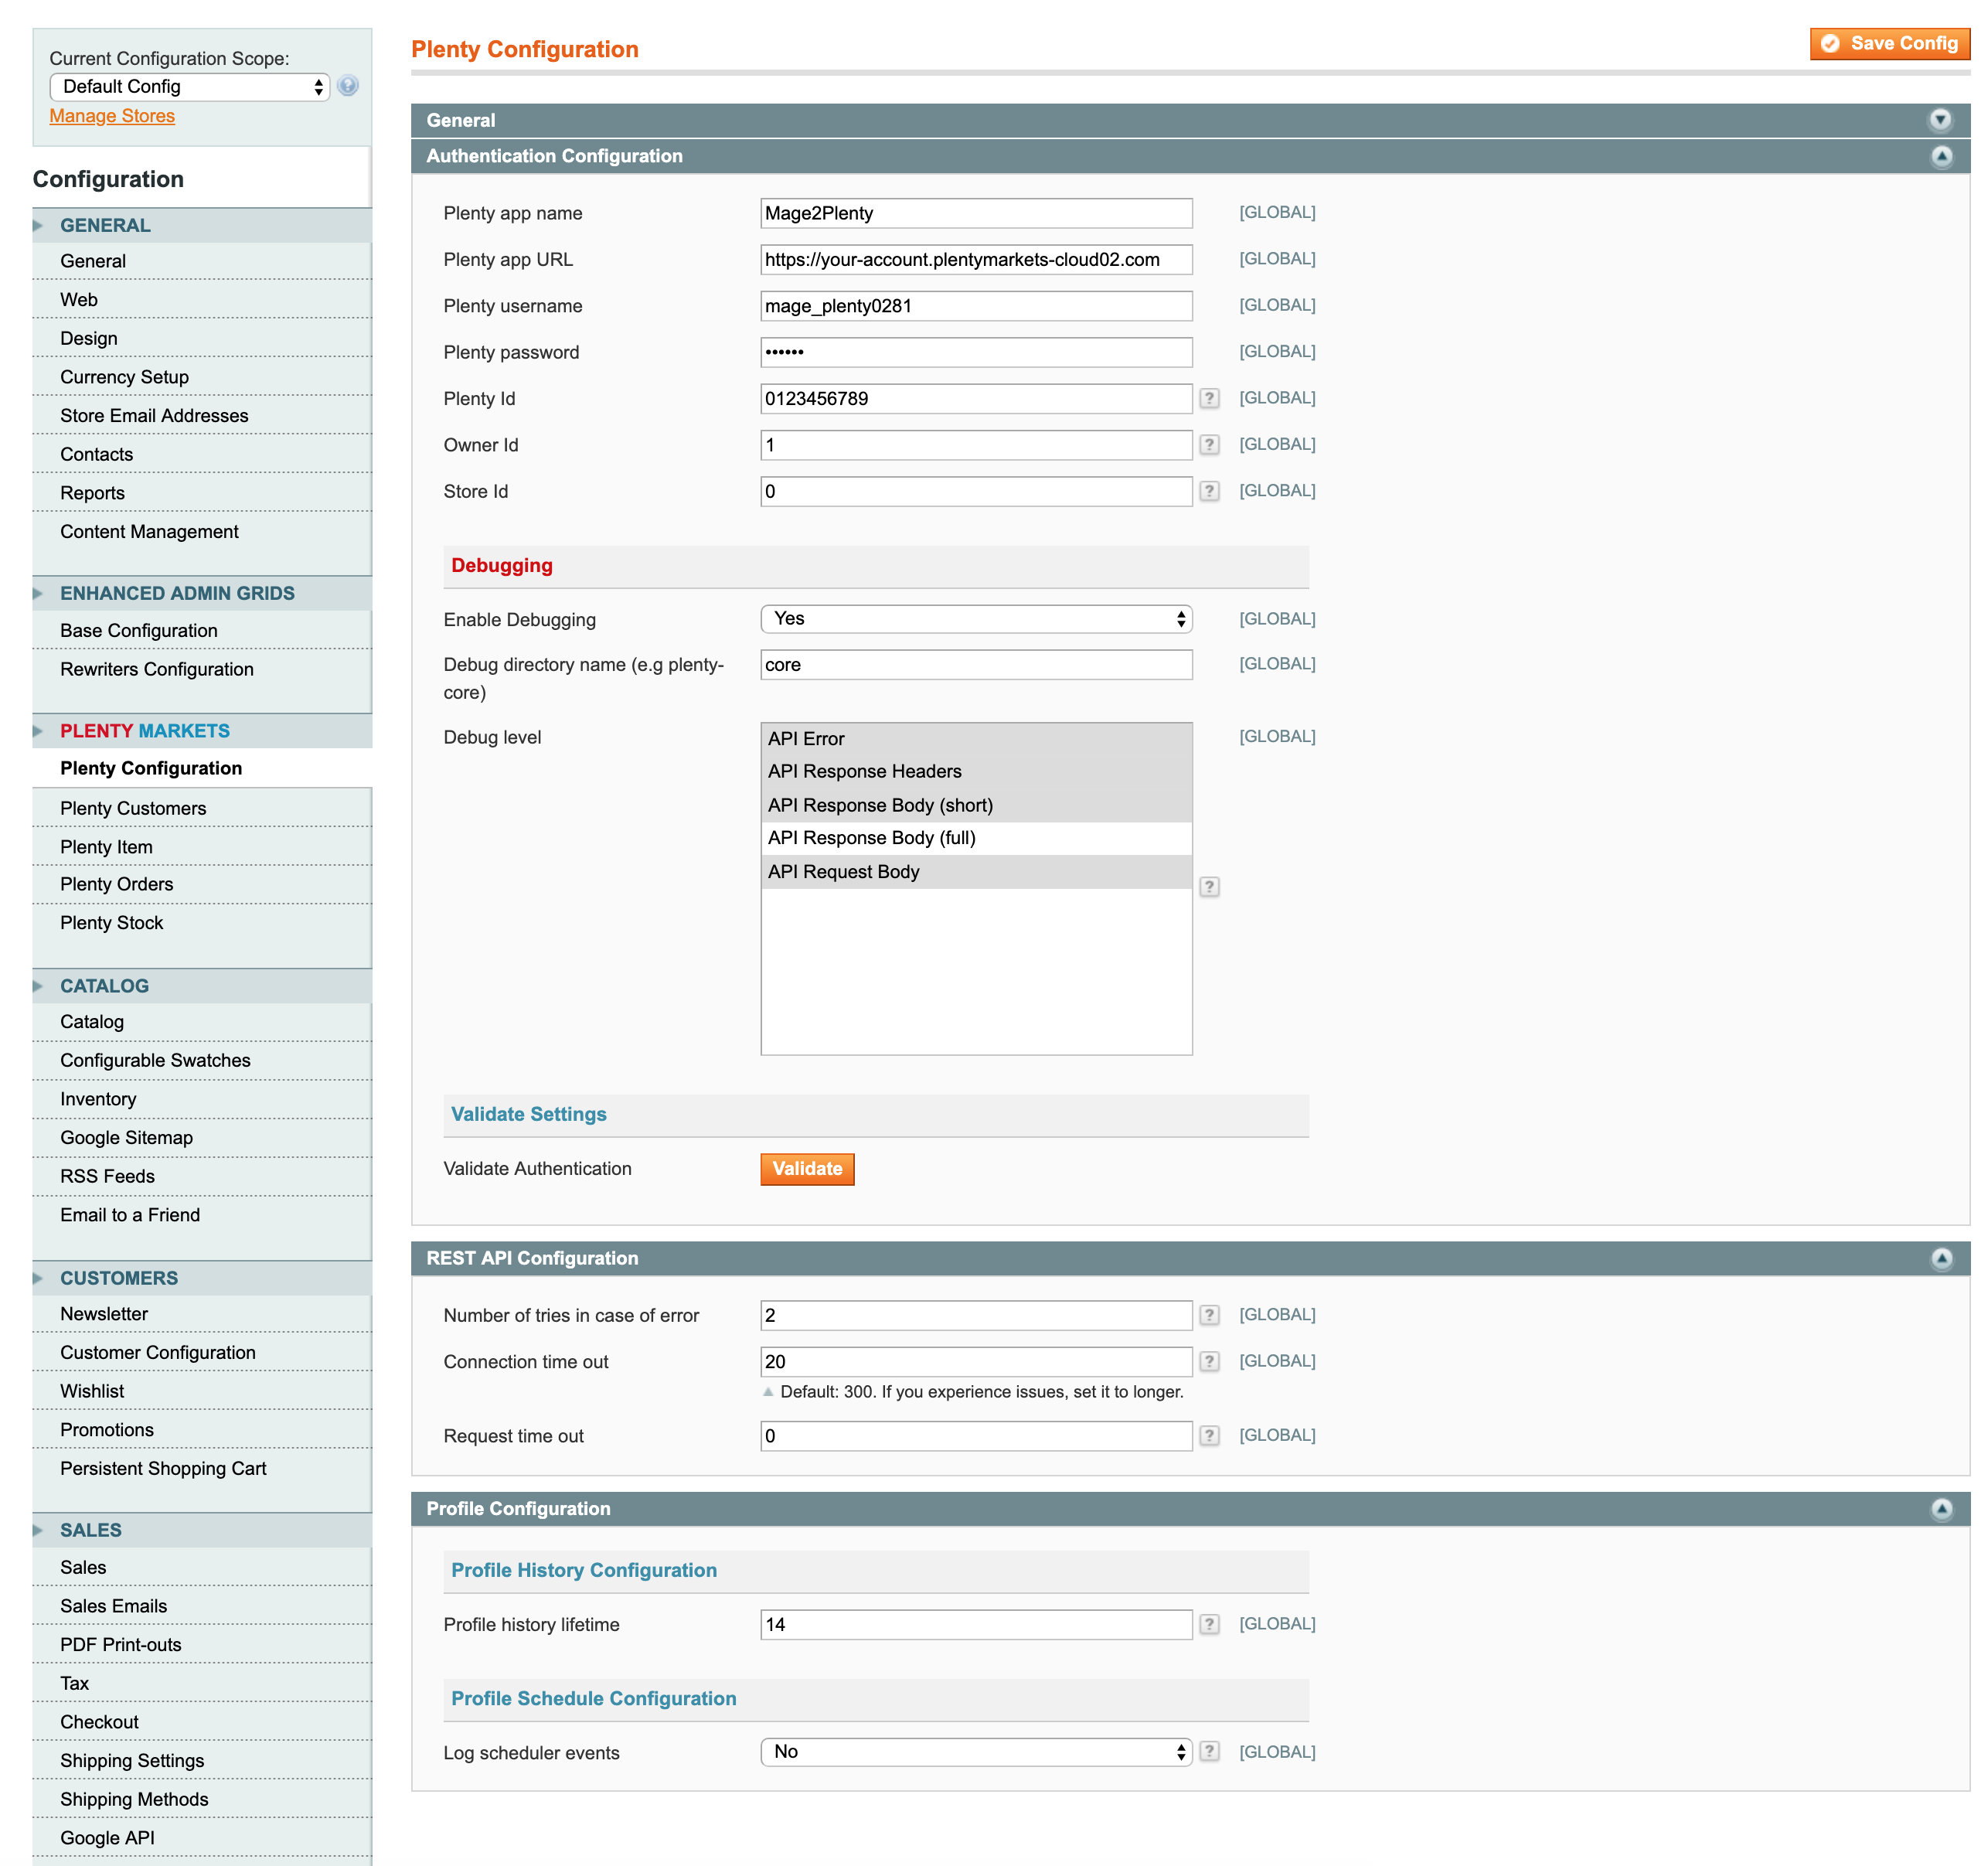
- Within Plenty Configuration tab, click on “Authentication Configuration” section to expand it. Follow bellow recommendation to fill out all the required fields:
- Enter name for your APP. This can be any string and not required.
- Enter your PlentyMarkets server URL, which you took note off in the previous step and enter it into “Plenty app URL” field.
- Enter PlentyMarkets username into “Plenty username” field. This is the username, which you created in the previous step.
- Enter the password into “Plenty password” field, which you also created in previous step.
REST API debugging
this is intended to be used for developers in order to debug request and response data between the two systems. If you experience any issues in the event of data transfer you could enable api logs. Within Authentication configuration, choose “yes” next to “Enable Debugging” field. This will enable logs to your preferred destination.
REST API configuration
There are a few entries that may need to be adjusted in case your system experiences issues. However, default settings are recommended in most situations. Under REST API configuration section you will find the following settings:
- “Number of tries in case of error”. This does not normally happen, but as with any other server, PlentyMarkets server can also return system error while transmitting data. This can be due to many factors but one of them is web server or connection error. For this situation we’ve included a field “Number of tries in case of error” that can be adjusted to suite your needs. Default setting is 2 tries in case of a system error but if you experience issues you can increase the number of tries.
- “Connection time out” can also be handy at times when you need to adjust connection time value.
- “Request time out” is used to adjust libcurl transfer operation. We recommend leaving default value 0.
REST API test
Finally, once you’ve carried out all configurations you can now test your APP. Within “Authentication Configuration” section, click on “Validate” button to validate connection. If connection is successful the fields will turn green and red otherwise. If you experience any issues, one of our staff members will be happy to help you.