In this guide we’ll show you how to configure a profile that will be responsible for automatic order export synchronisation.
Steps to create and configure profile
- Create order export profile
- Profile settings
- Export settings
- Export Configuration
- API Configuration
- Store Configuration
- Order Statuses Configuration
- Payment Configuration
- Shipping Configuration
- Customer Configuration
- Warehouse Configuration
- Order Synchronisation Tab
- Order Synchronisation History Tab
- Schedule Tab
- Schedule History Tab
Create order export profile
Create a profile with entity type: “Order” and direction: “Export”.
More on how to create a profile can be found here: Profile tool.
Profile settings
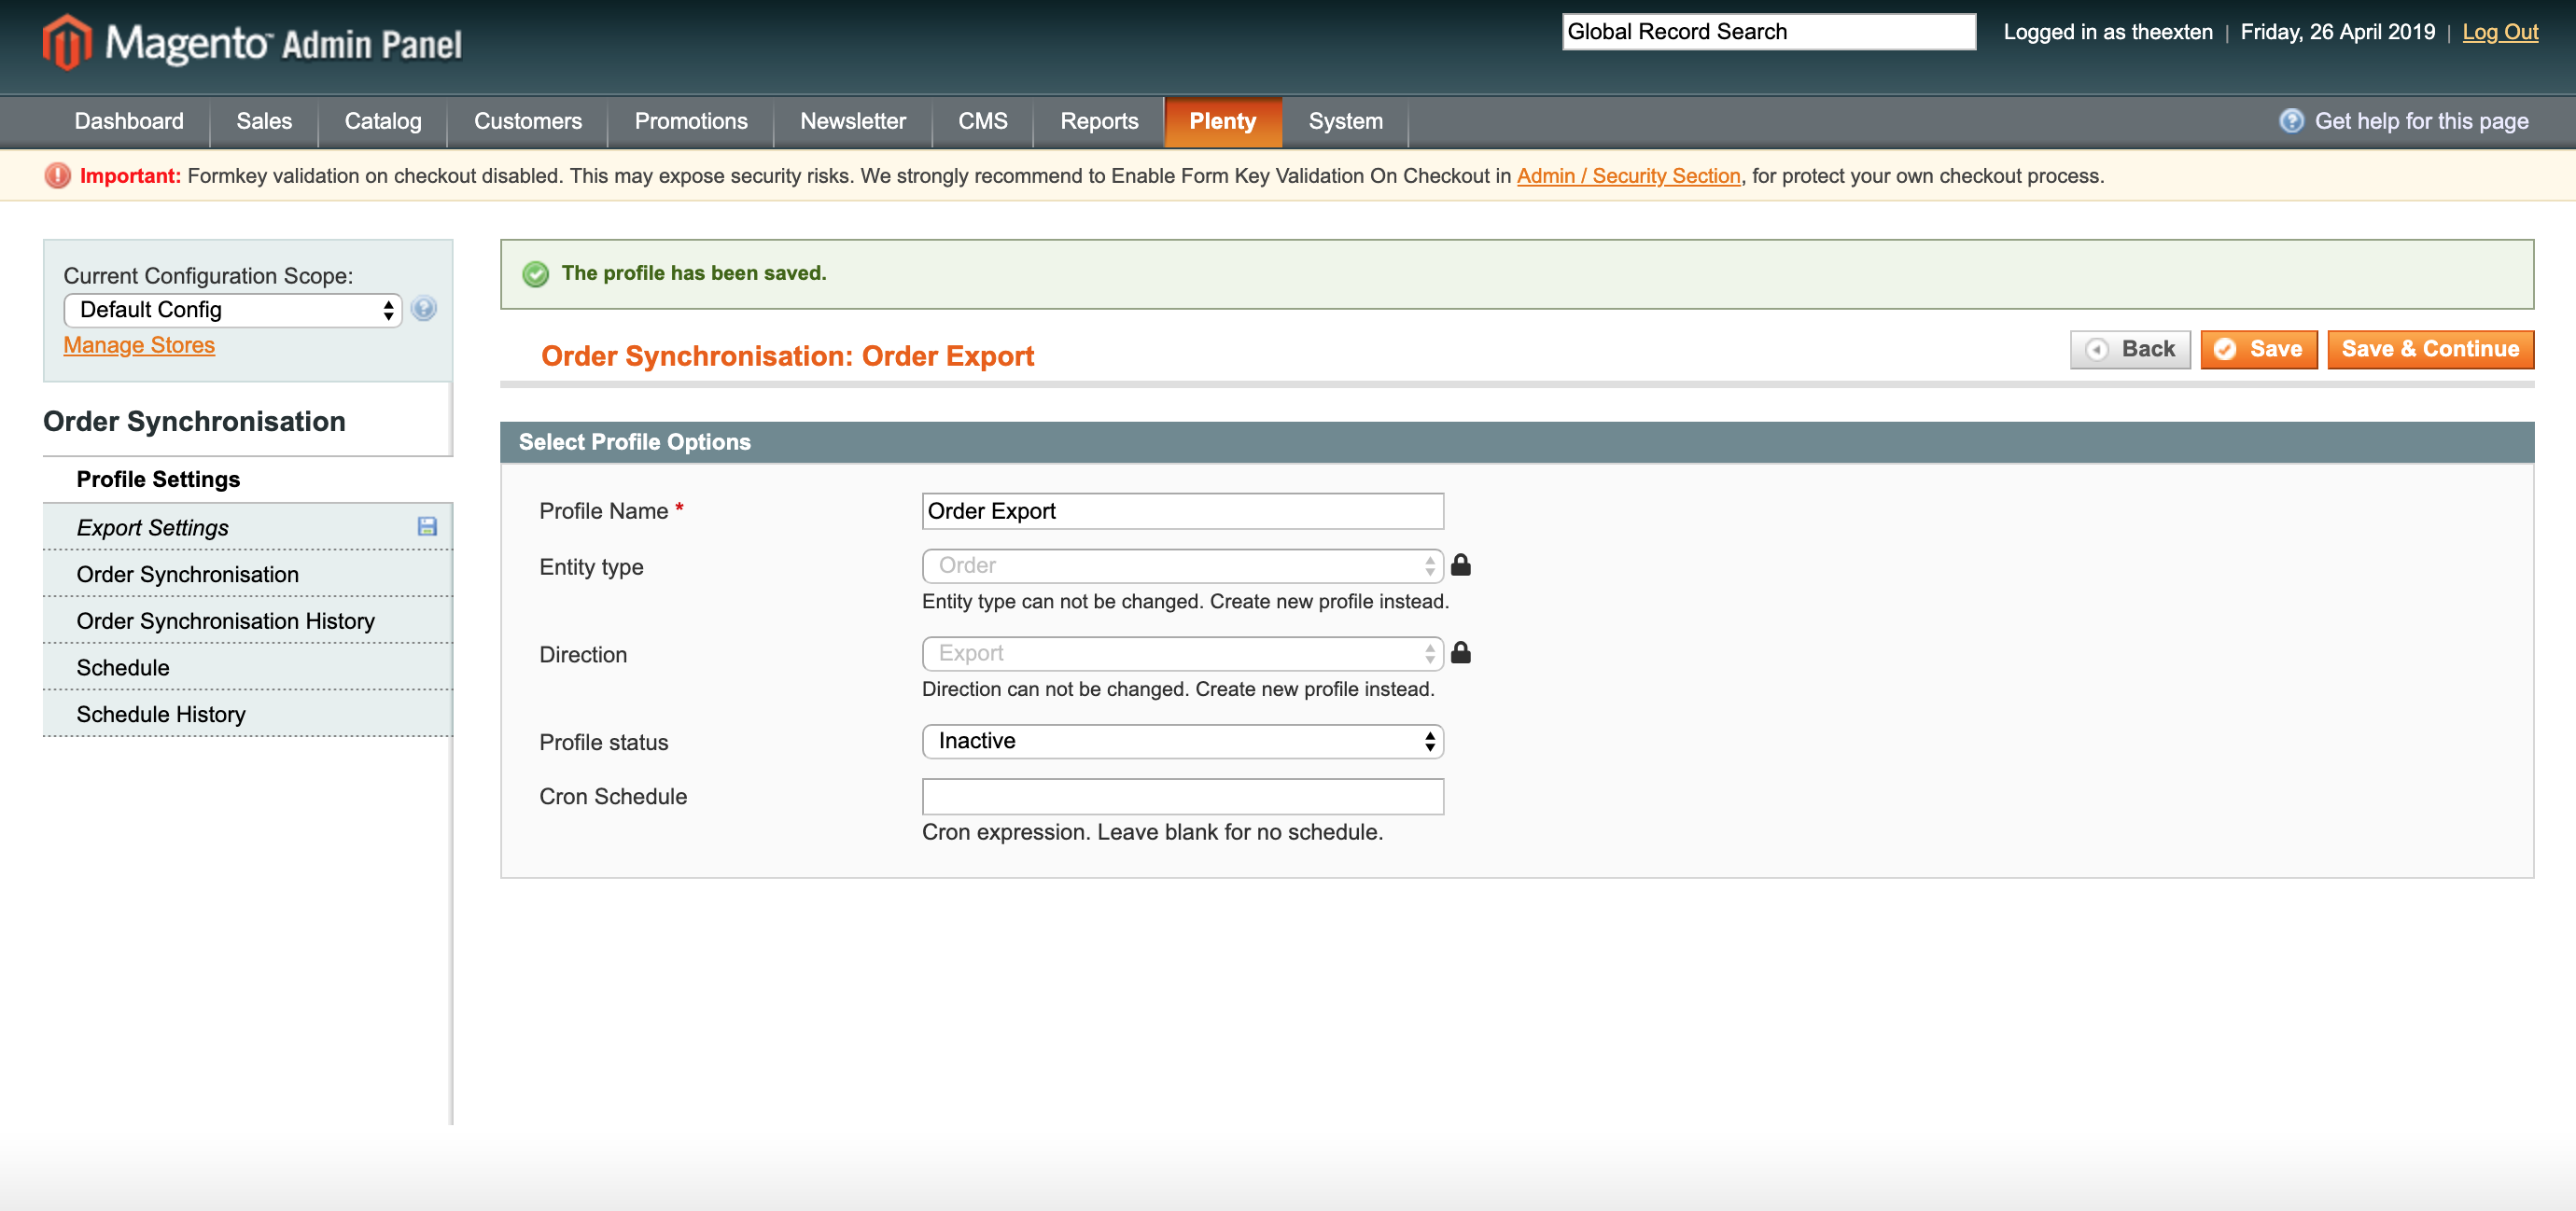
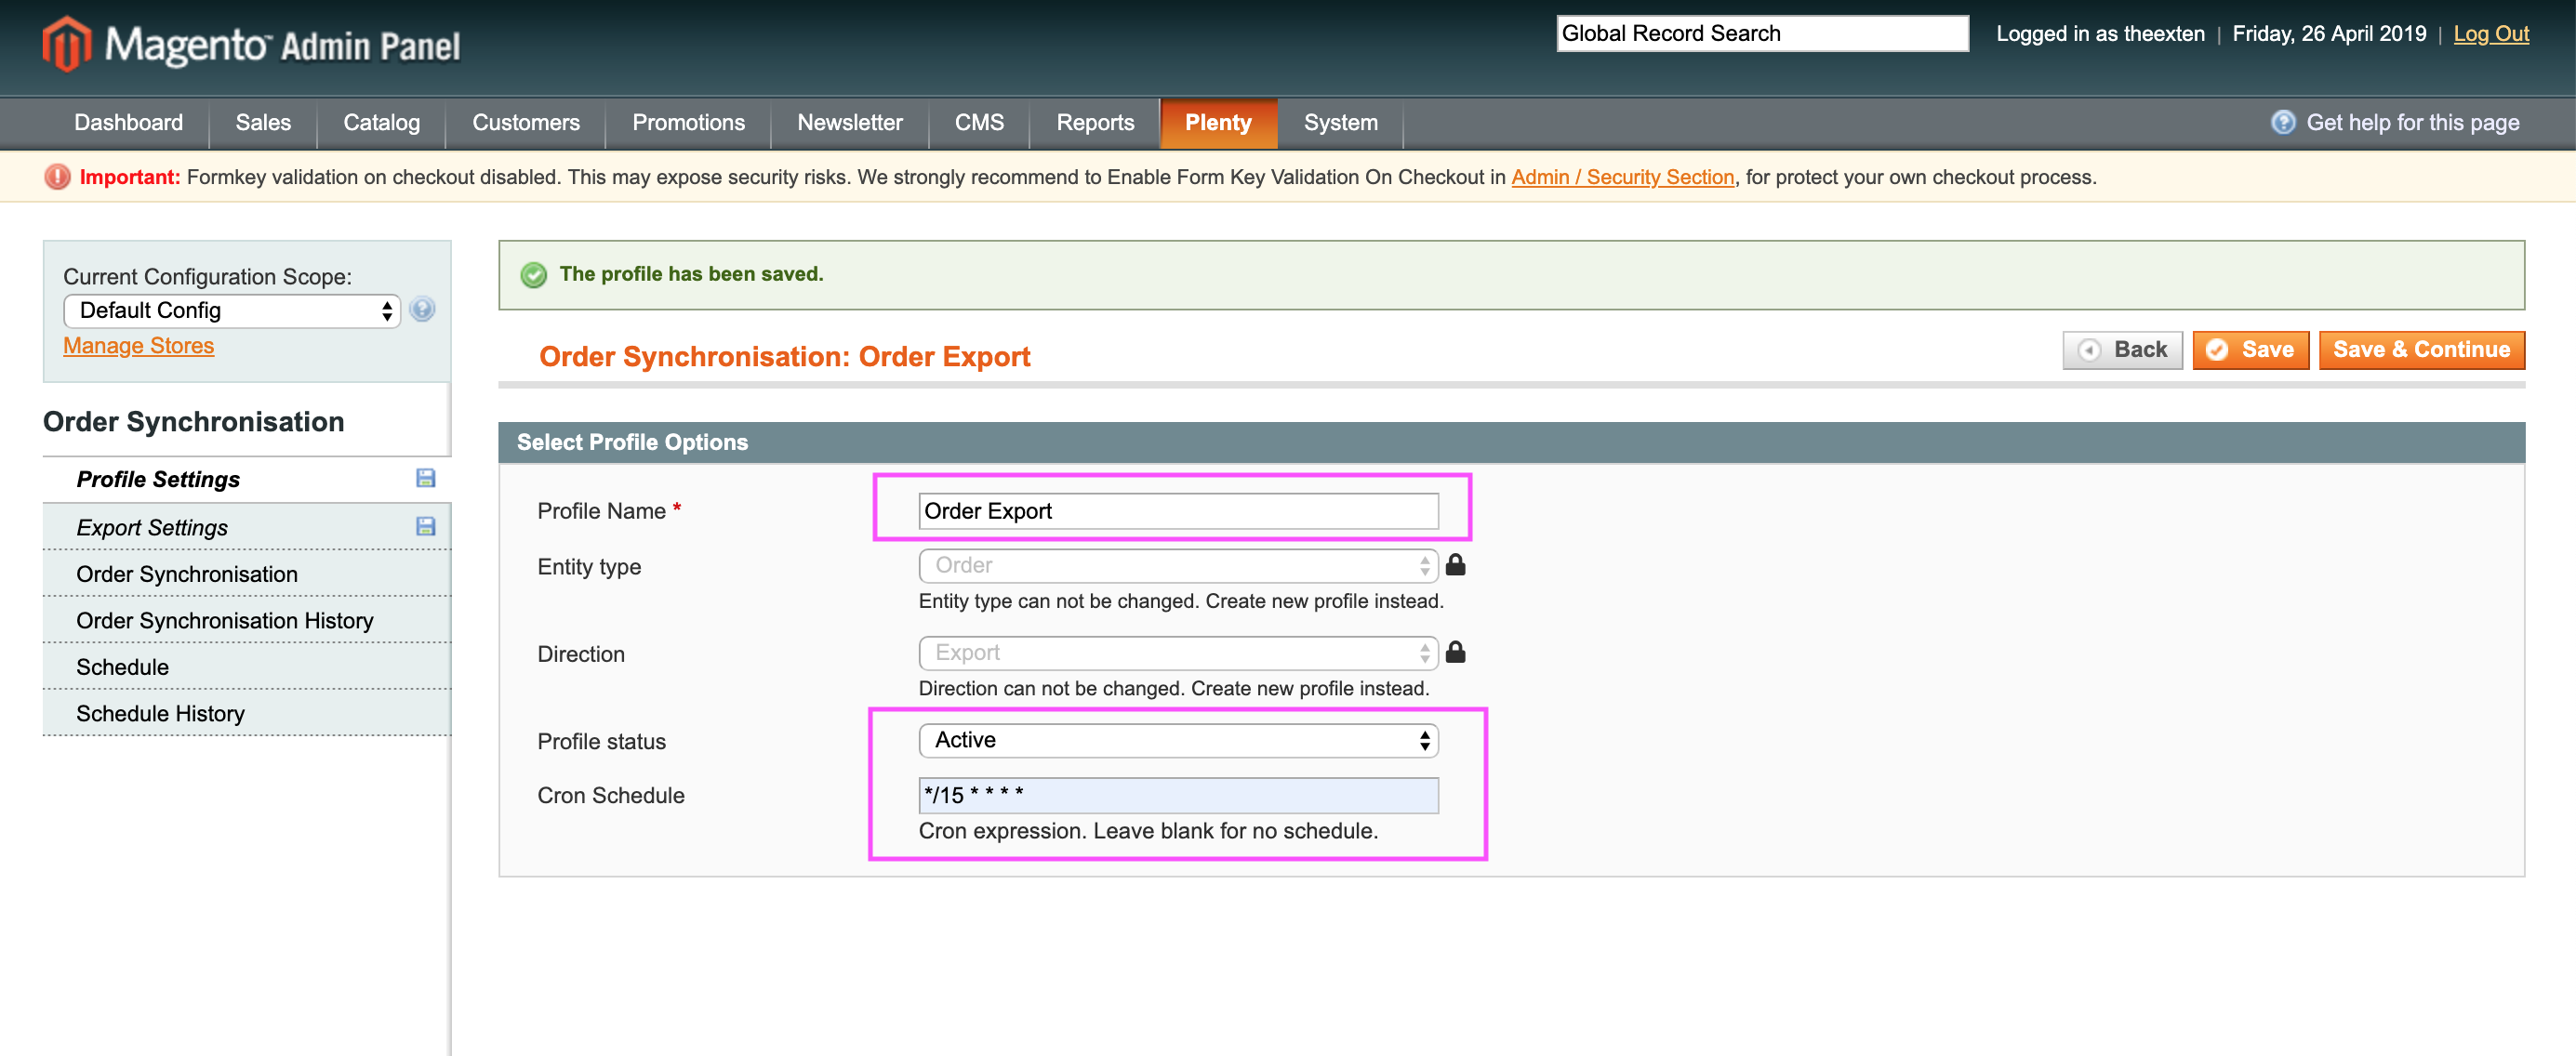
In this section we need to enable our profile. Select “Active” next to “Profile status”.
Next, we need to create cron expression to enable our profile to execute tasks on the scheduled basis. Scheduled task intervals depend on how often you like orders to be exported to PlentyMarkets. We recommend setting cron schedule to every 15-30 minutes. If your shop is not very busy, consider increasing time to every 30 minutes or an hour.
Export settings
All profile configurations are located under export settings tab.
This is where you need to configure your order synchronisation process.
Our connector supports multi-store environment therefore, profile data can be configured per store, website or global scope if possible.
In this section you can map Magento to PlentyMarkets stores, configure orders, payments, shipment and credit memos. We’ll describe each step as we go alone.
Export Configuration
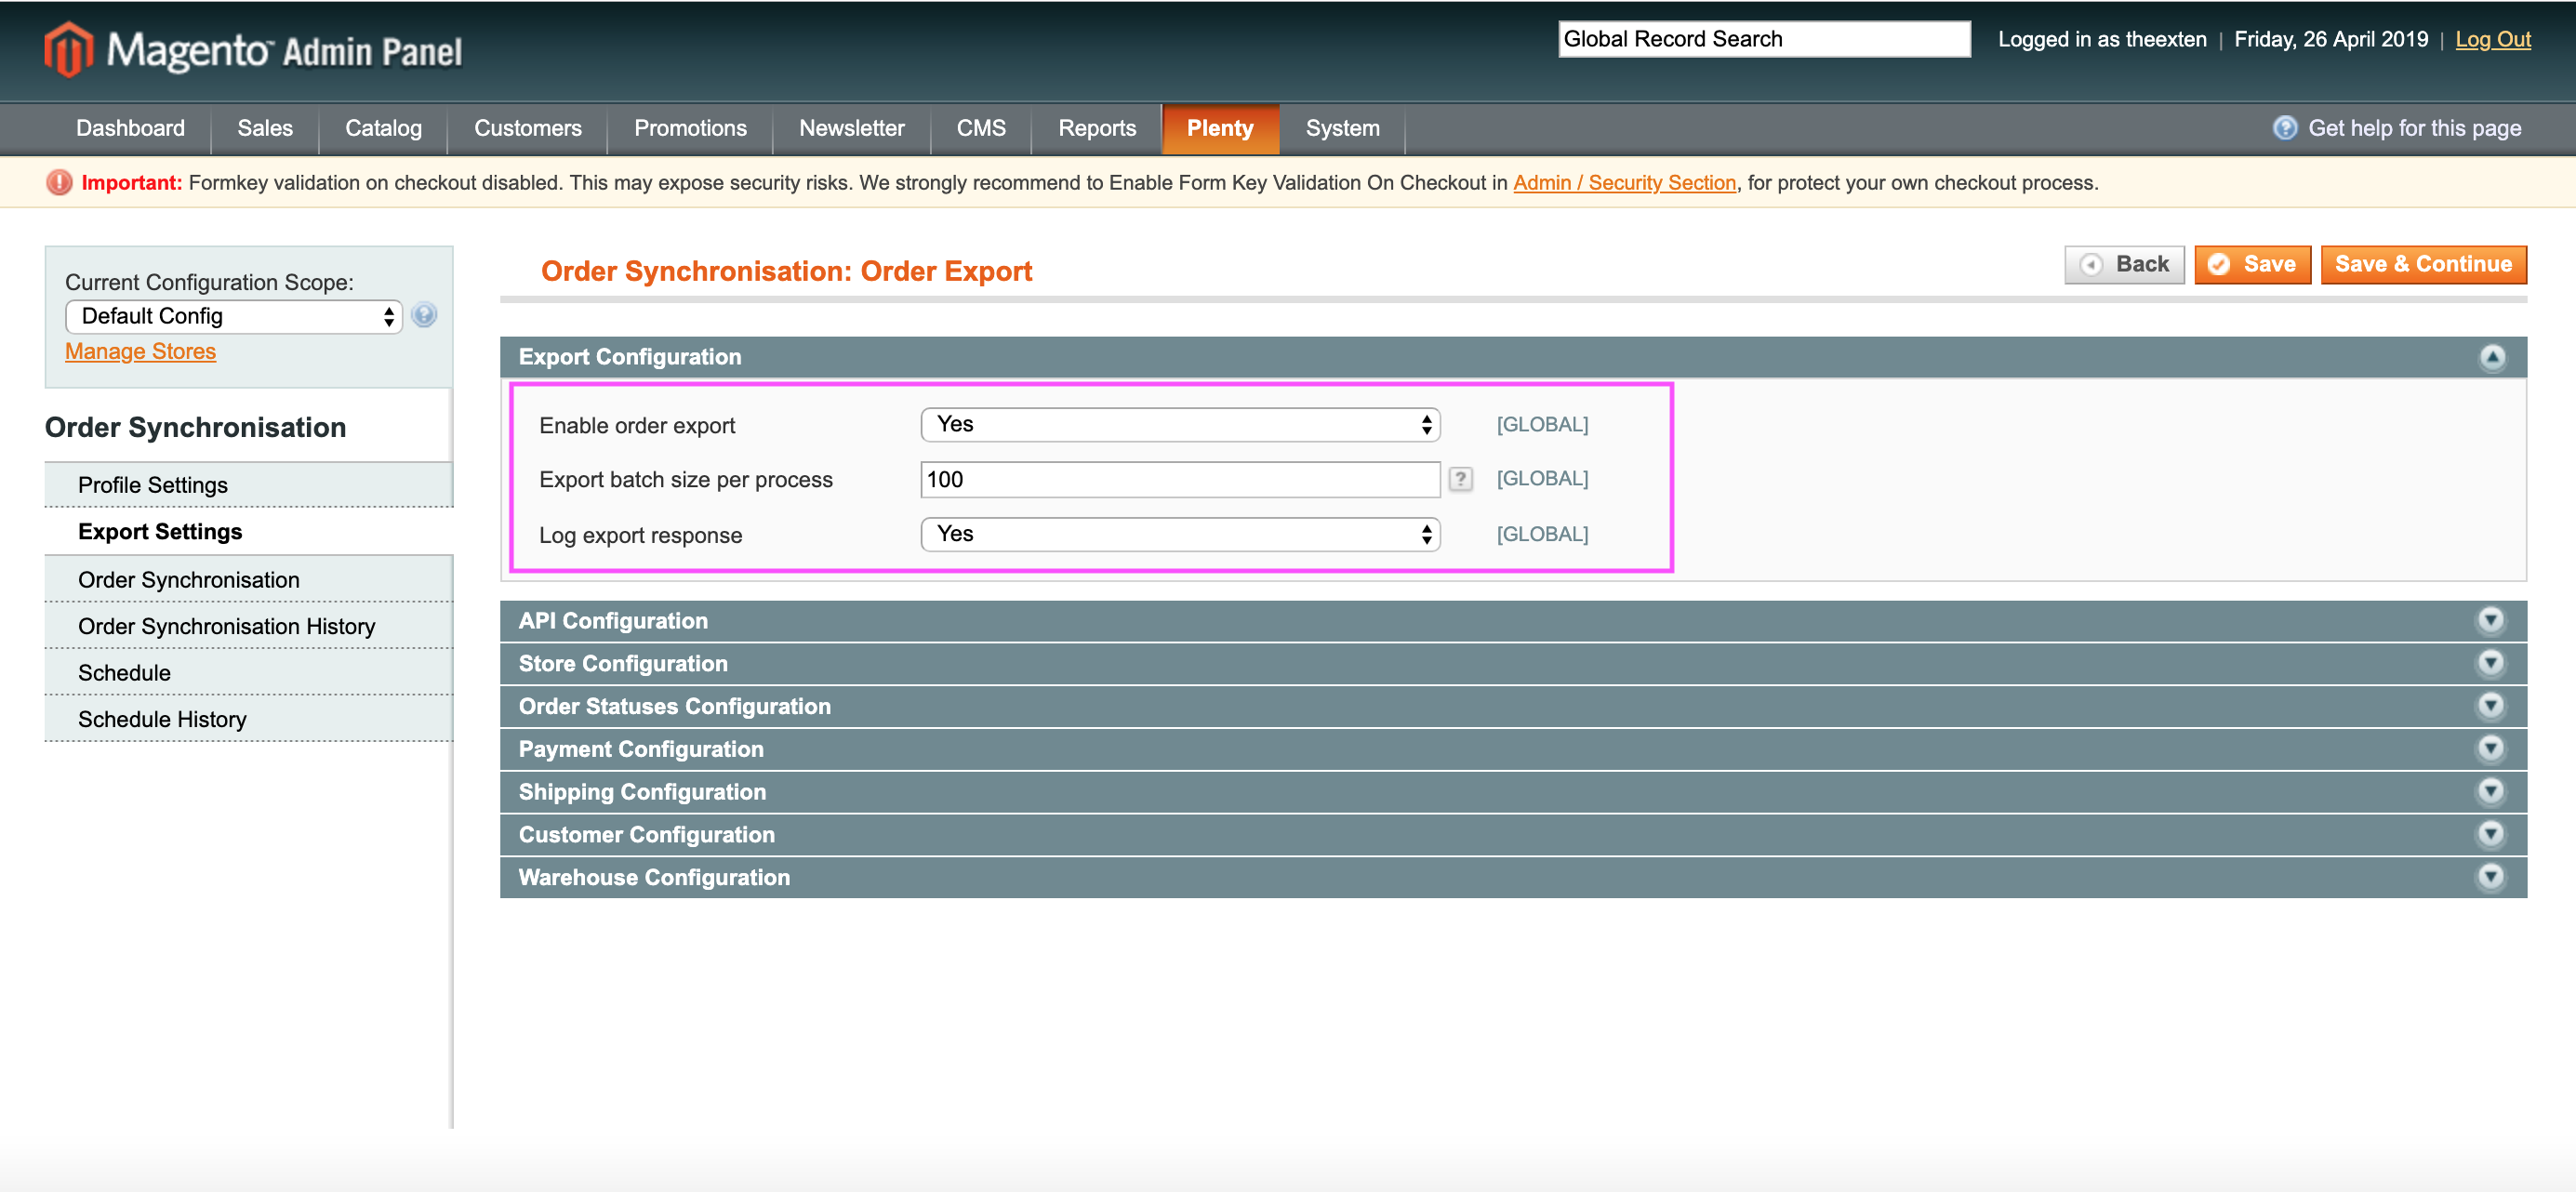
Export configuration section has three settings:
- Enable order export: an option to enable / disable export of orders.
- Export batch size per process: an option to limit export to a number or records specified in this field. Handy option to prevent server overload.
- Log export response: An option for developers to debug export data.
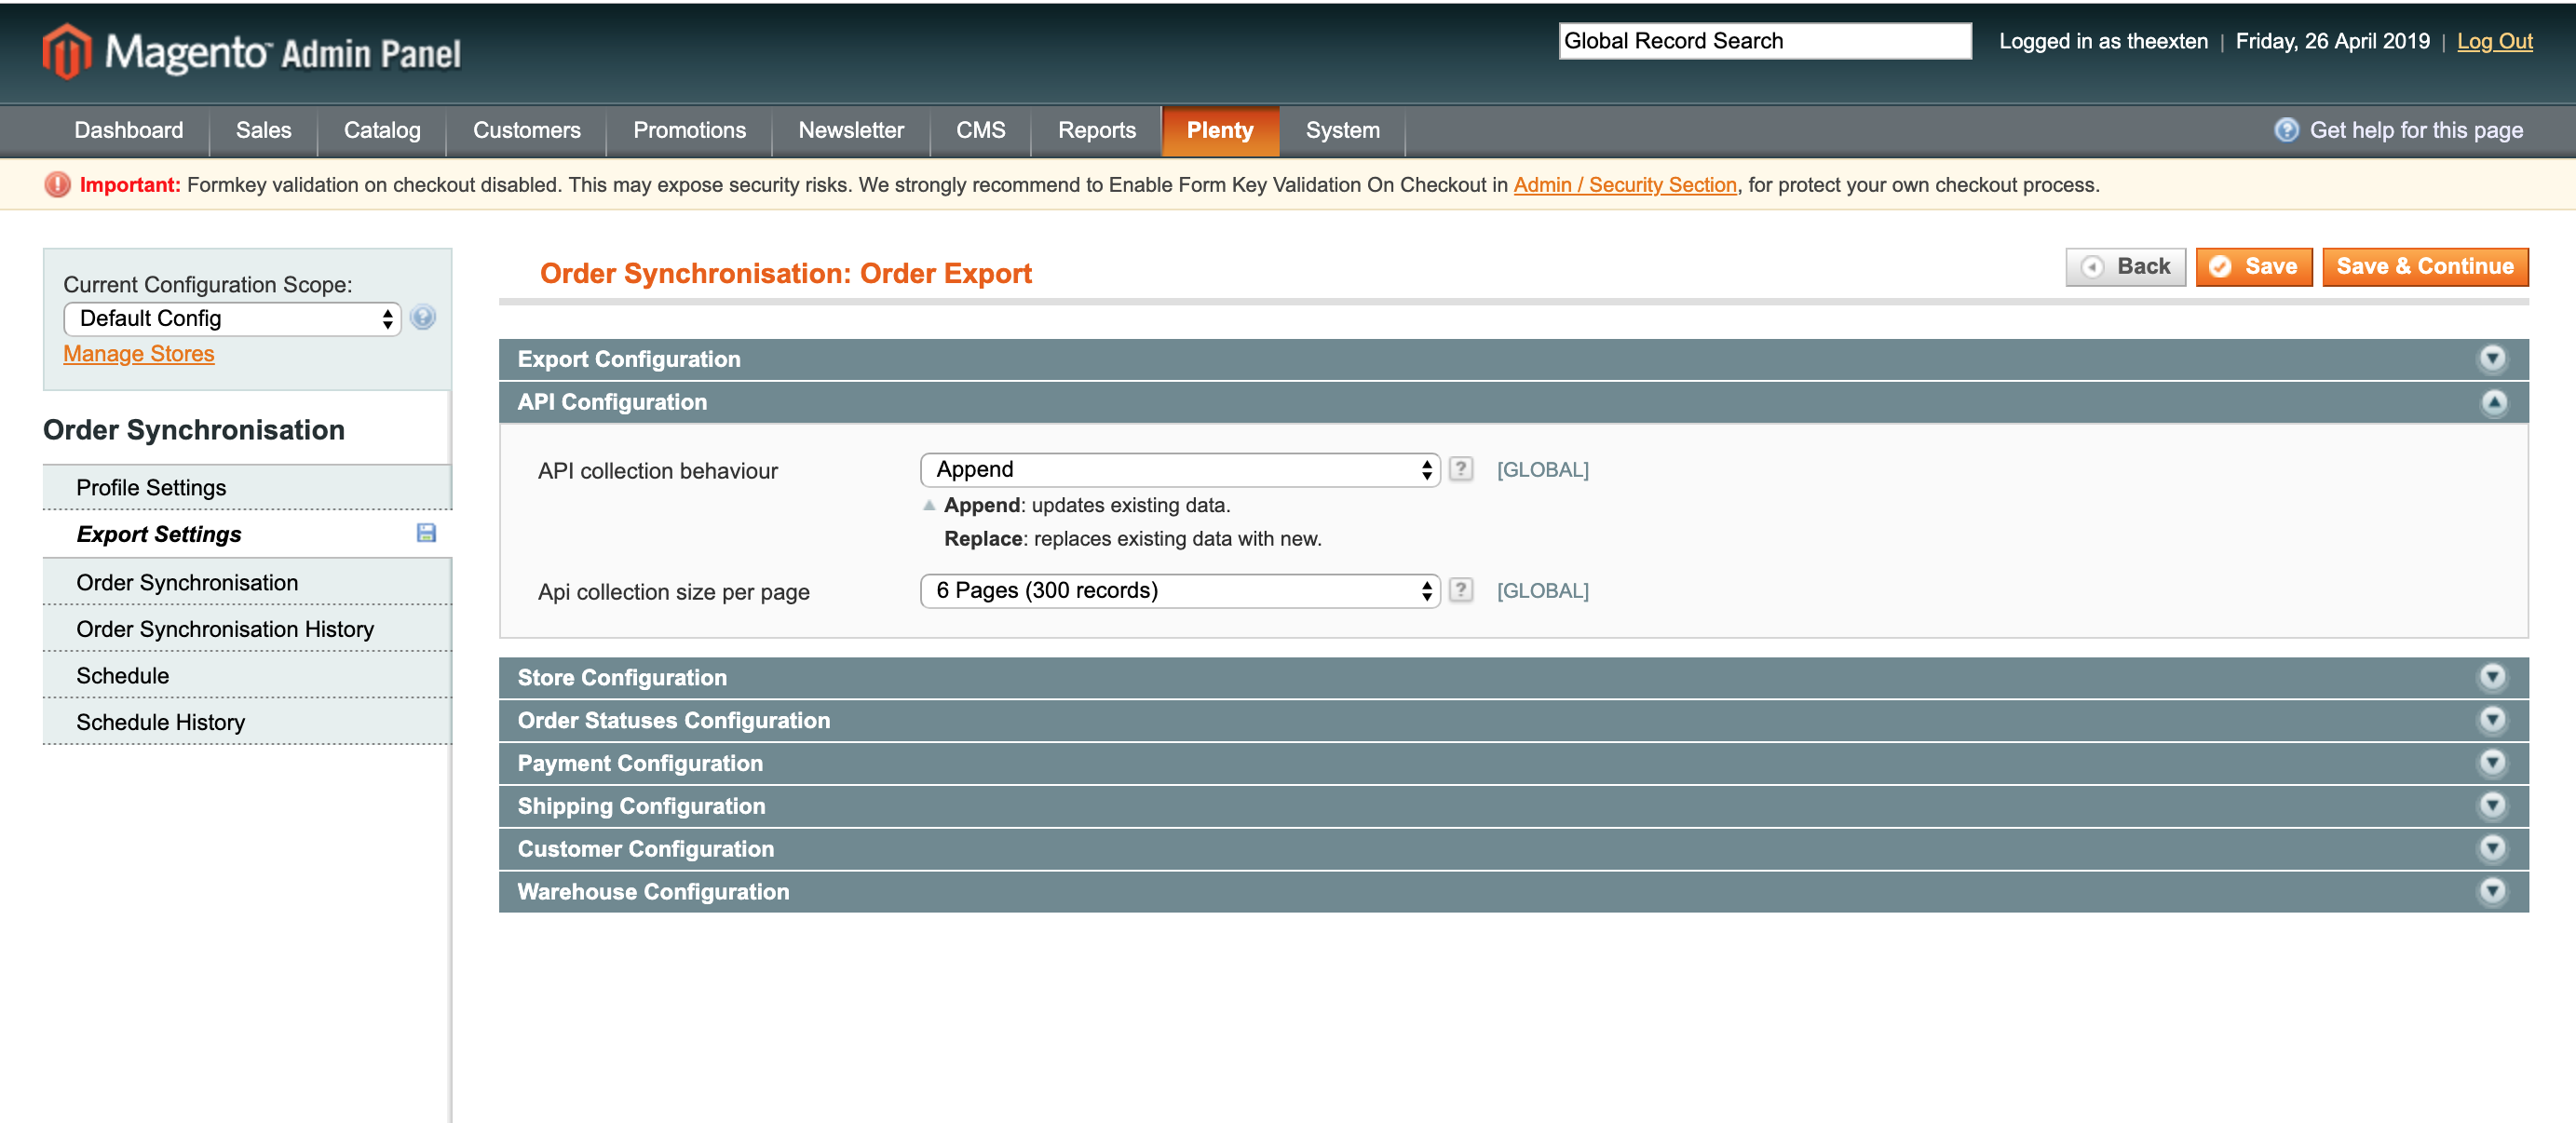
API Configuration
In this section you can configure API behaviour and collection size.
- API collection behaviour: append behaviour will fetch recently updated data and replace behaviour will fetch new data.
- Api collection size per page: a number of entries to be returned per one page.
We recommend leaving default values.
Store Configuration
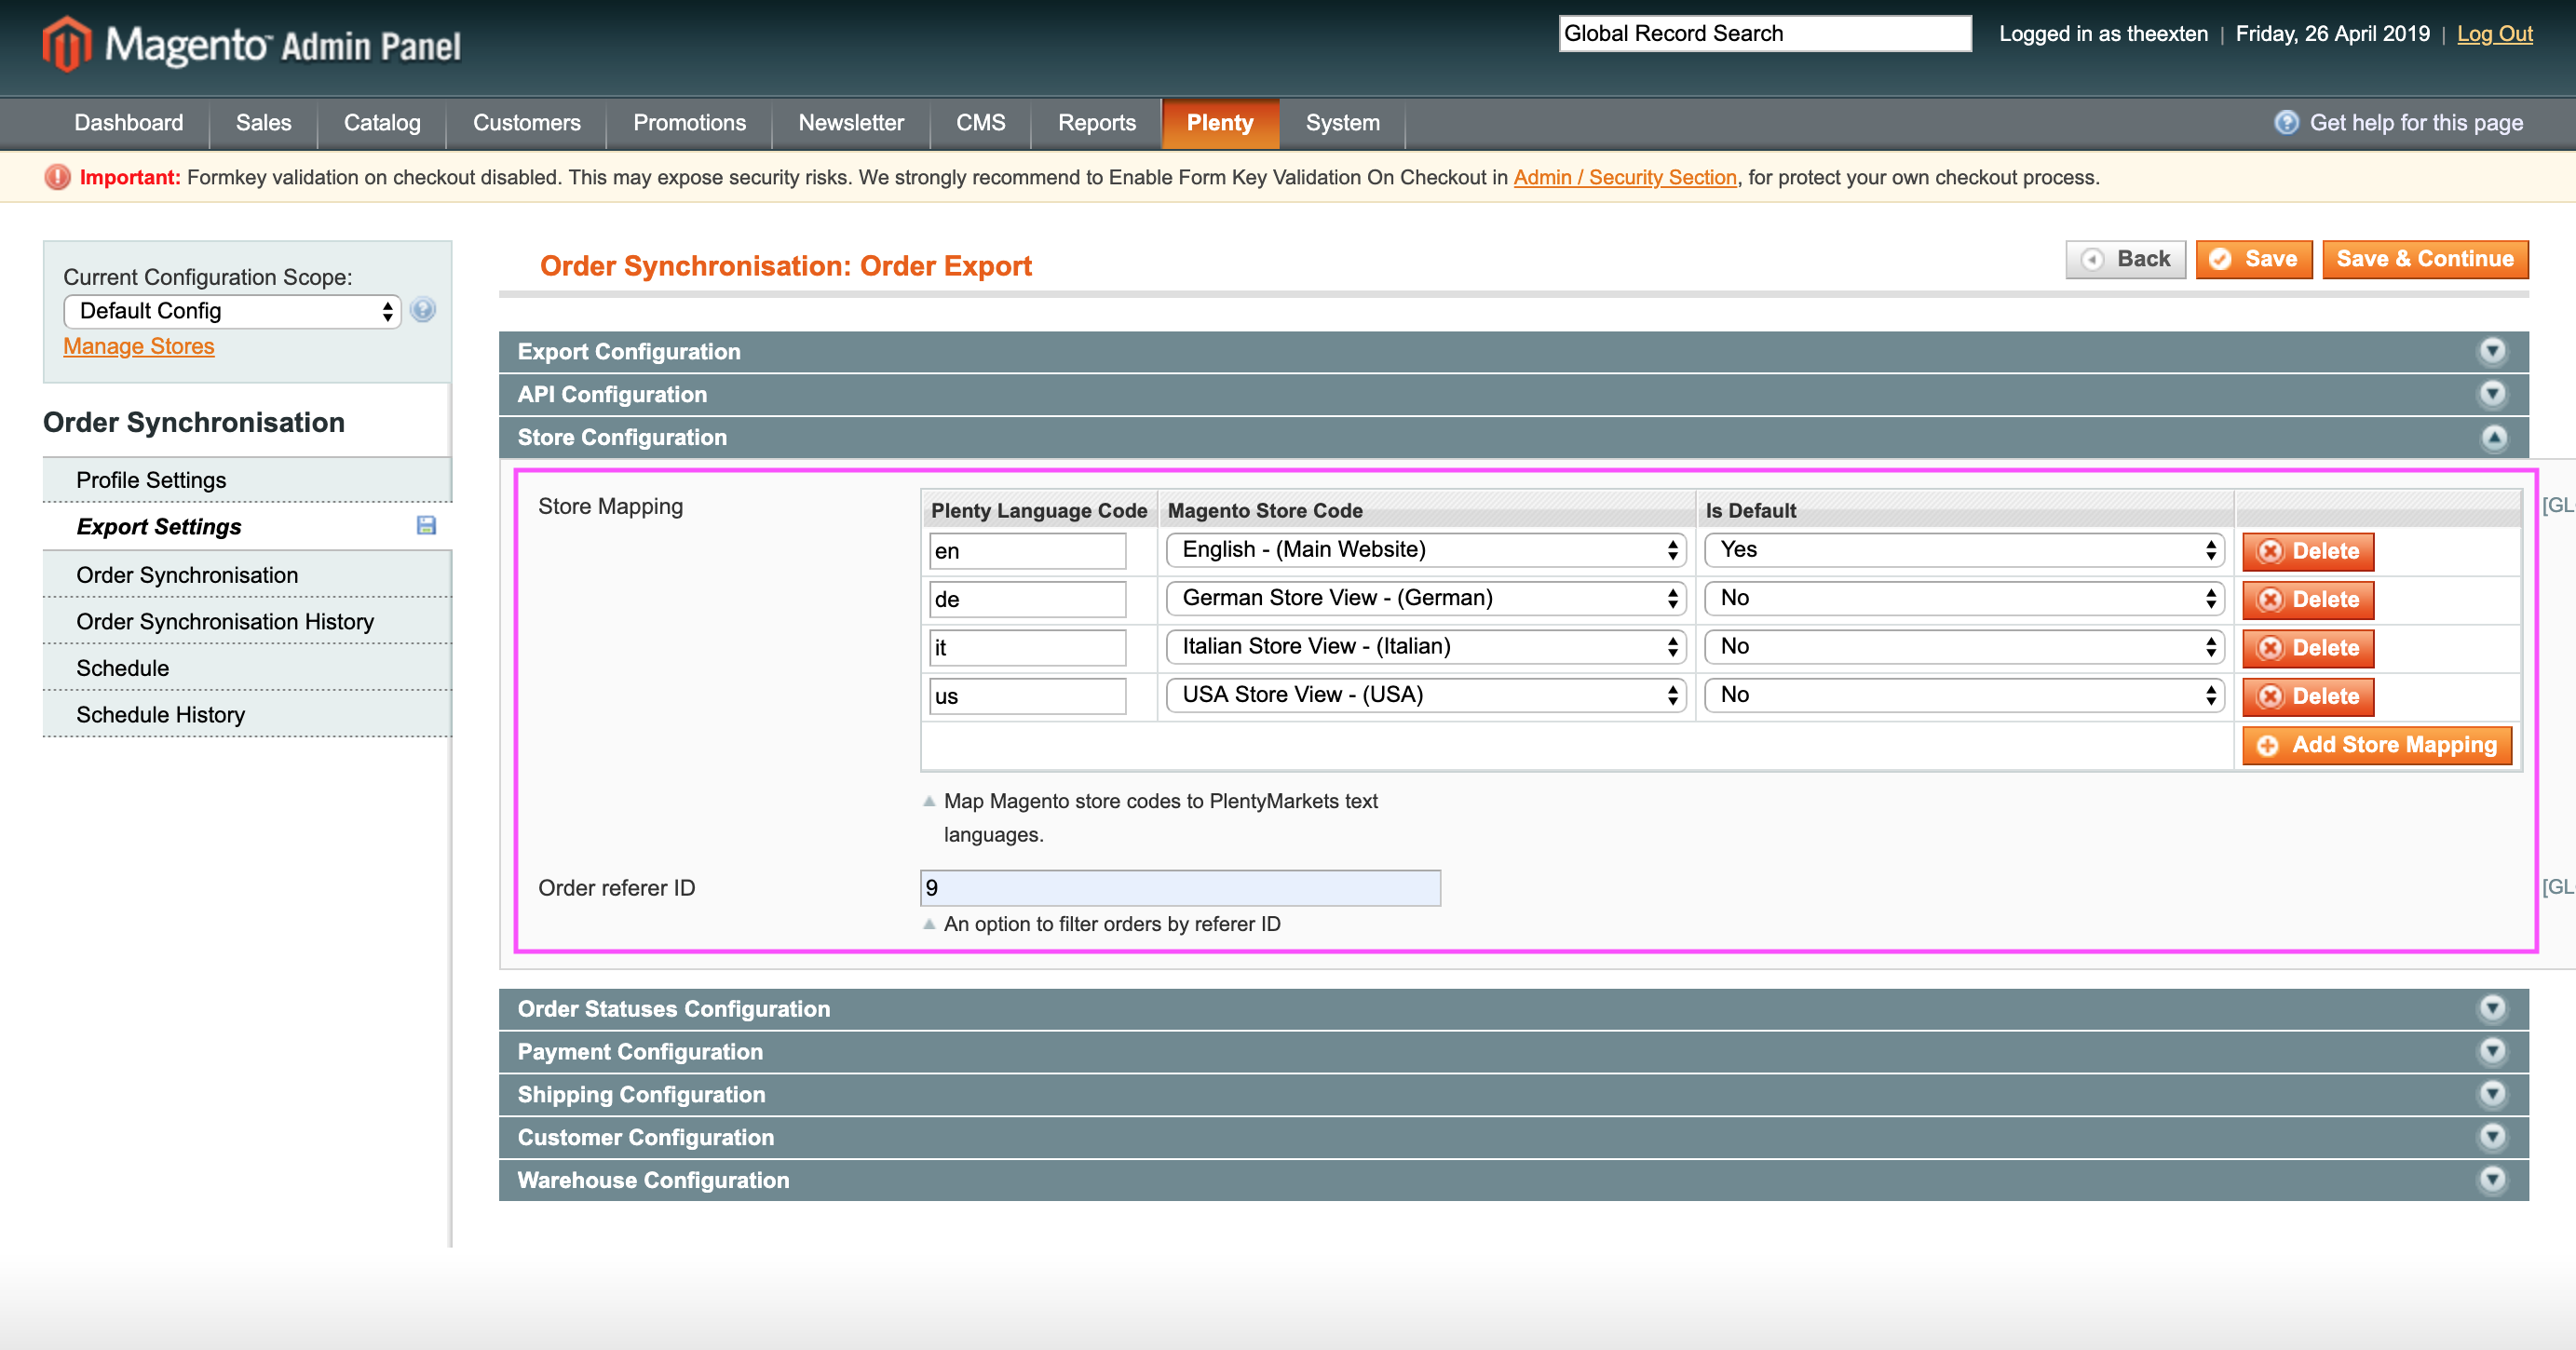
Here we need to map PlentyMarkets language to Magento store and optionally configure PlentyMarkets referrer id.
- Store Mapping: used to map language code to magento store.
- Order referer ID: an option to specify referrer ID for order items.
Order Statuses Configuration
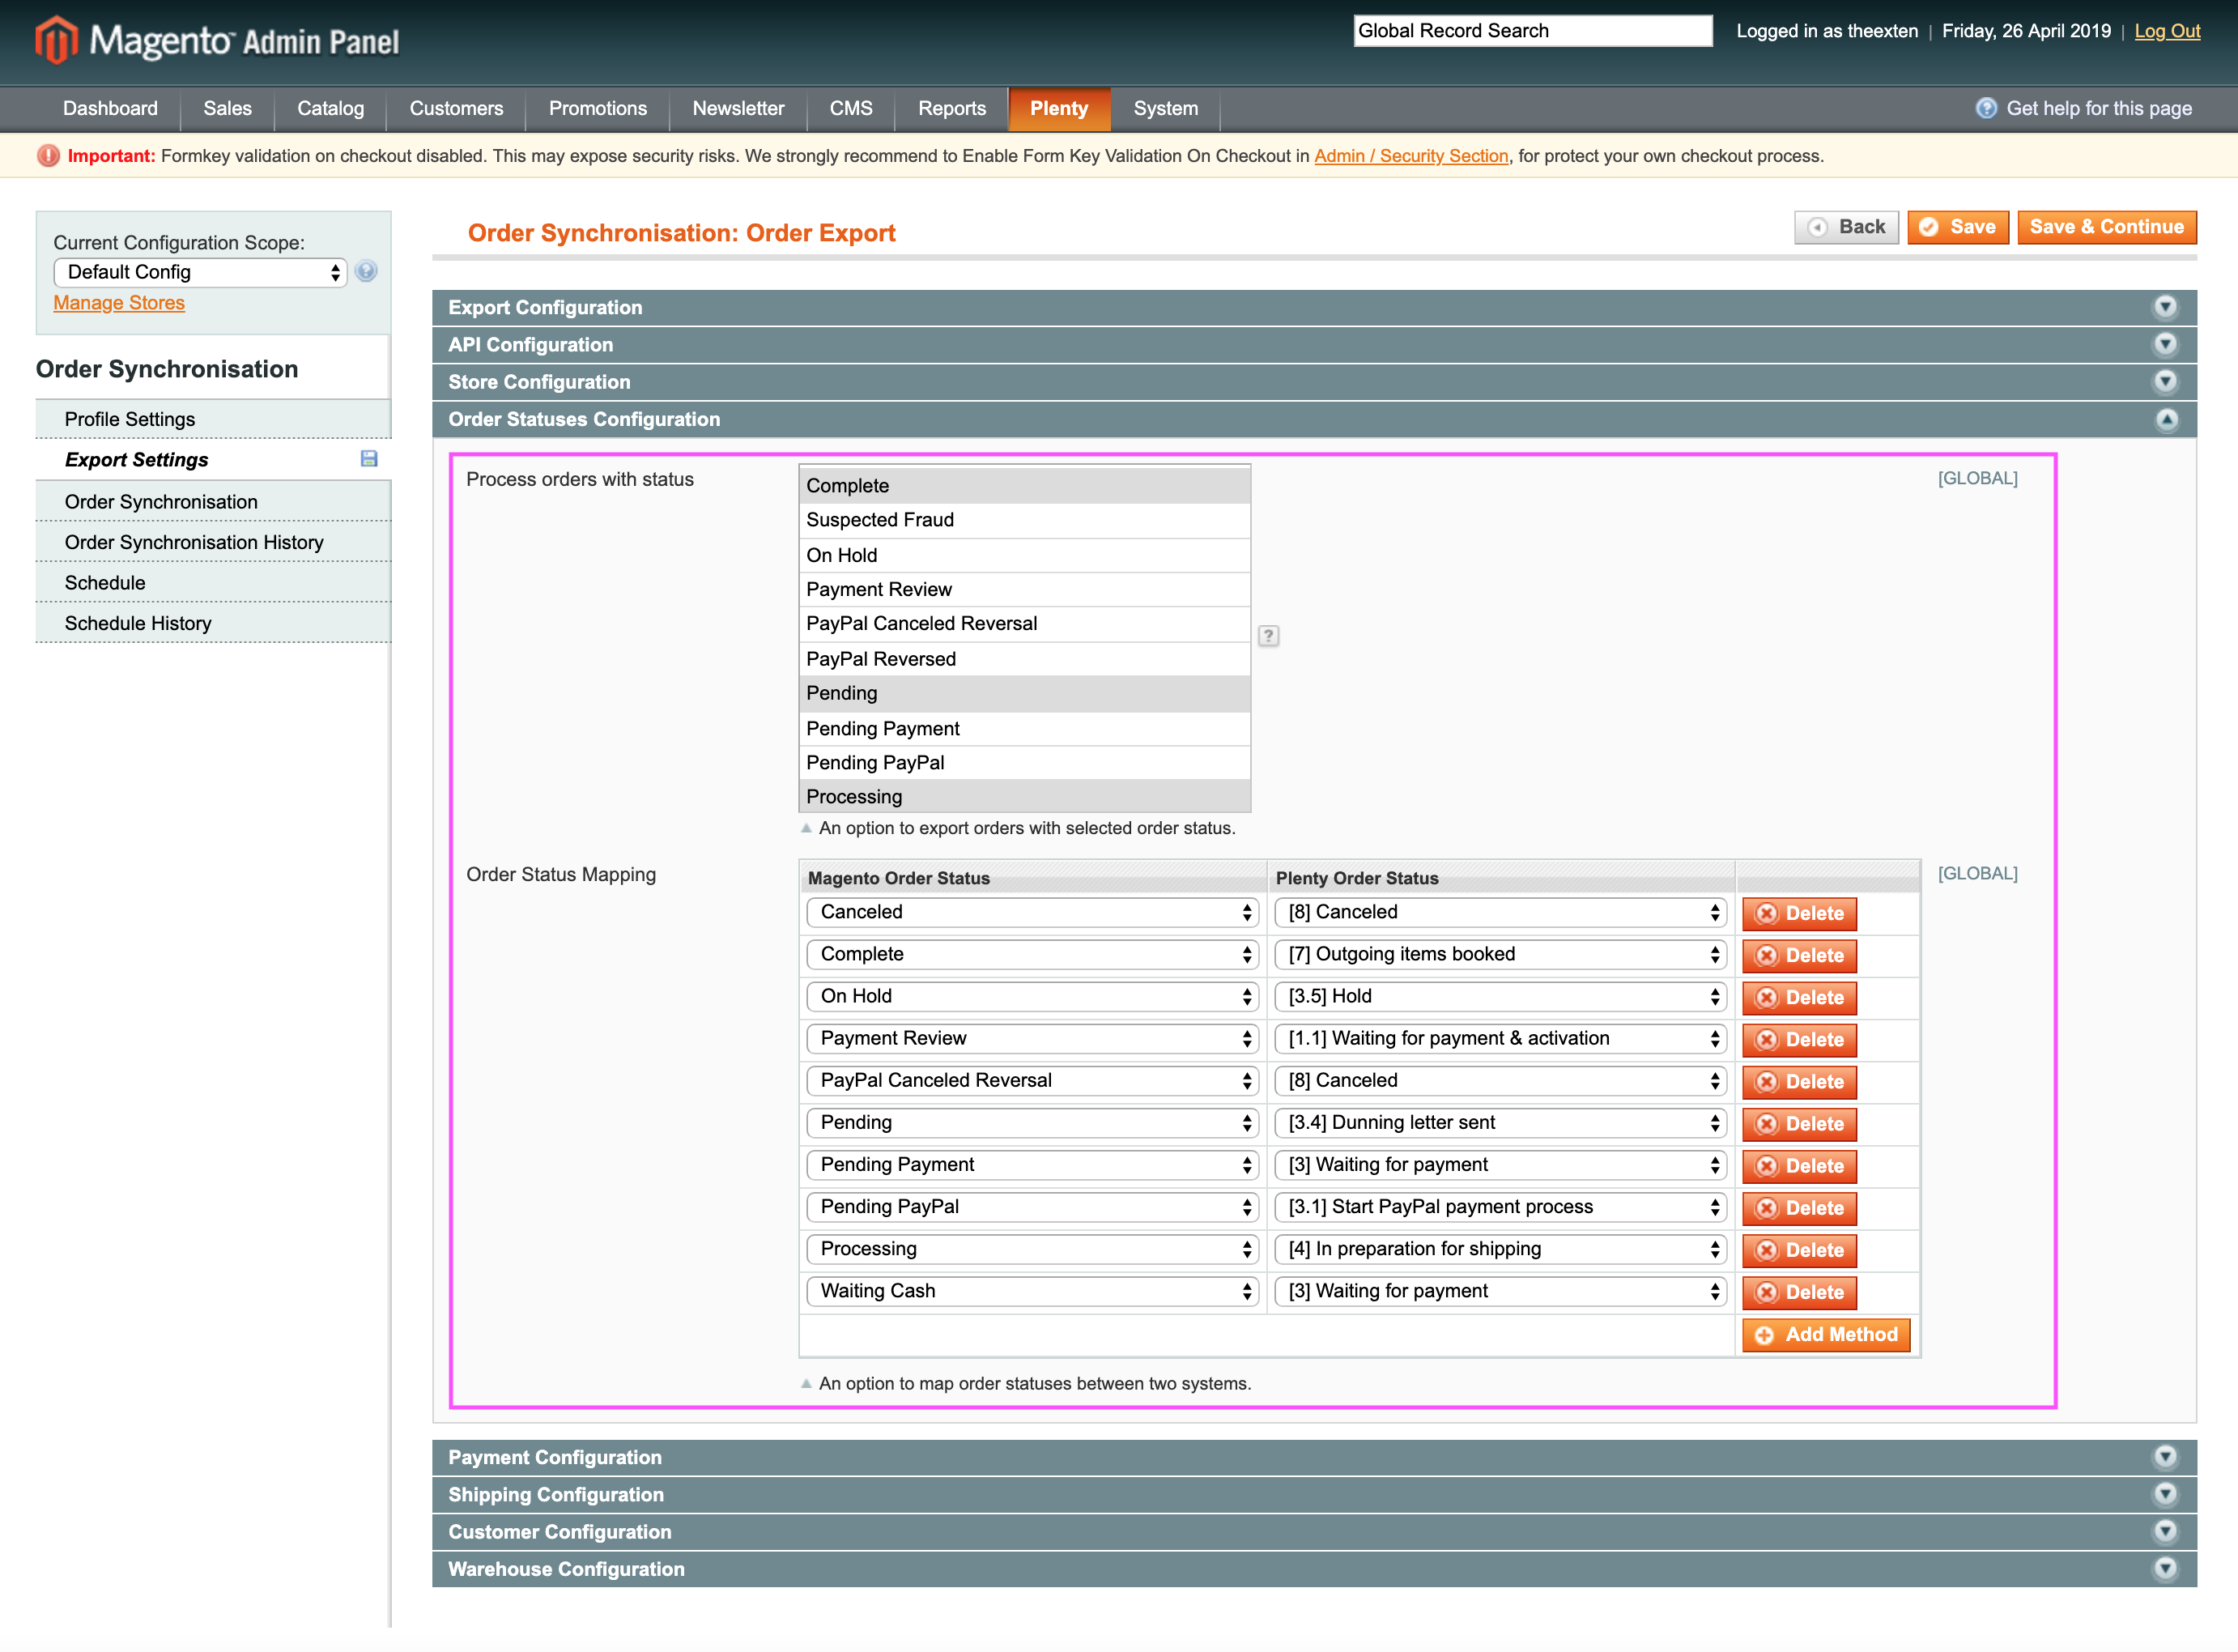
In this section are able to map magento order statuses to the ones in PlentyMarkets and configure allowed order statuses for export.
- Process orders with status: an option to limit export orders to those with statuses selected in the configuration. For example, selecting statuses “Processing” and “Complete” will ensure that export will execute oly those orders which match one of the selected status. This may come handy when you need to avoid exporting pending or incomplete orders to PlentyMarkets. Leave blank to disable this feature.
- Order Status Mapping: this is required entry and magento statuses need to be mapped to ones in PlentyMarkets. Our application automatically collects all PlentyMarkets statuses during profile setup, you’ll only have to select those in a way as outline in the example image bellow. Please map most appropriate statuses. This is required for data synchronisation process and to ensure the data is consistent between the two systems.
Payment Configuration
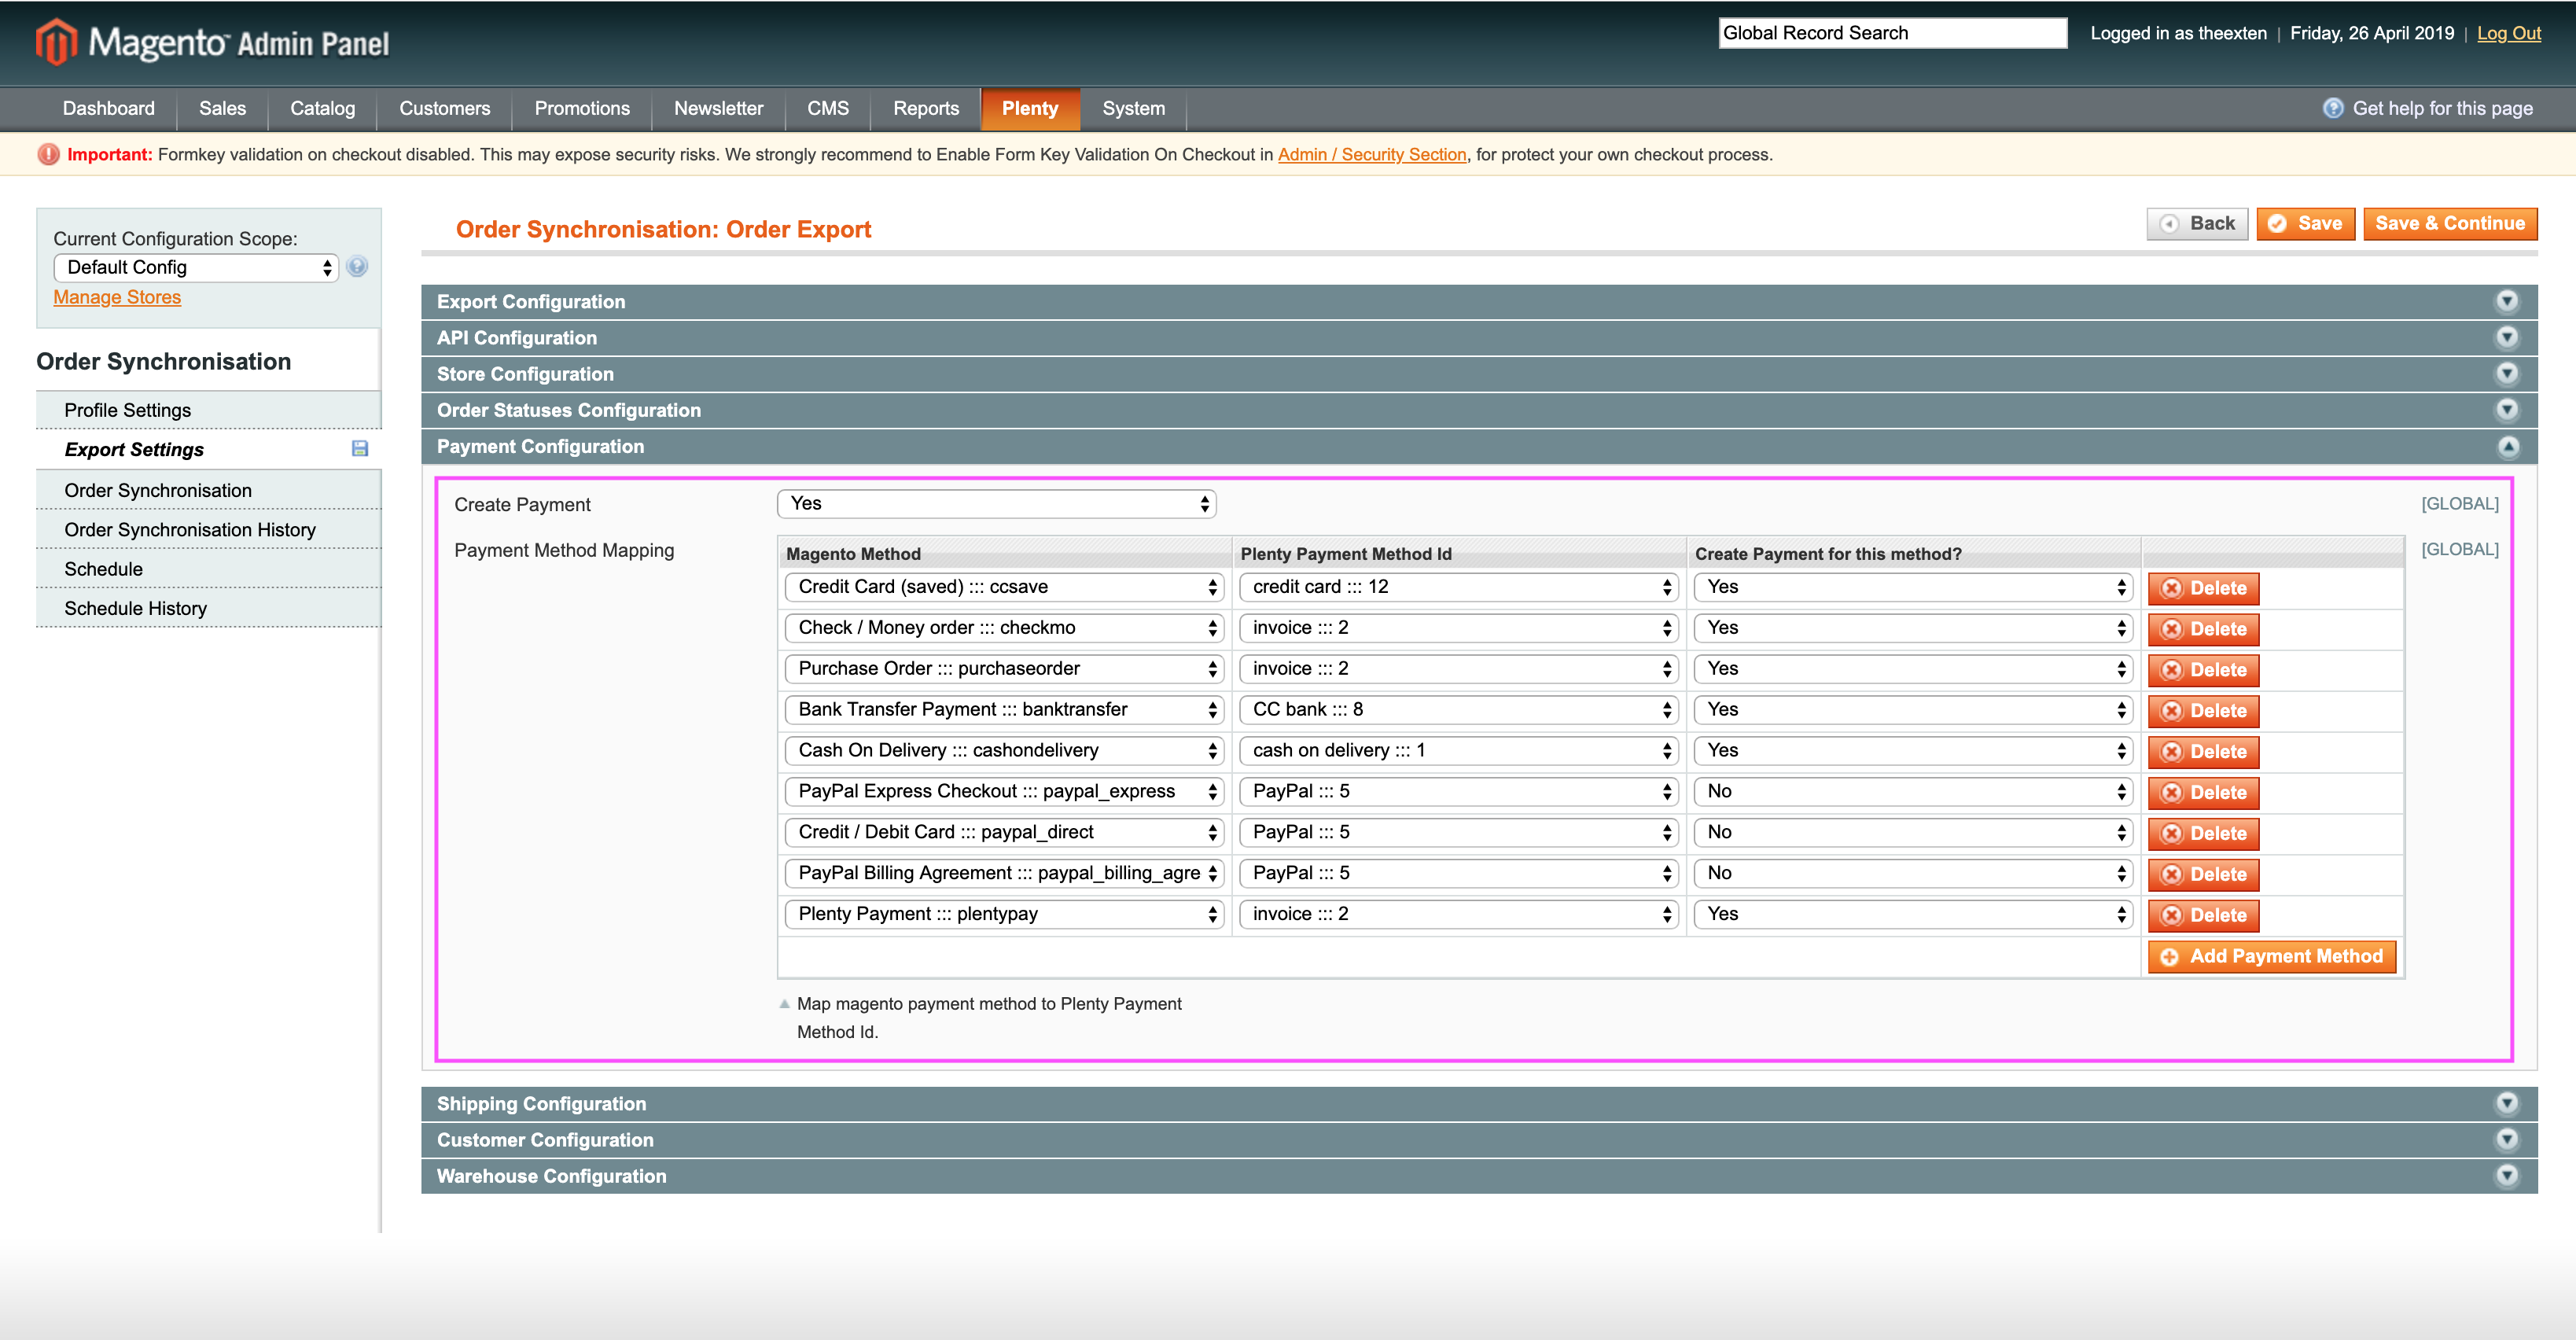
- Create Payment: an option to enable or disable payment creation.
- Payment Method Mapping: ability to map magento payment methods to ones in PlentyMarkets. This is required entry and is used during order export. You are able to enable or disable payment creation next to each payment method mapping row in the last column (Create Payment for this method?).
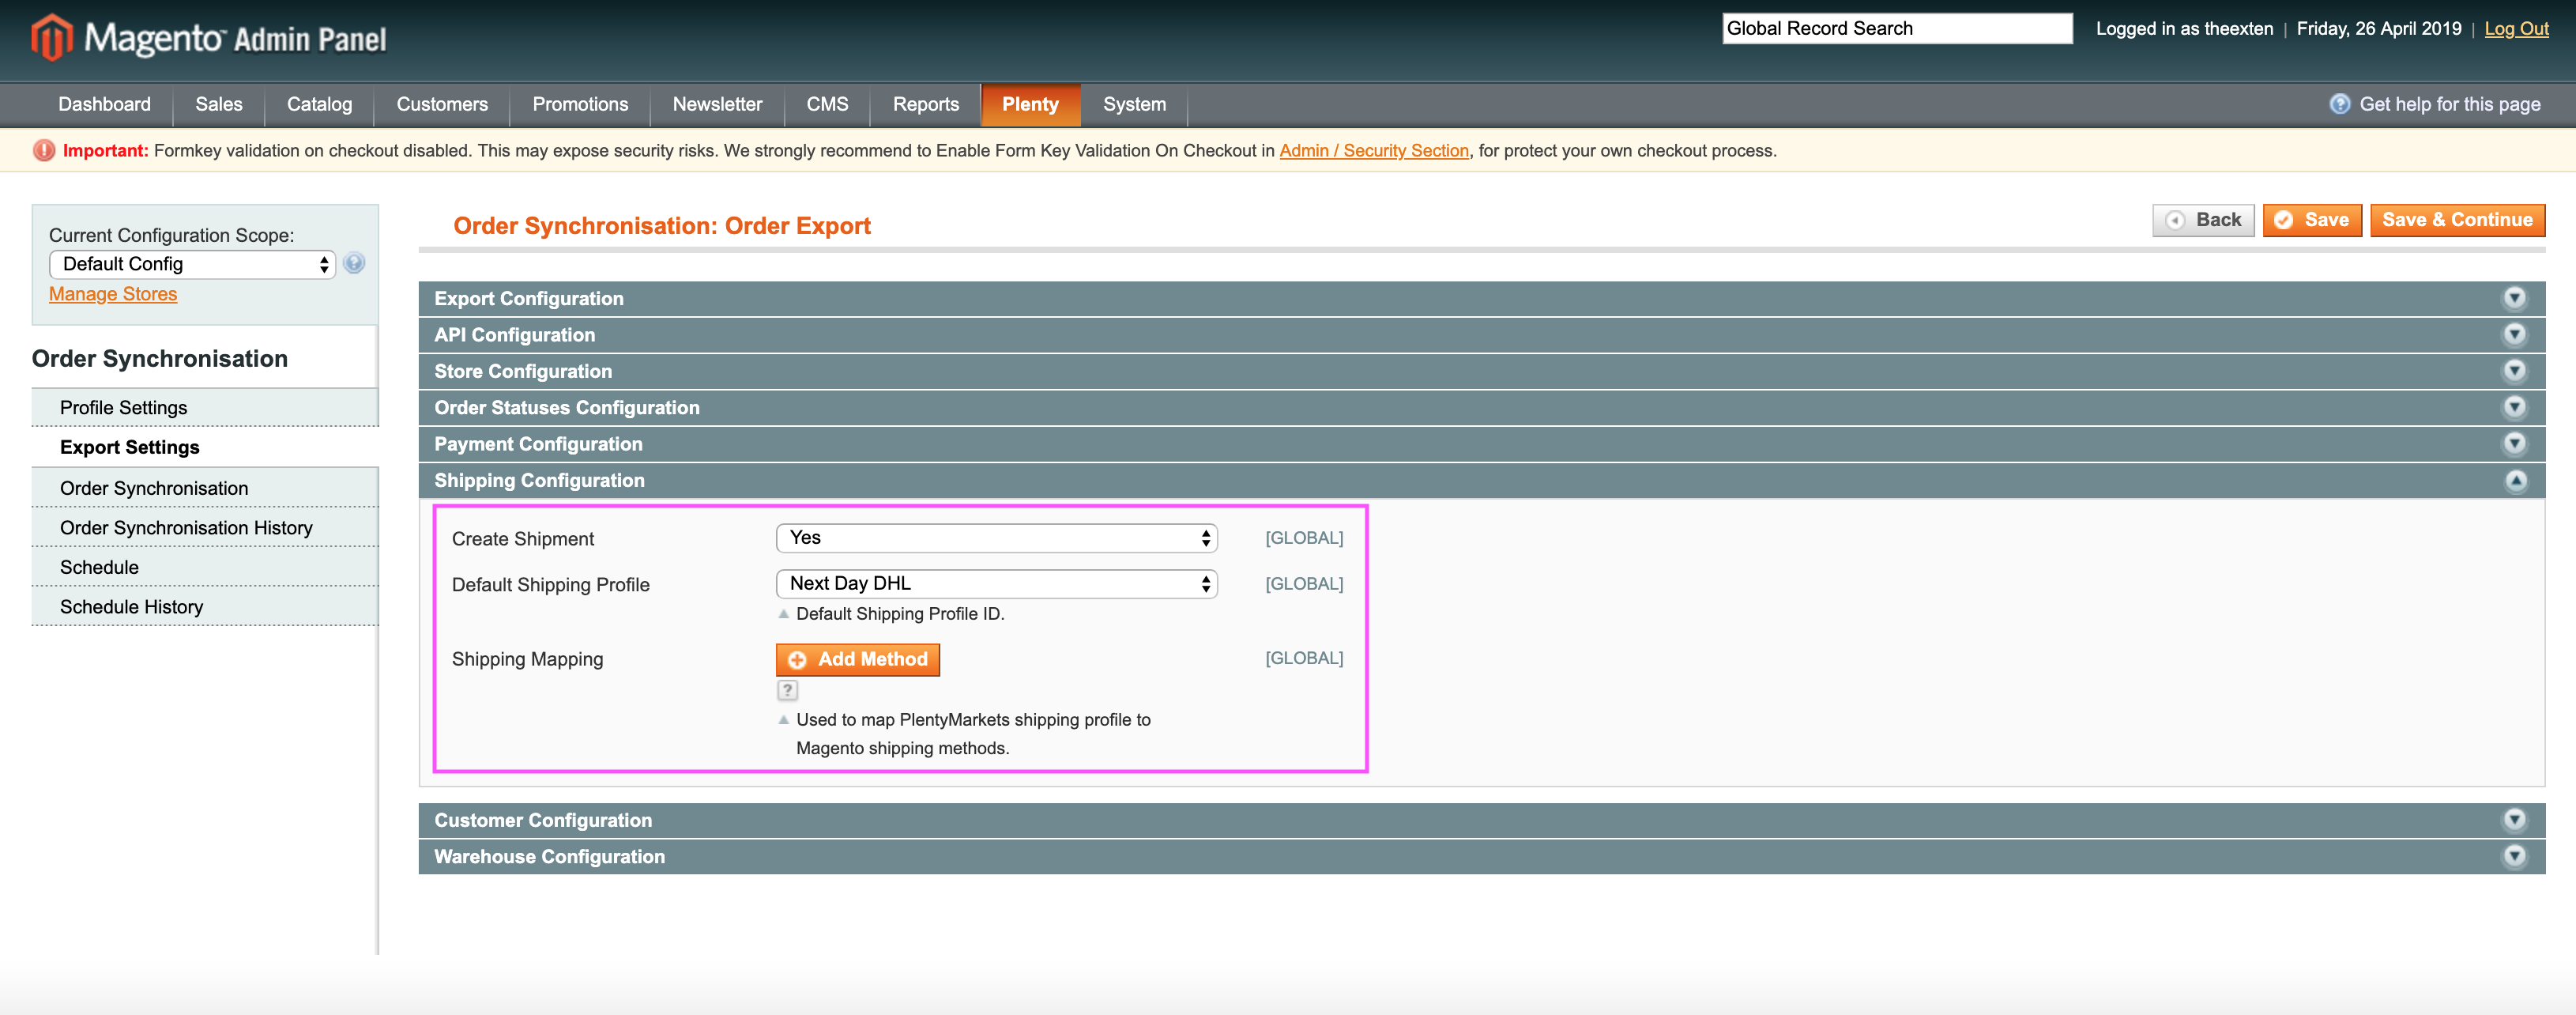
Shipping Configuration
- Create Shipment: an option to enable or disable shipment creation.
- Default Shipping Profile: this is required selection. Shipping profiles are collected during profile setup, you’ll have to choose one of the shipping profiles from the dropdown selection.
Customer Configuration
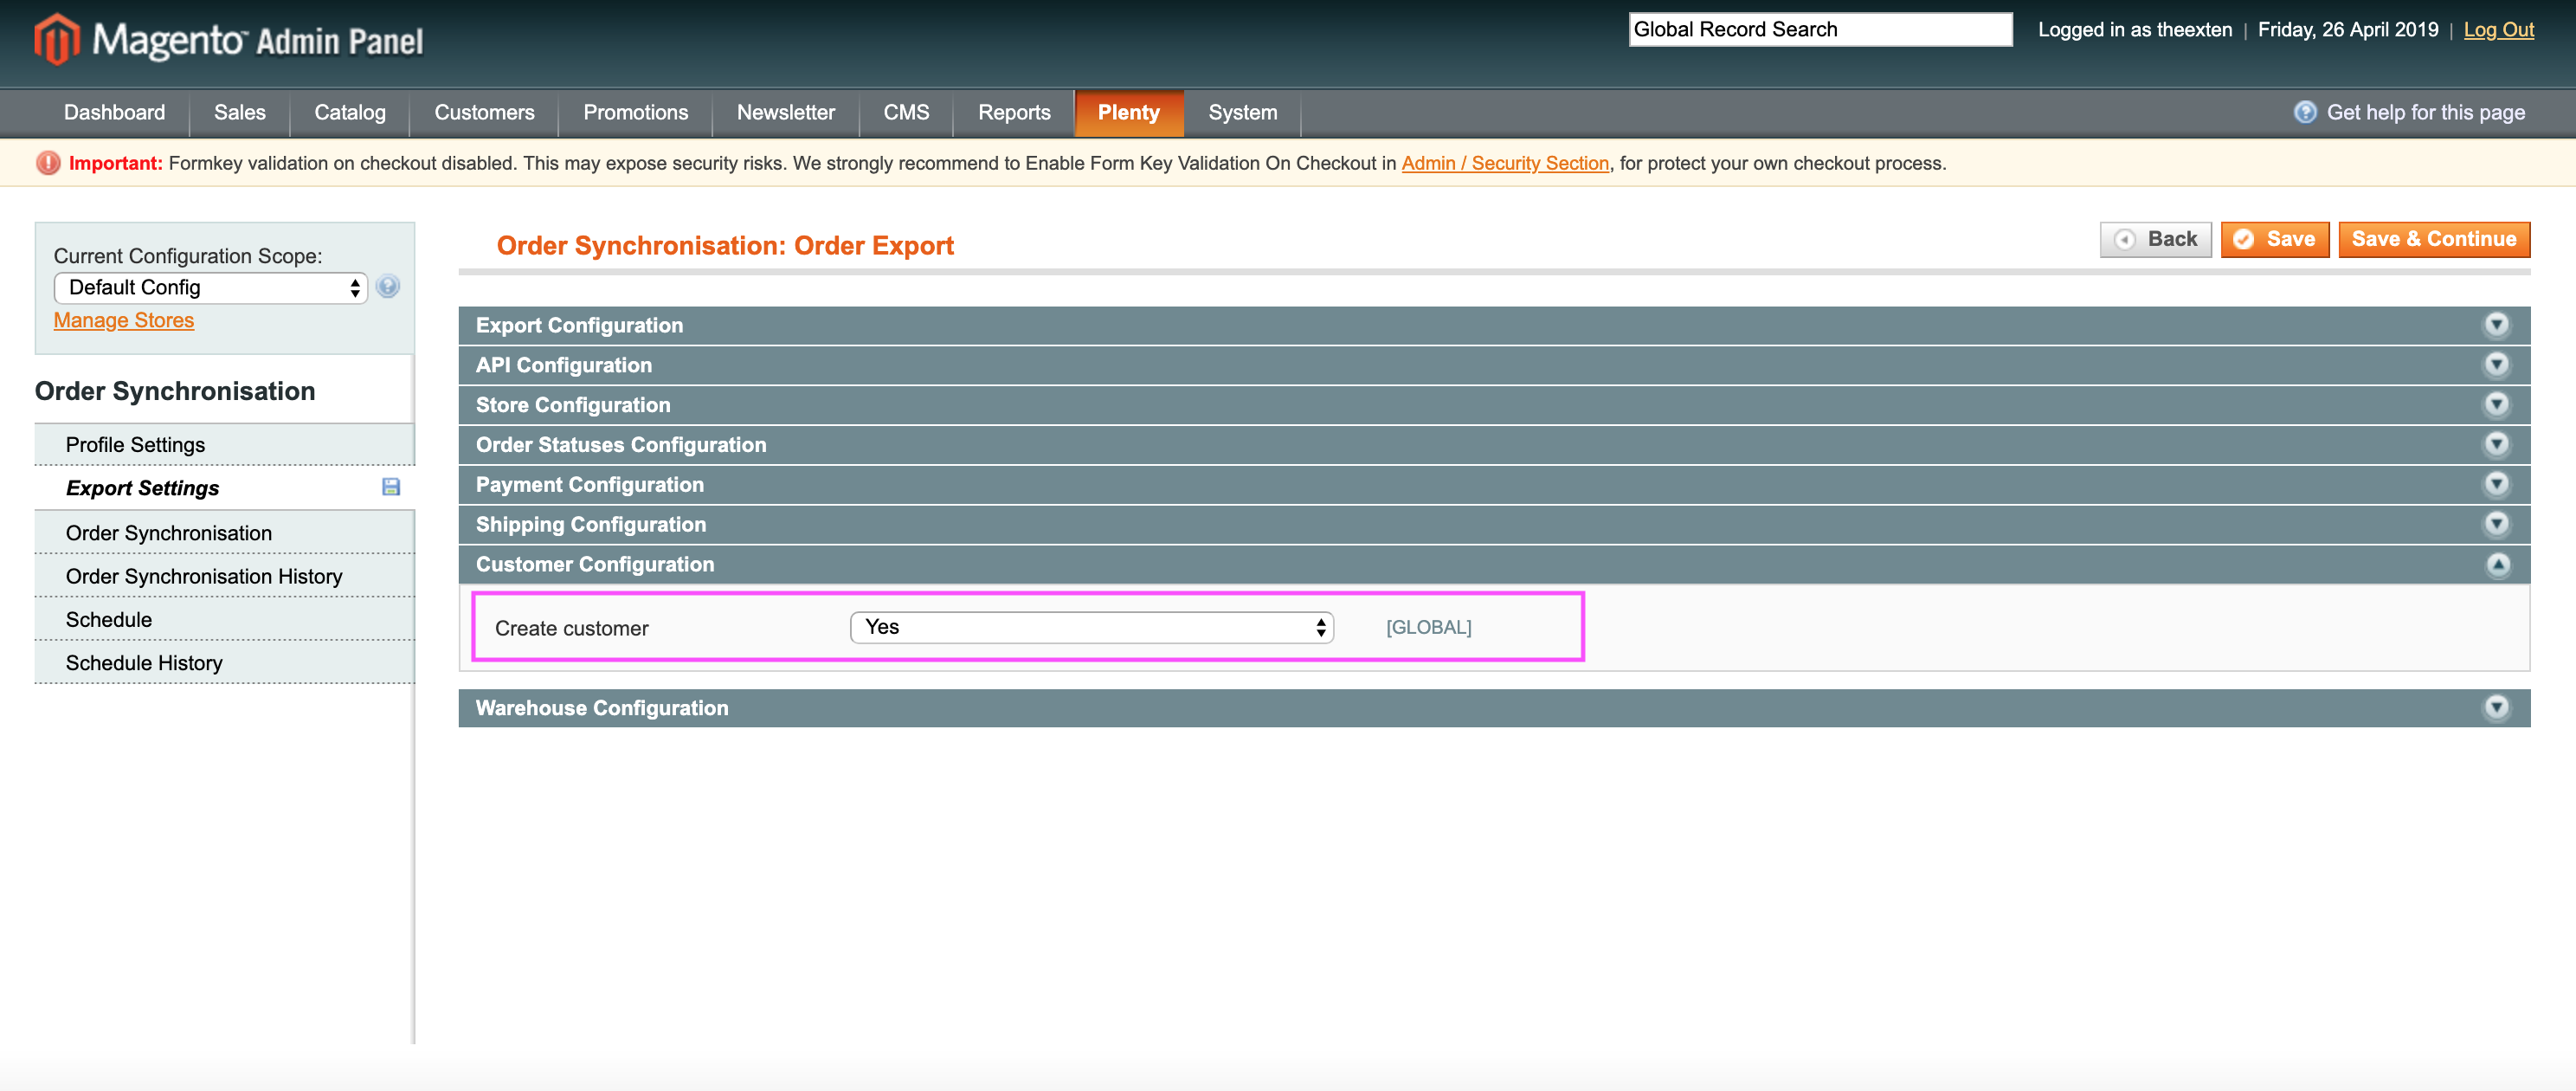
In this section you can enable or disable customer creation. If you choose to disable customer creation, our application will create an order with guest customer details.
Warehouse Configuration
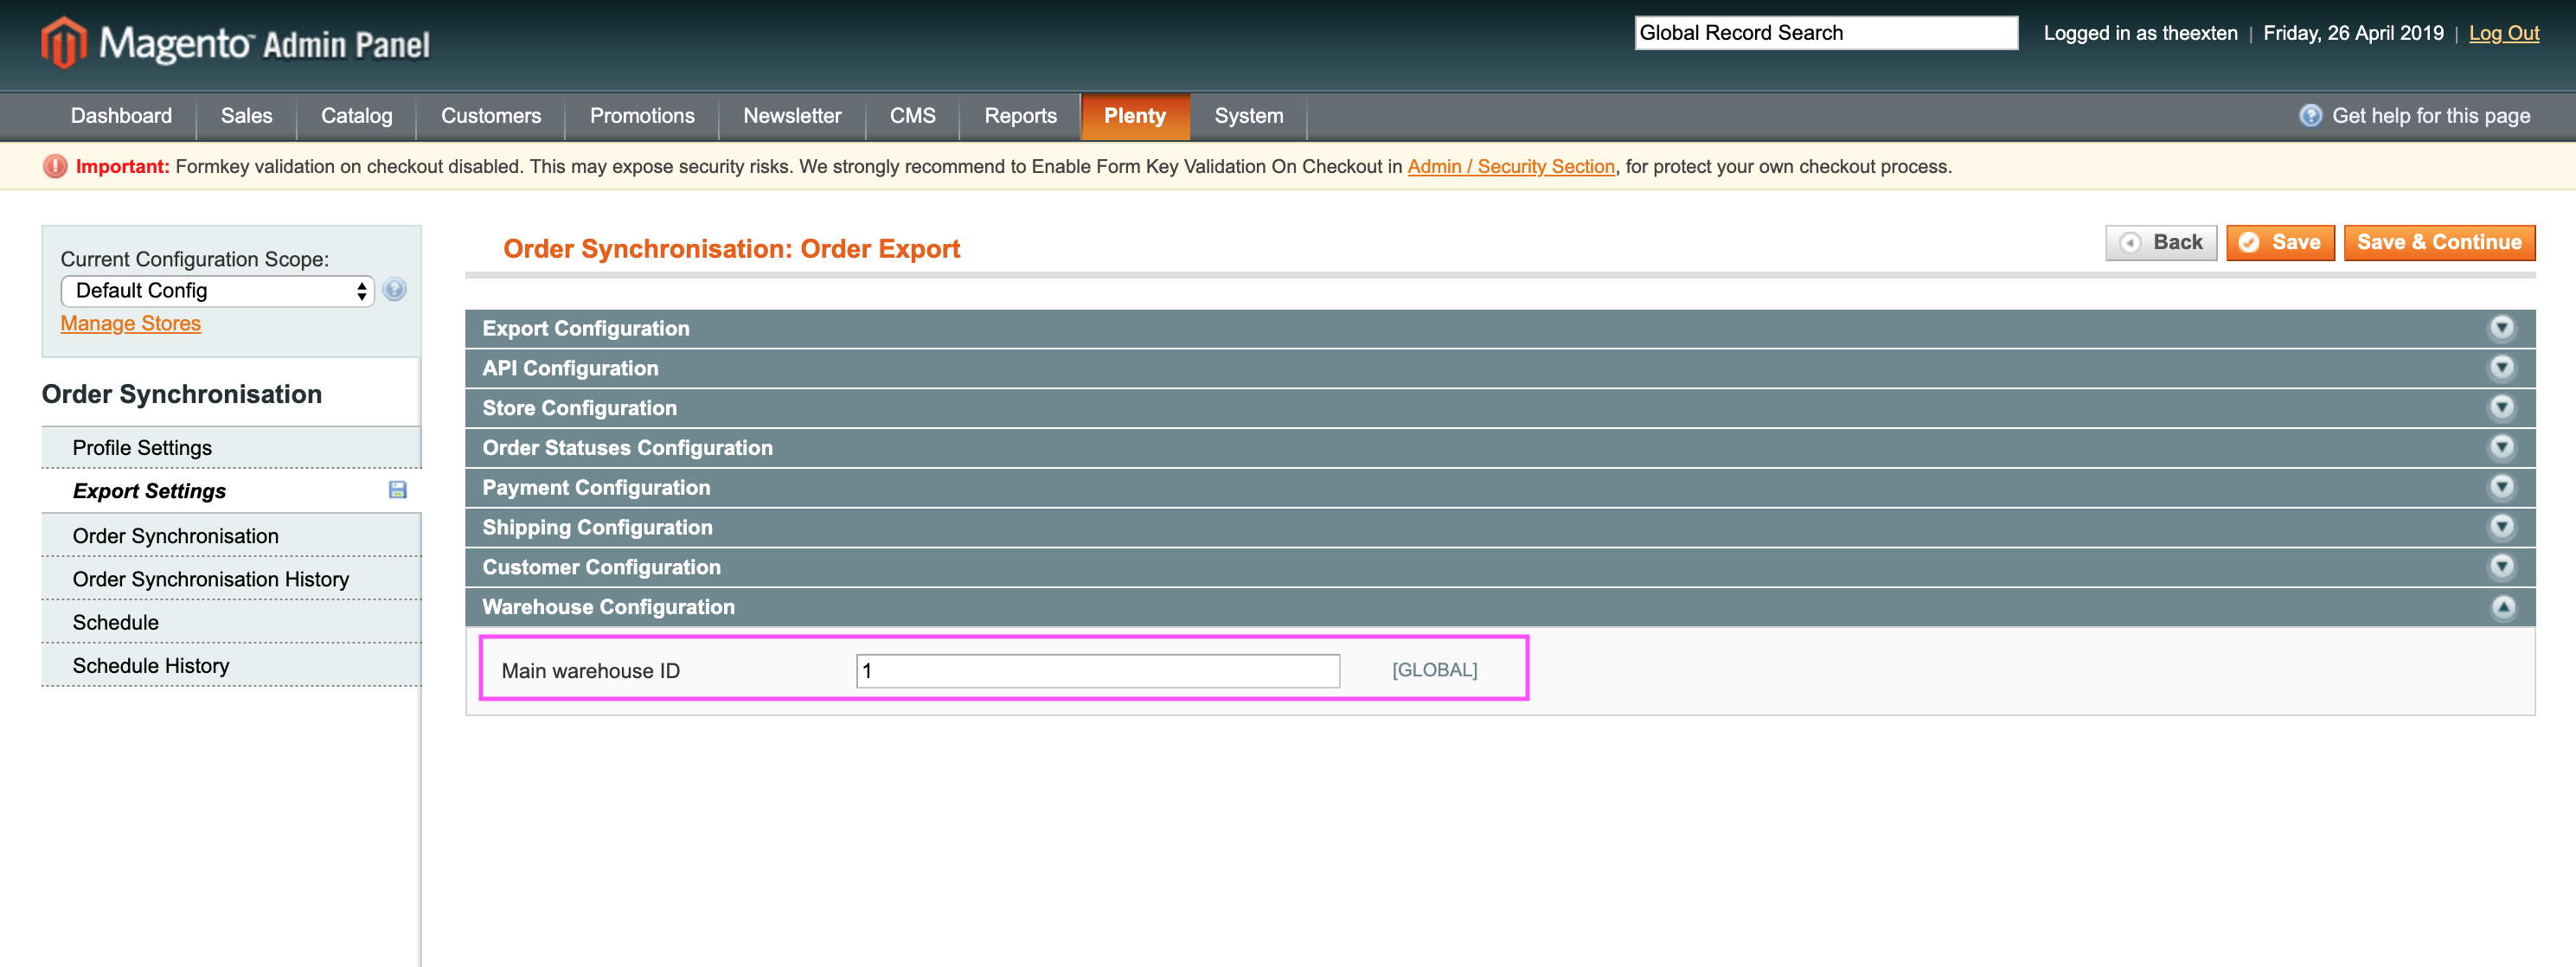
In this section you need to provide main warehouse ID. This is used in order creation process.
Order Synchronisation Tab
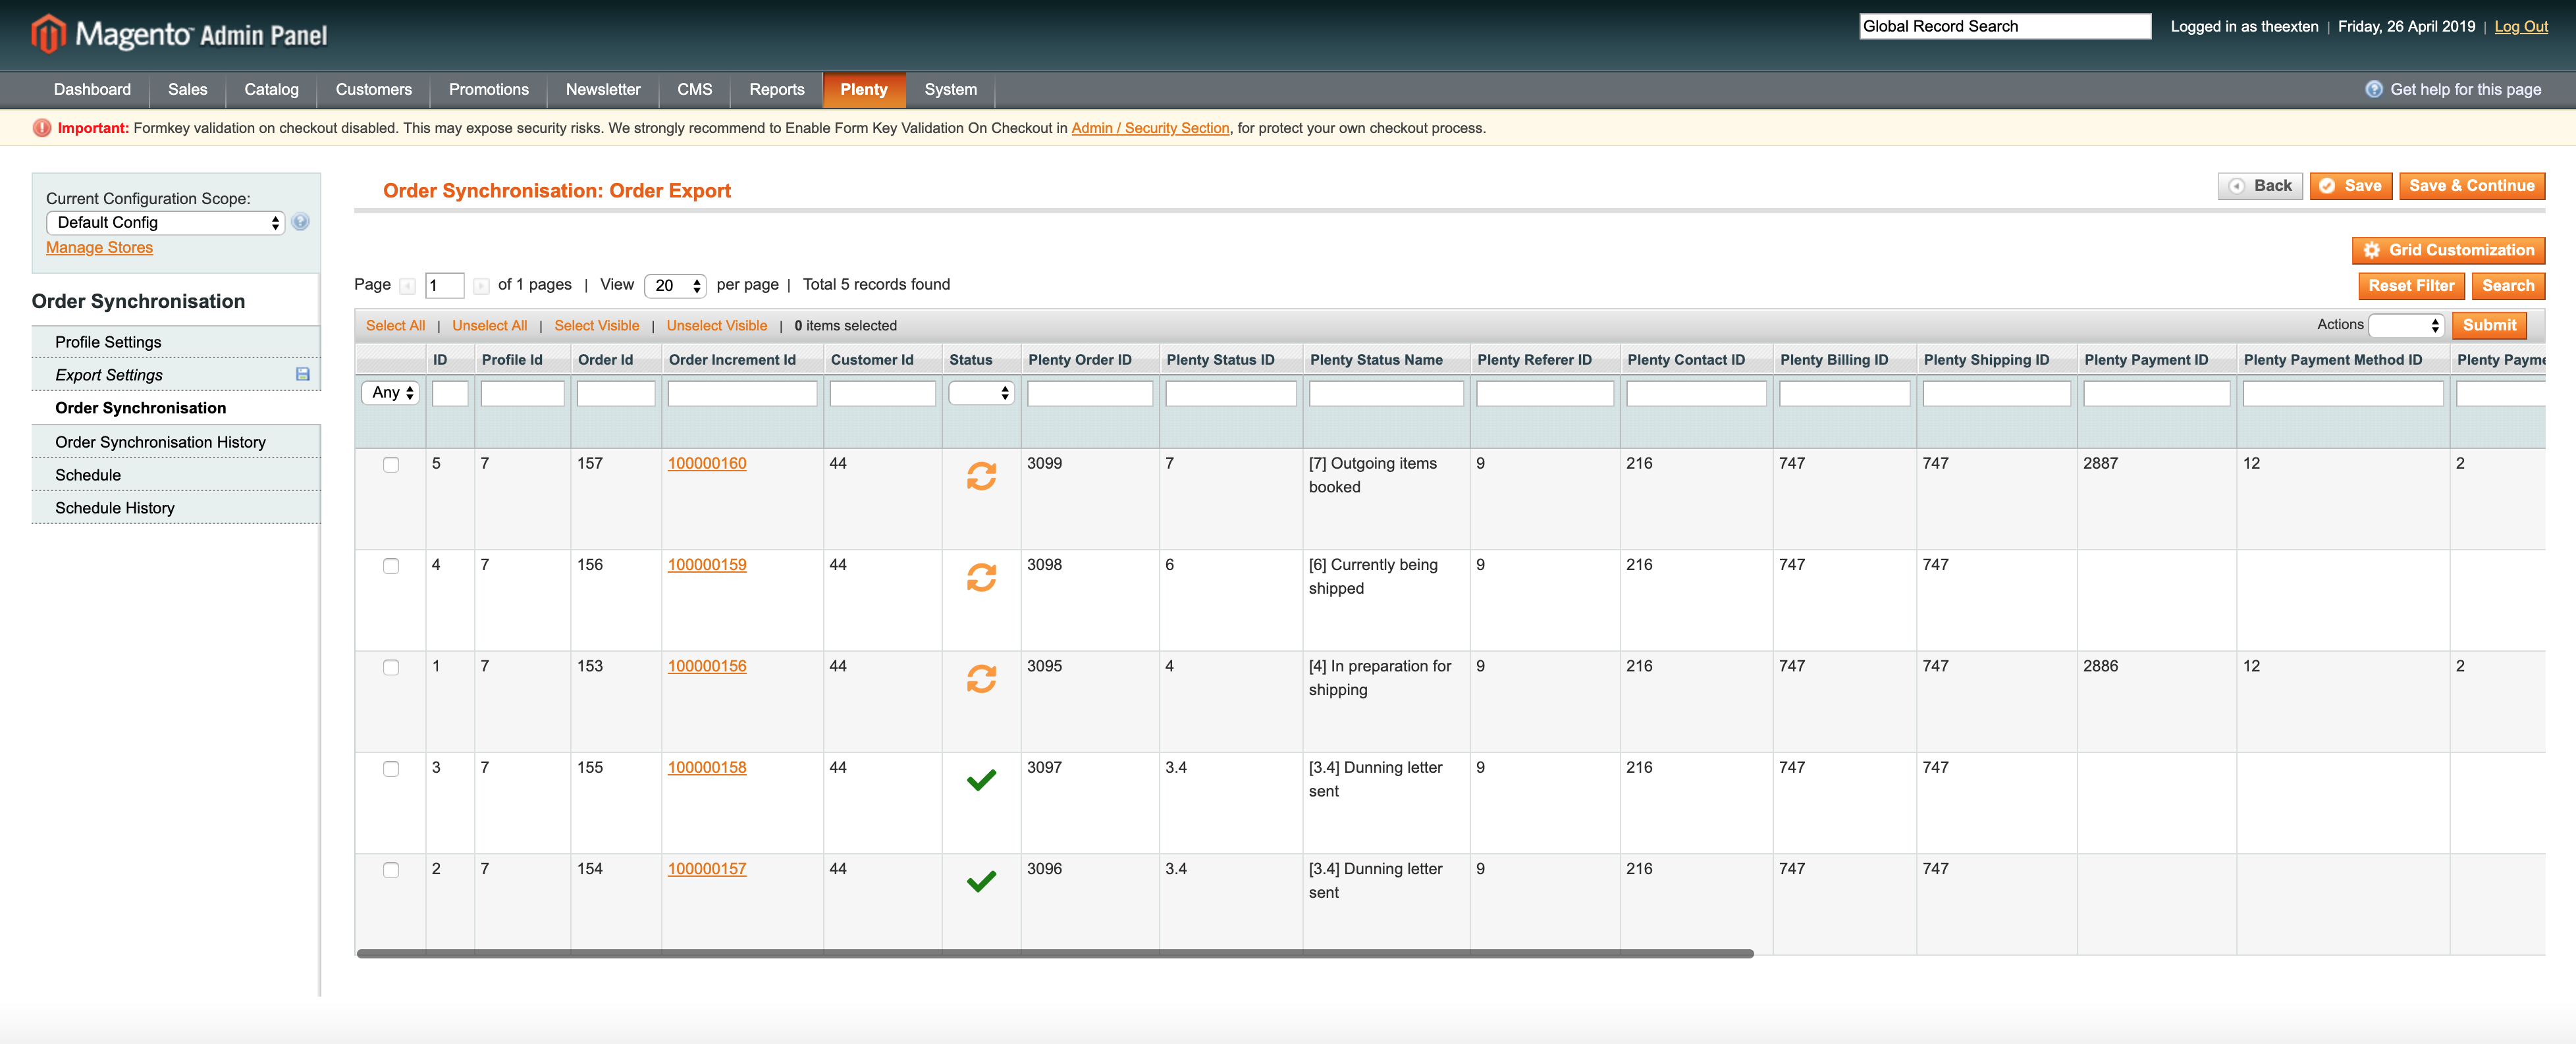
Order synchronisation tab holds a log of orders that were synchronised between the two systems. This tab is also available in Order Import profile. Here you can trace and track orders and see its statuses and other usefull information, such as the following:
- Order ID: the ID of an order assigned in Magento;
- Customer ID: the ID of a customer assigned in Magento;
- Status: the status of synchronisation. Available statuses are “complete”, “updated”, “pending”, “processing”, “skipped” and “failed”;
- Plenty Order ID: an ID assigned to order in PlentyMarkets;
- Plenty Status ID: the ID of the status assigned to an order in PlentyMarkets;
- Plenty Status Name: the name of the status assigned to an order in PlentyMarkets;
- Plenty Referrer ID: the referrer ID assigned to an order items in PlentyMarkets;
- Plenty Contact ID: the ID of a customer assigned in PlentyMarkets;
- Plenty Billing ID: the ID of a billing address assigned in PlentyMarkets;
- Plenty Shipping ID: the ID of a shipping address assigned in PlentyMarkets;
- Plenty Payment ID: the ID of a payment assigned to an order in PlentyMarkets;
- Plenty Payment Method ID: the ID of payment method assigned in PlentyMarkets;
- Plenty Payment Status ID: the ID of payment status assigned in PlentyMarkets;
- Plenty Payment Order Ass. ID: the ID of payment-order relation assignment in PlentyMarkets;
- Plenty Payment Contact Ass. ID: the ID of payment-contact relation assignment in PlentyMarkets;
- Message: general messages of order export process;
- Created At: the date entry was created at;
- Updated At: the date entry was updated at;
- Processed At: the date entry was processed at;
Order Synchronisation History Tab
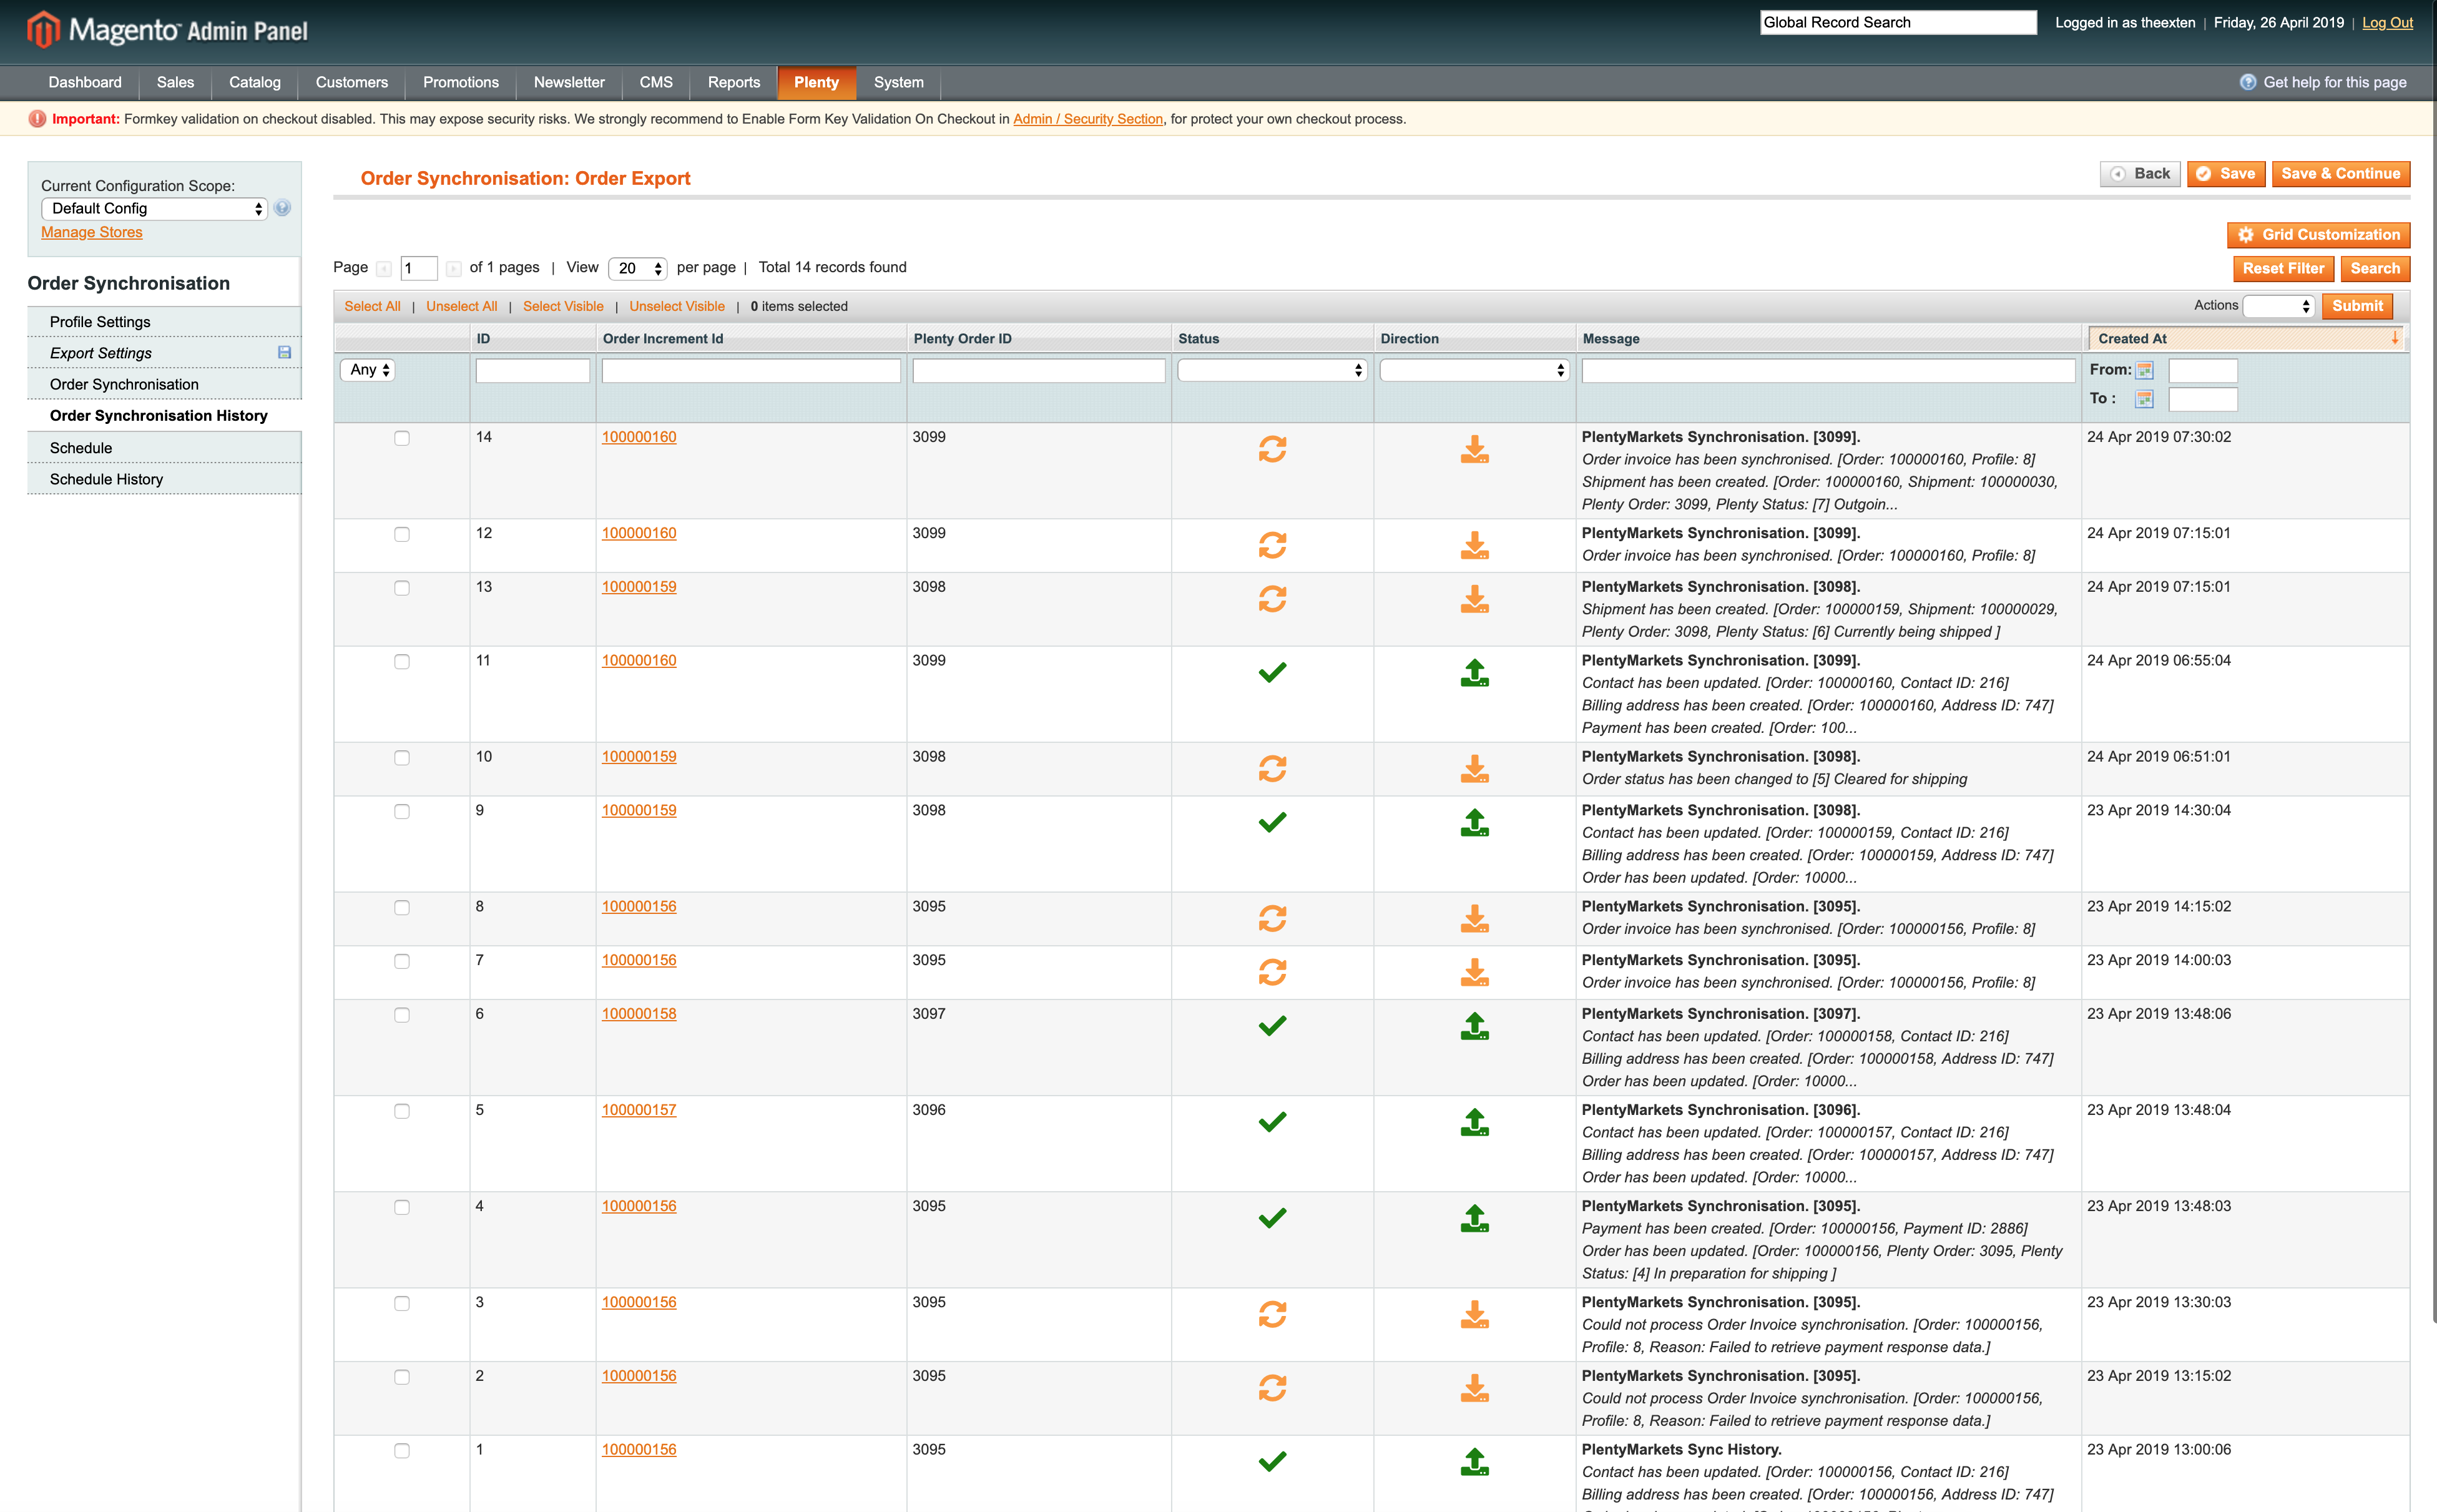
Order synchronisation history tab contains a log of all actions that were executed during order synchronisation. This tab is also available in Order Import profile.
- Order ID: the ID of an order assigned in Magento;
- Plenty Order ID: an ID assigned to order in PlentyMarkets;
- Status: the status of synchronisation. Available statuses are “complete”, “updated”, “pending”, “processing”, “skipped” and “failed”;
- Direction: direction of synchronisation. This is either import or export;
- Message: detailed information of order export process;
- Created At: the date entry was created at;
Schedule Tab
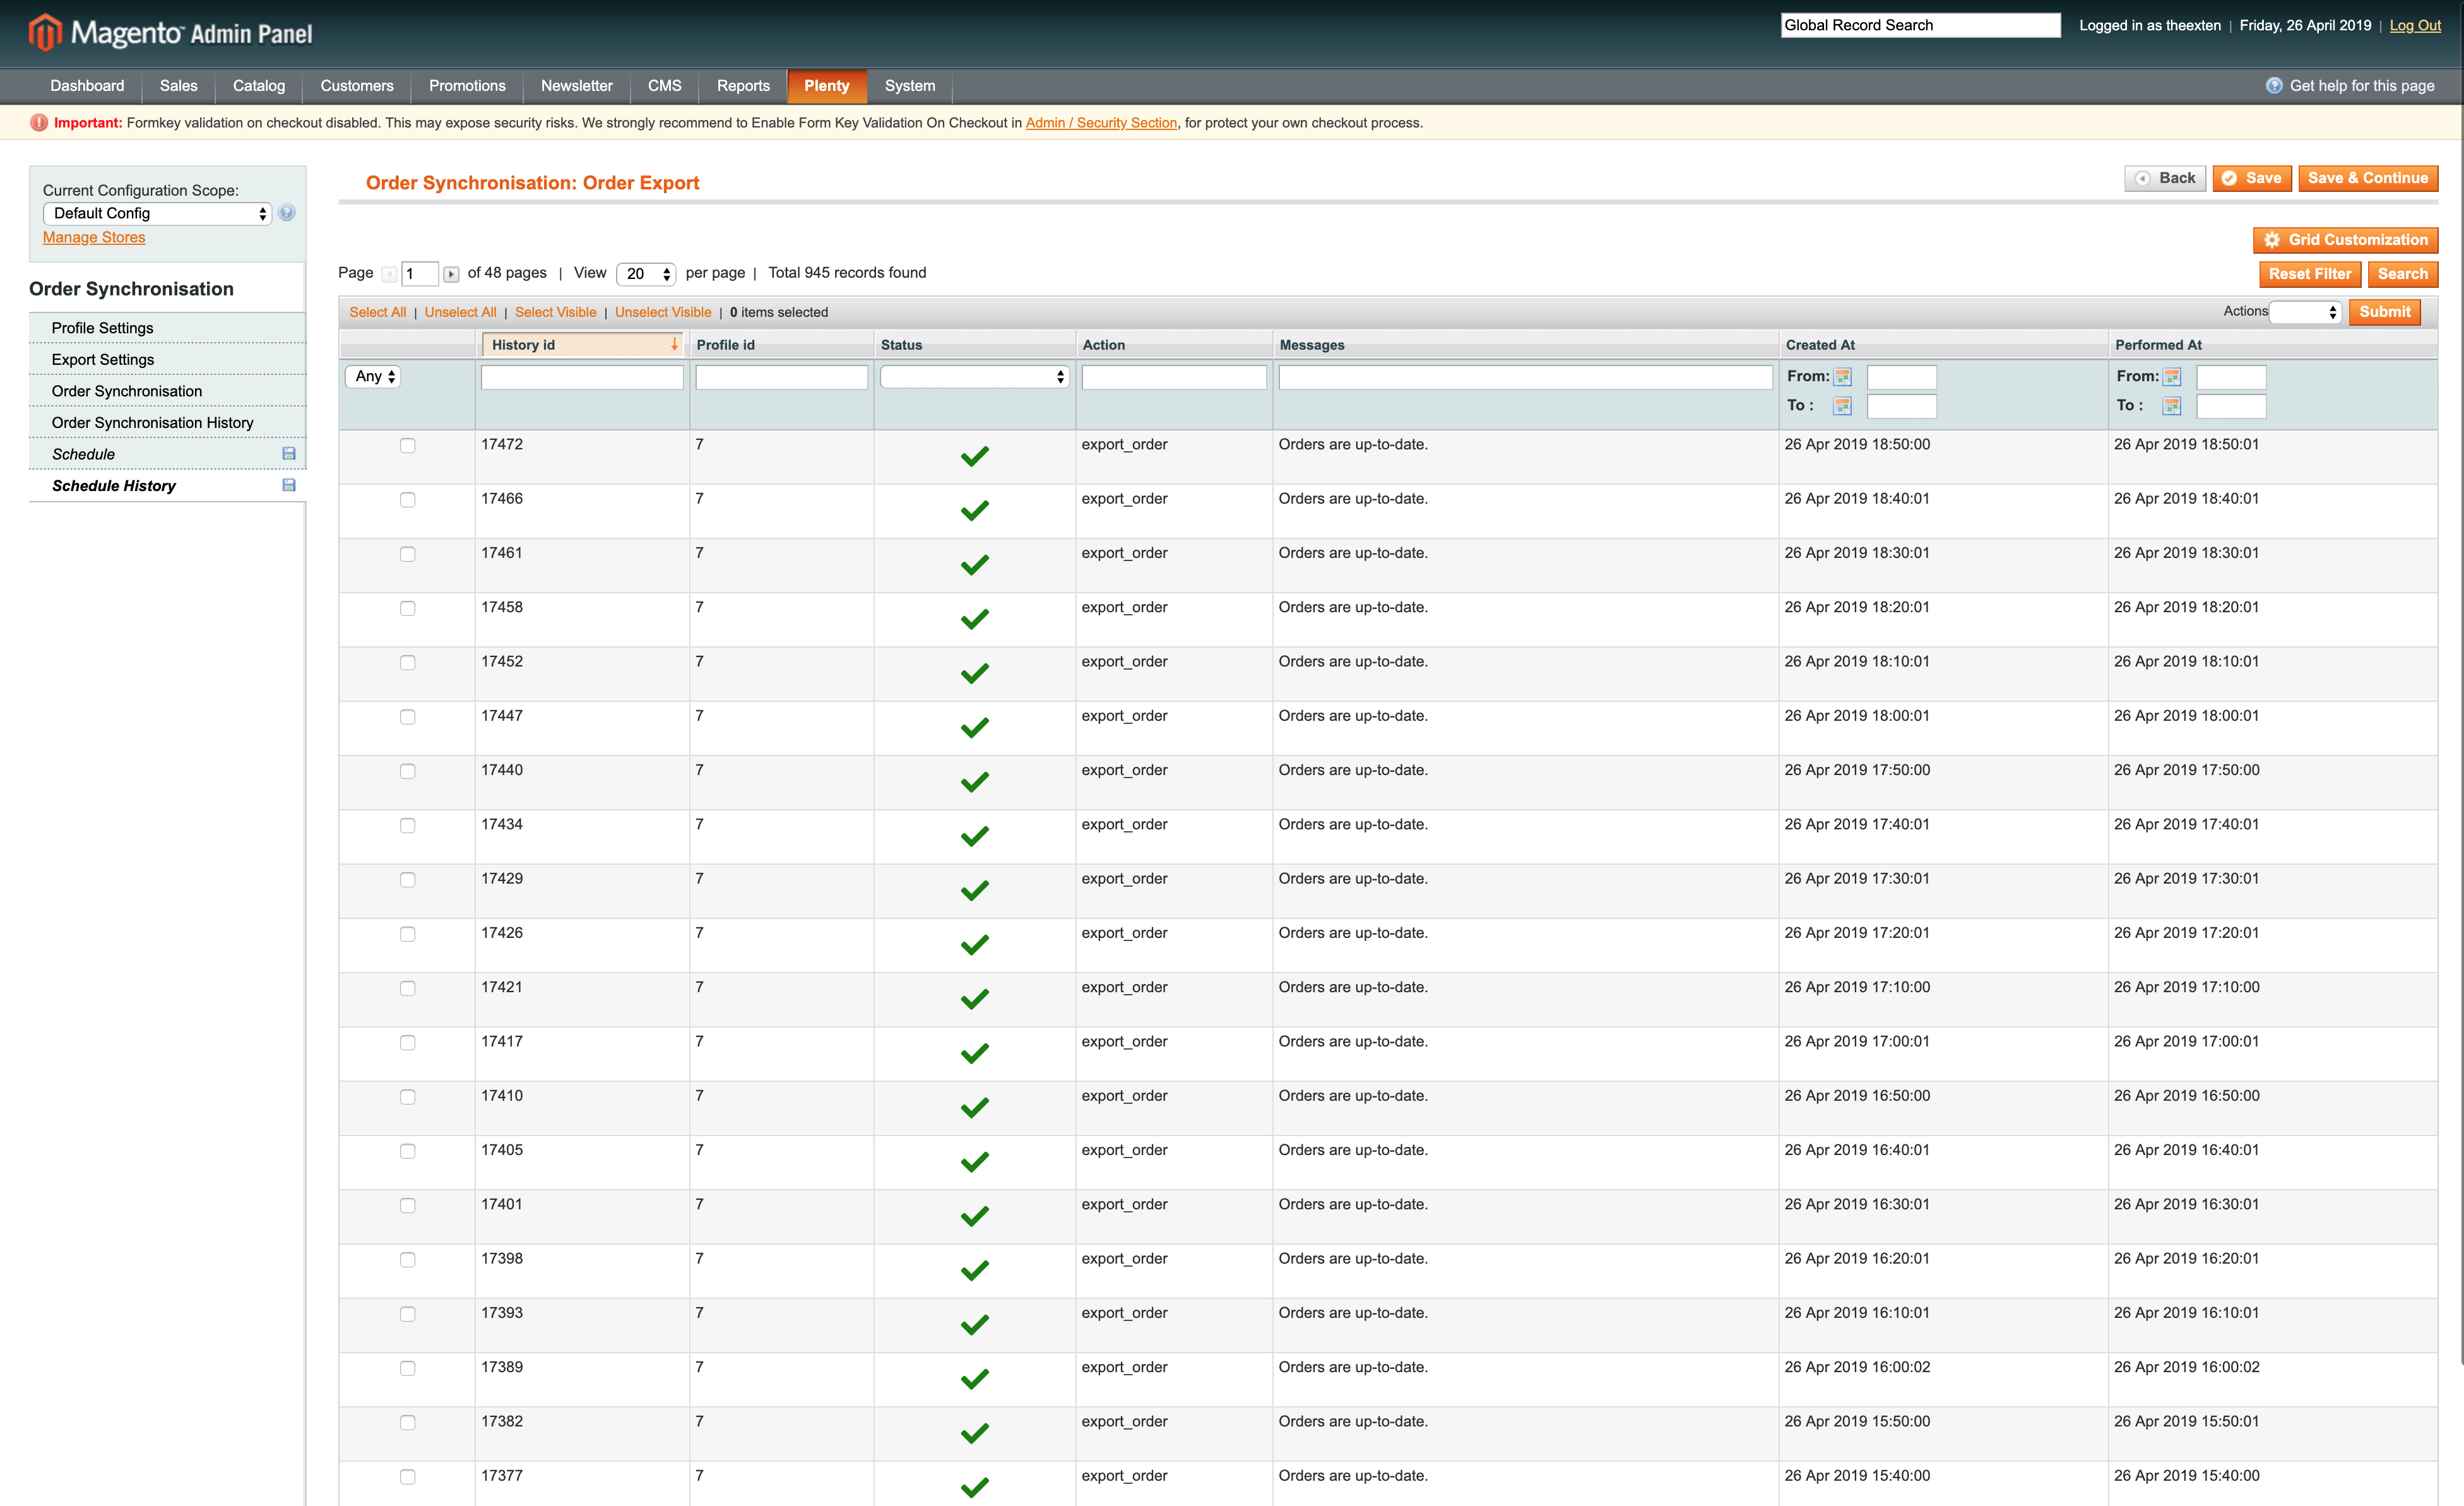
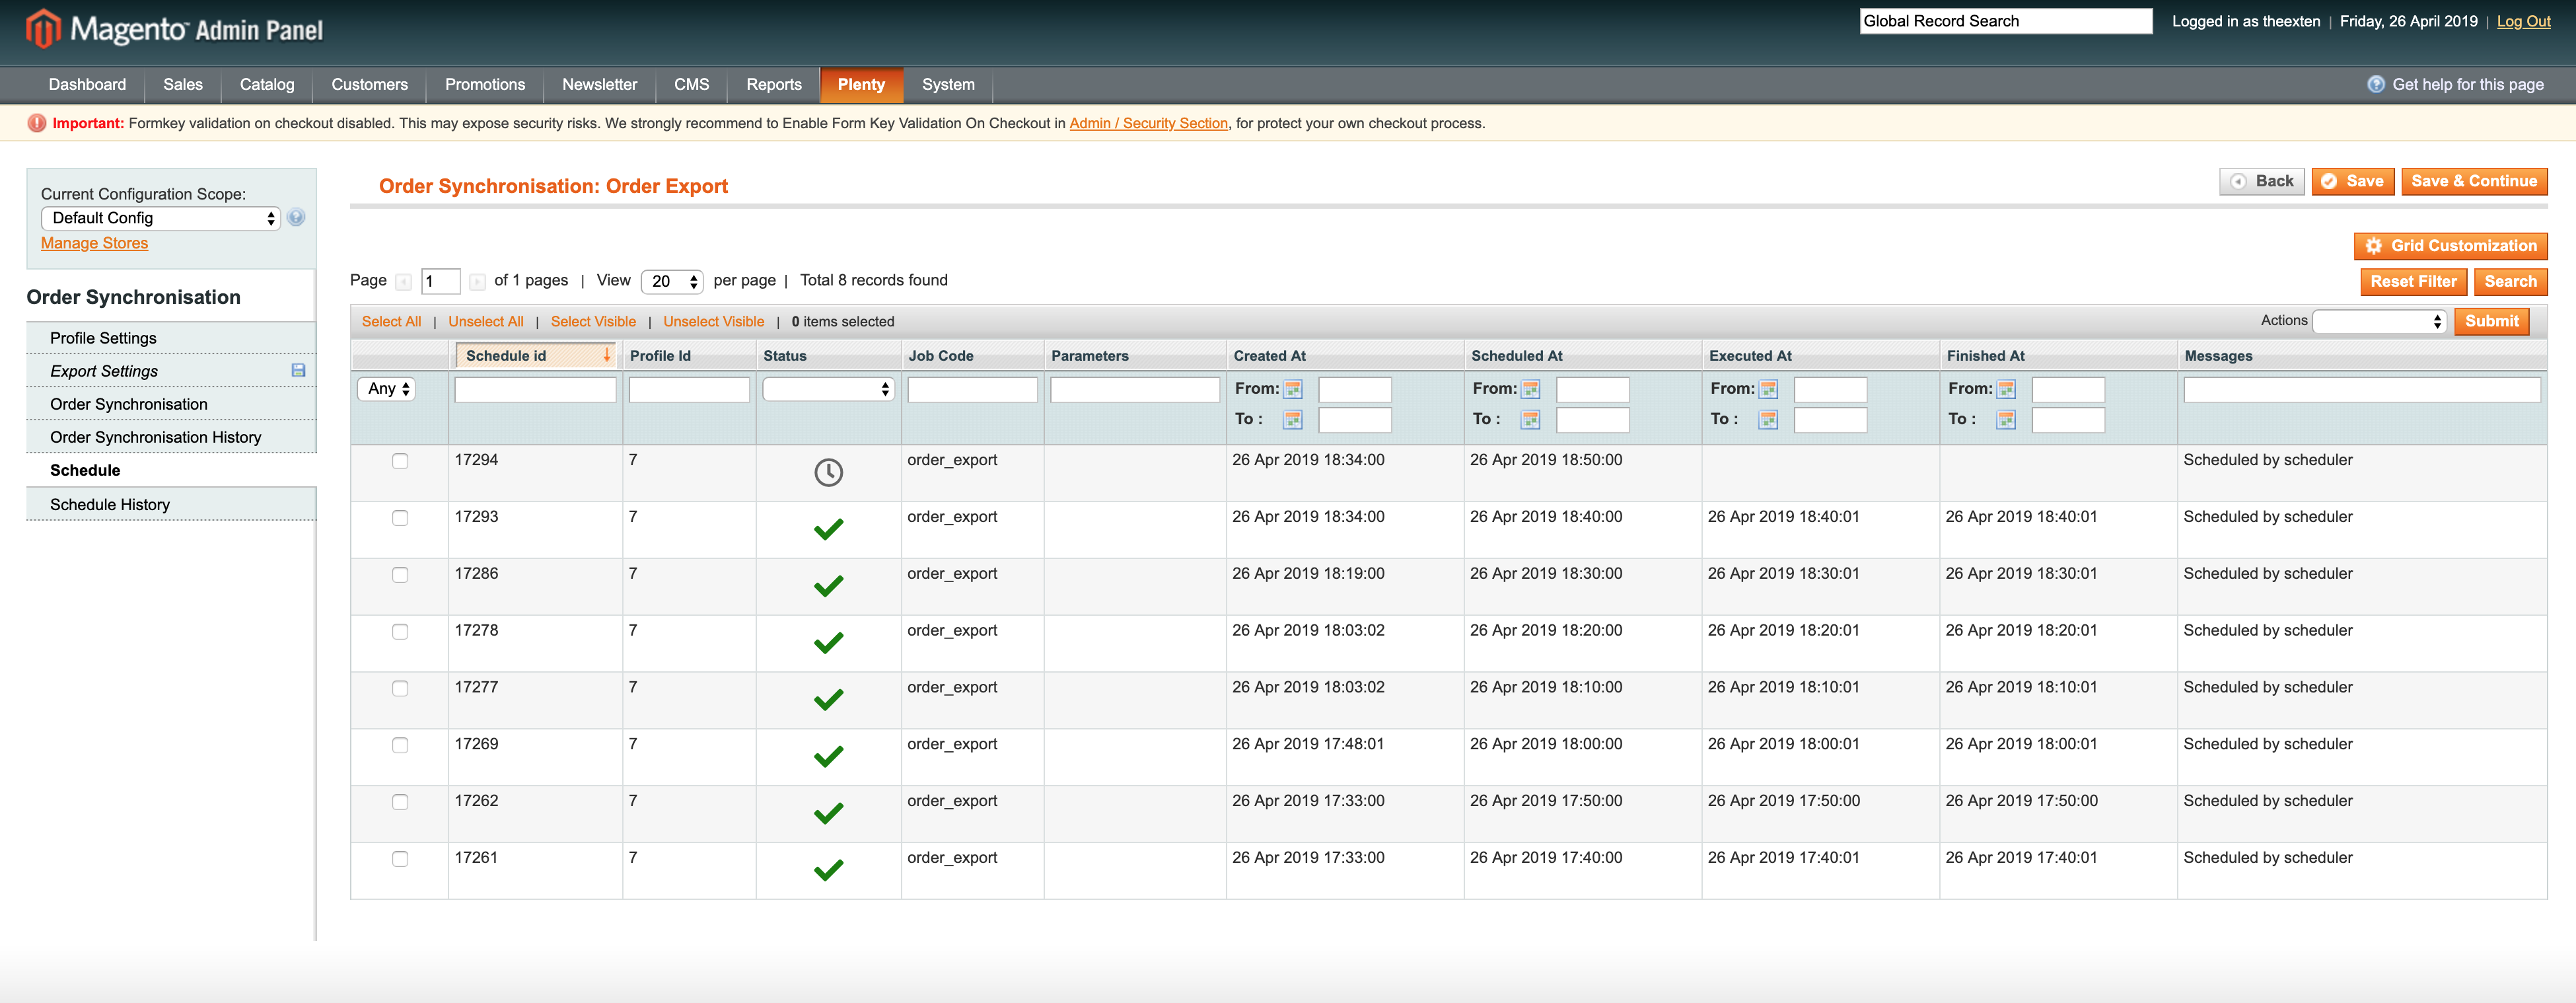
In this area you can find a log of all scheduled tasks for order export process.
- Schedule id: the ID of the scheduled task;
- Status: the status of scheduled task. Available statuses are “error”, “missed”, “pending”, “processing” and “success”;
- Job Code: the code used to identify profile task;
- Created At: the time and date a task is created at;
- Scheduled At: the time and date a task is scheduled at;
- Executed At: the time and date a task is executed at;
- Finished At: the time and date a task is finished at;
- Message: general messages of task process. Any errors will be shown here;
Schedule History Tab
Here you can find a log of scheduled tasks history, where all the scheduled processes are logged to.
- Status: the status of scheduled task process. Available statuses are “error”, “missed”, “pending”, “processing” and “success”;
- Action: the code used to identify profile scheduled task;
- Message: general messages of task process. Any errors will be shown here;
- Created At: the time and date a task is created at;
- Performed At: the time and date a task is performed at;
